> ## Documentation Index
> Fetch the complete documentation index at: https://support.lilt.com/llms.txt
> Use this file to discover all available pages before exploring further.
# Custom Segmentation Using SRX Files
Custom Segmentation using SRX files offers segmentation flexibility, allowing organizations to leverage their own segmentation rules on a per-job or org-wide basis, directly addressing the unique content structures and translation memory (TM) alignment needs of larger, localization-savvy clients. Key features include SRX file support in file loaders, enhanced control over segmentation, and a seamless integration with translation workflows.
## How to set SRX files
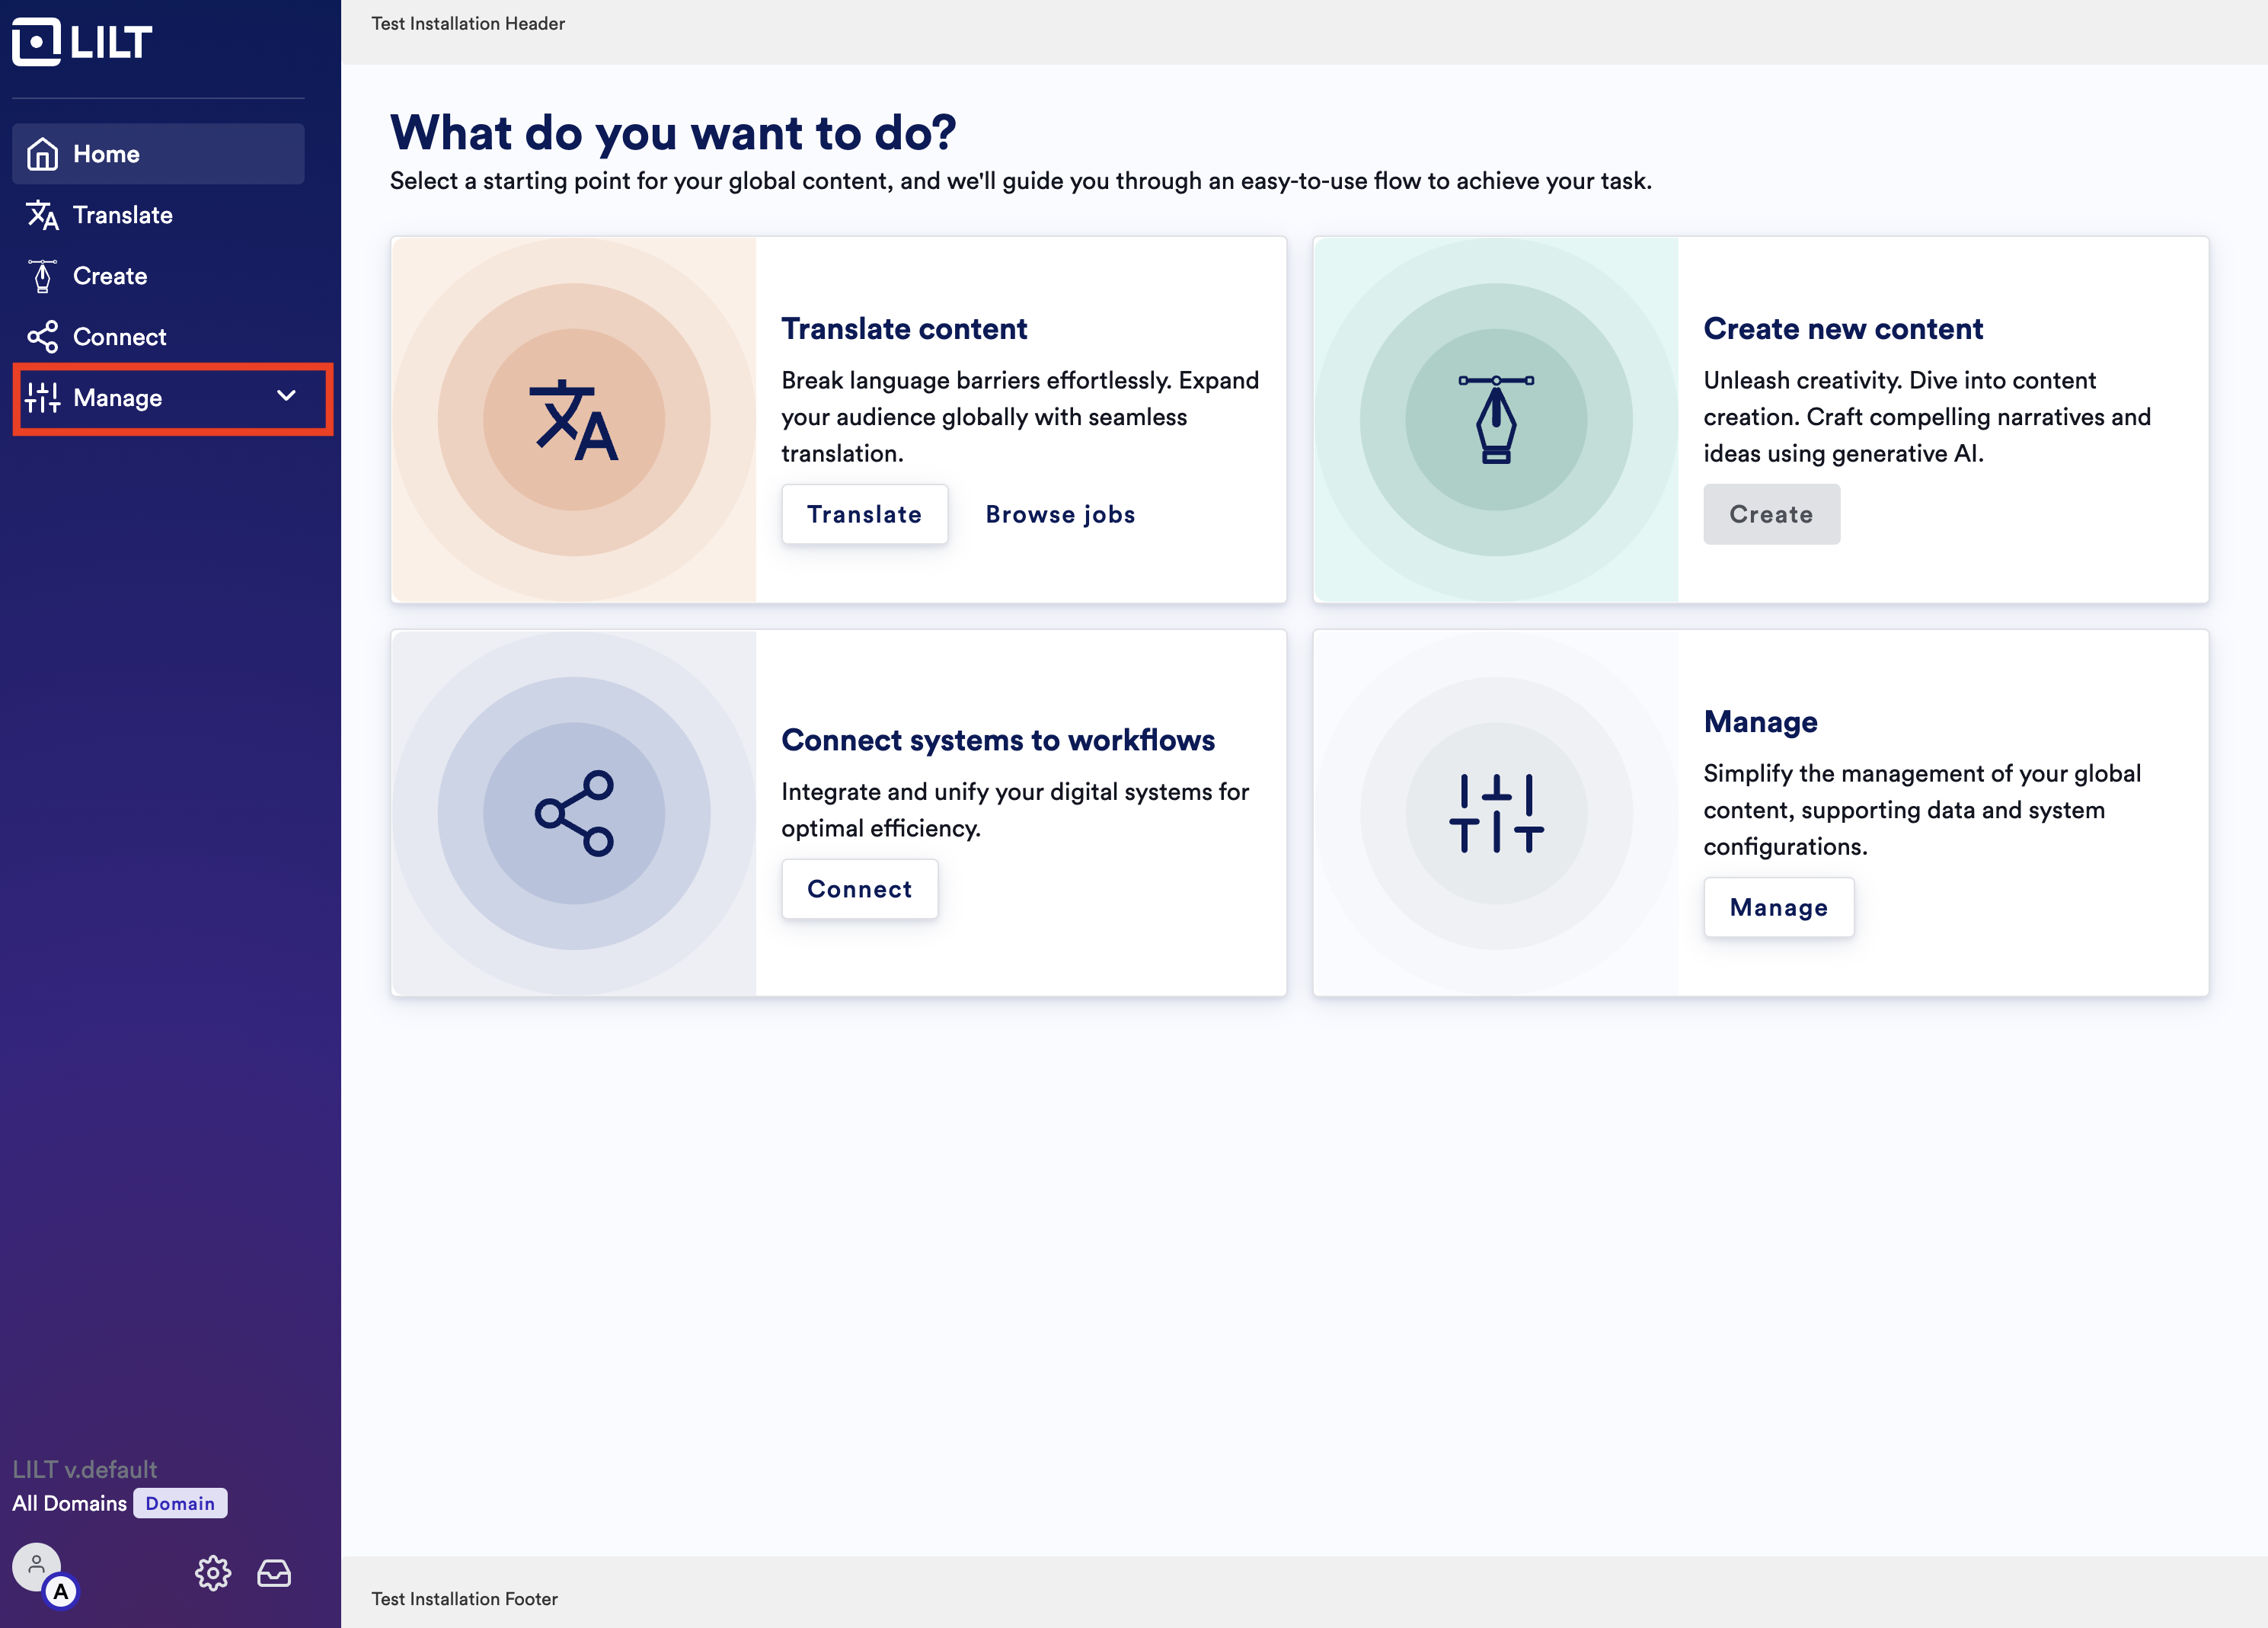
1. Click “Manage” on the left rail
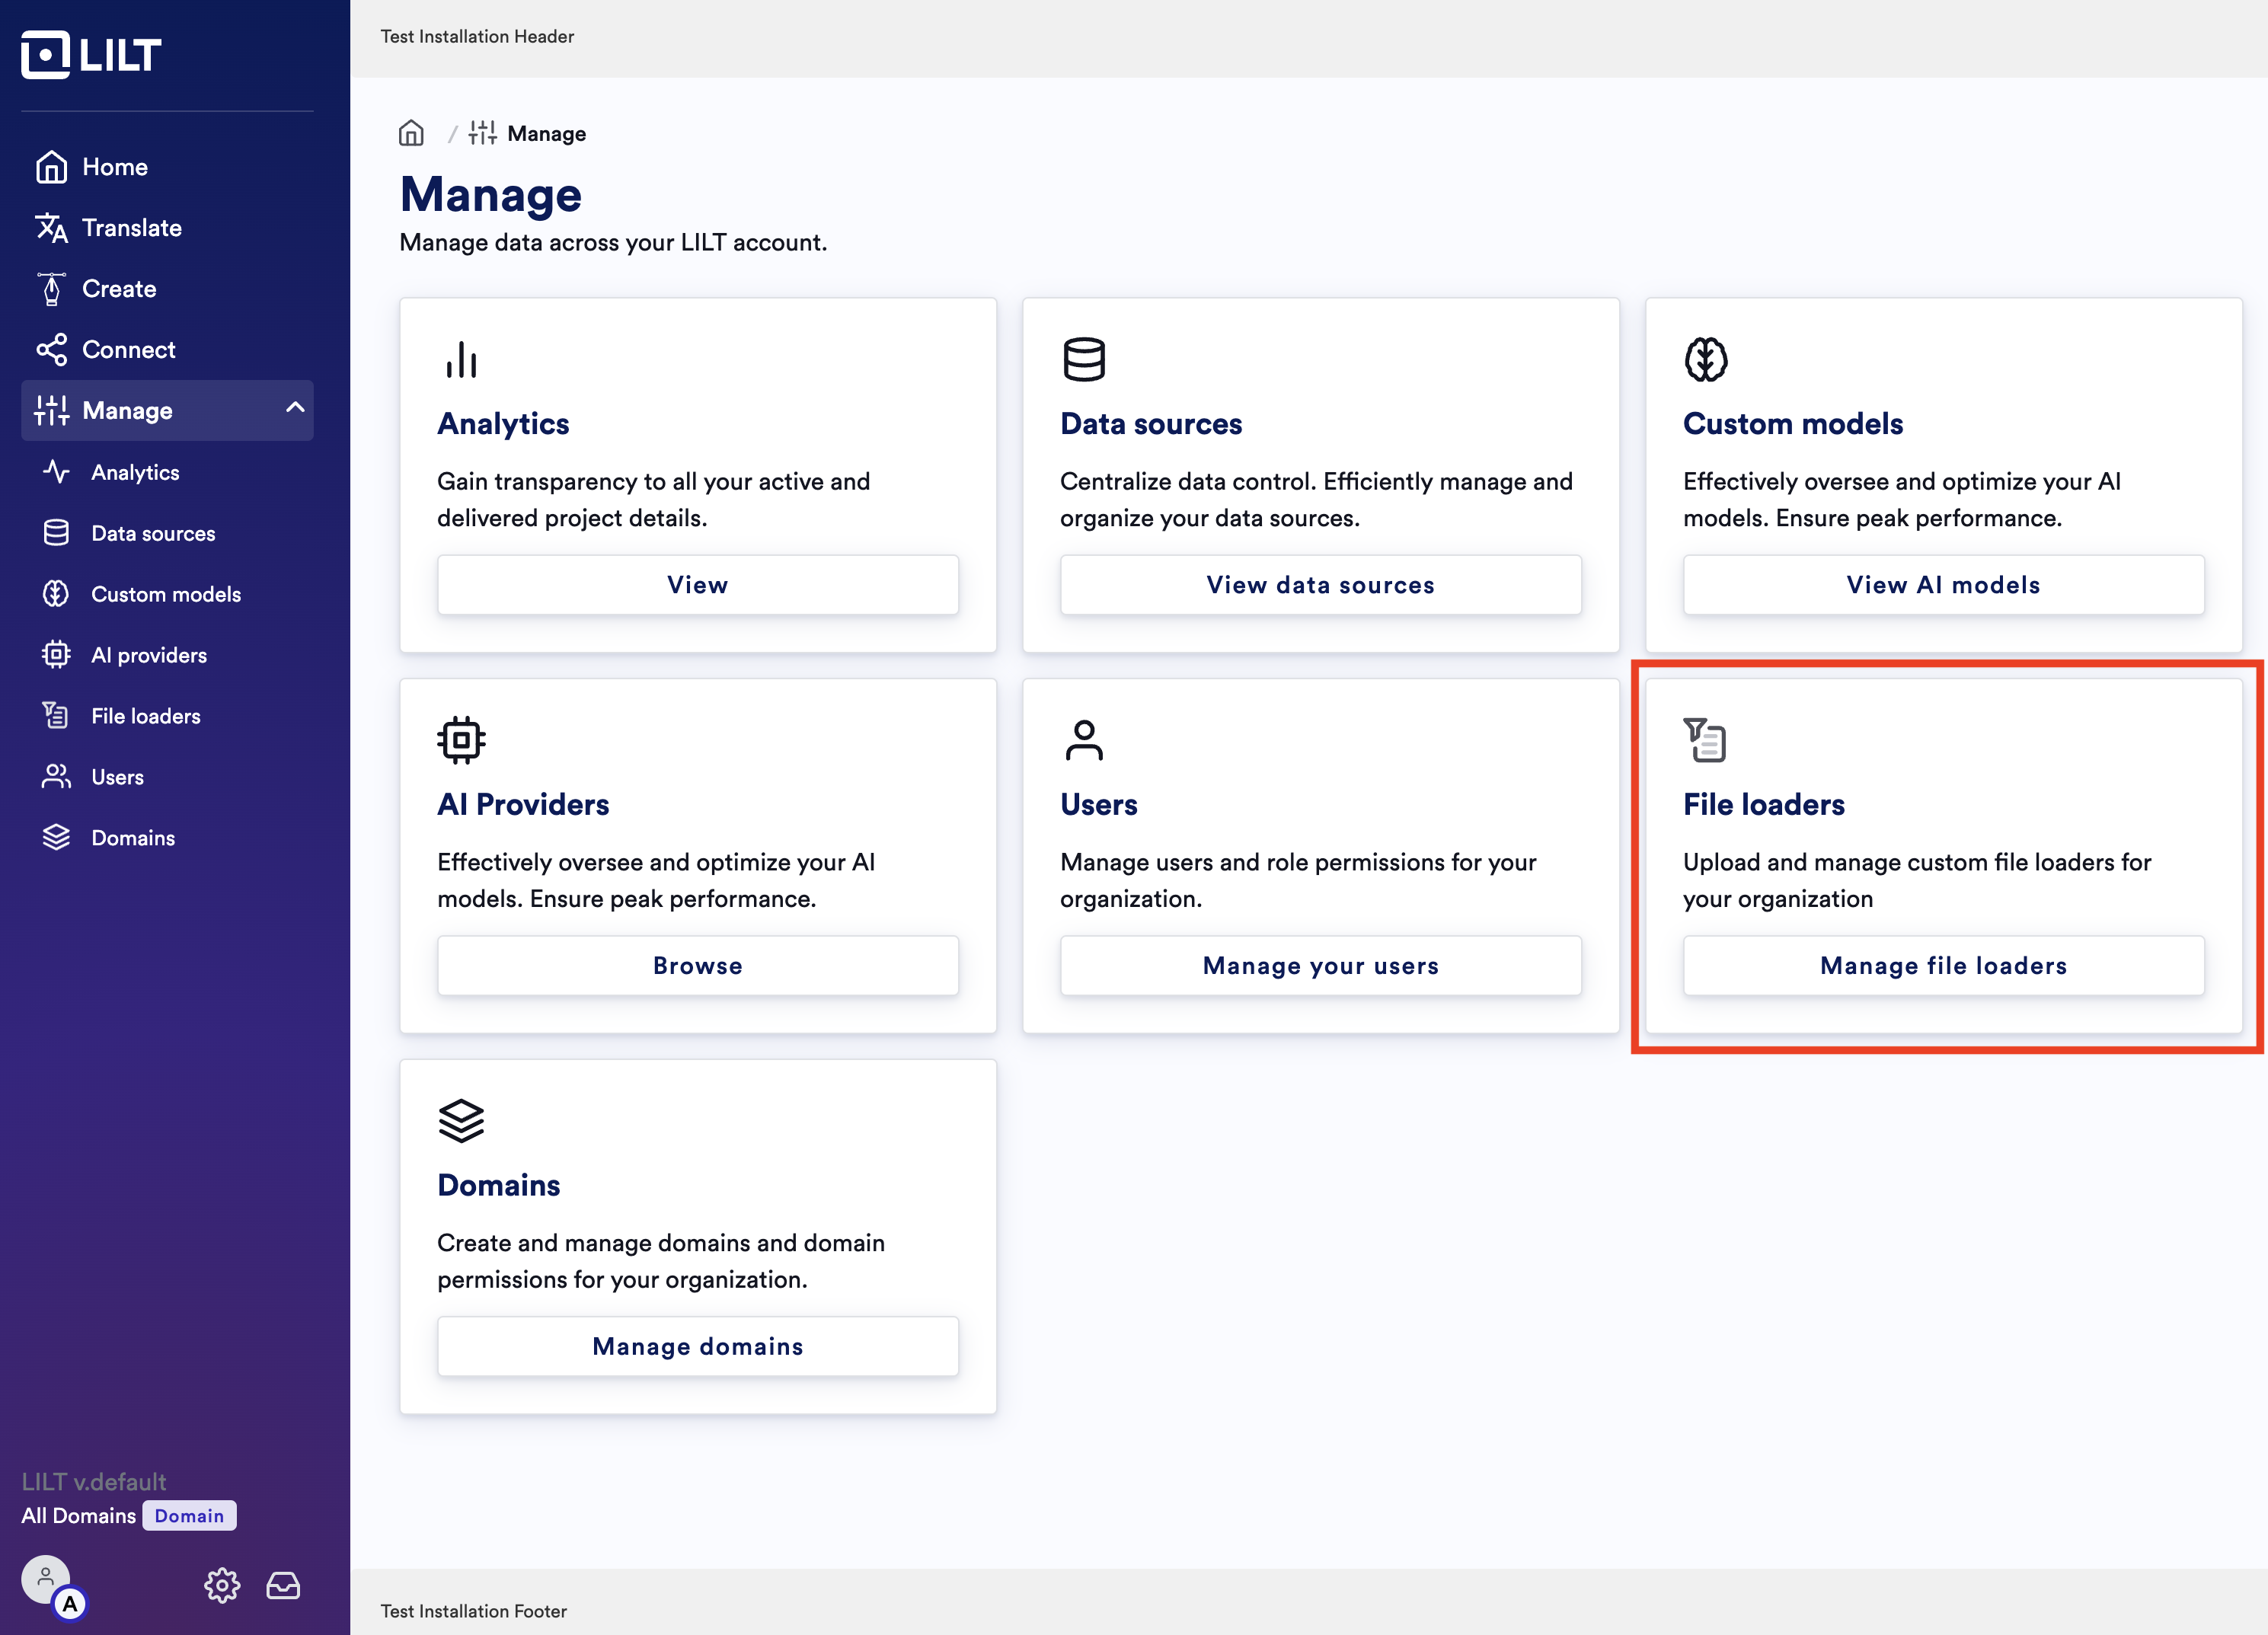
 2. Click on “File Loaders”
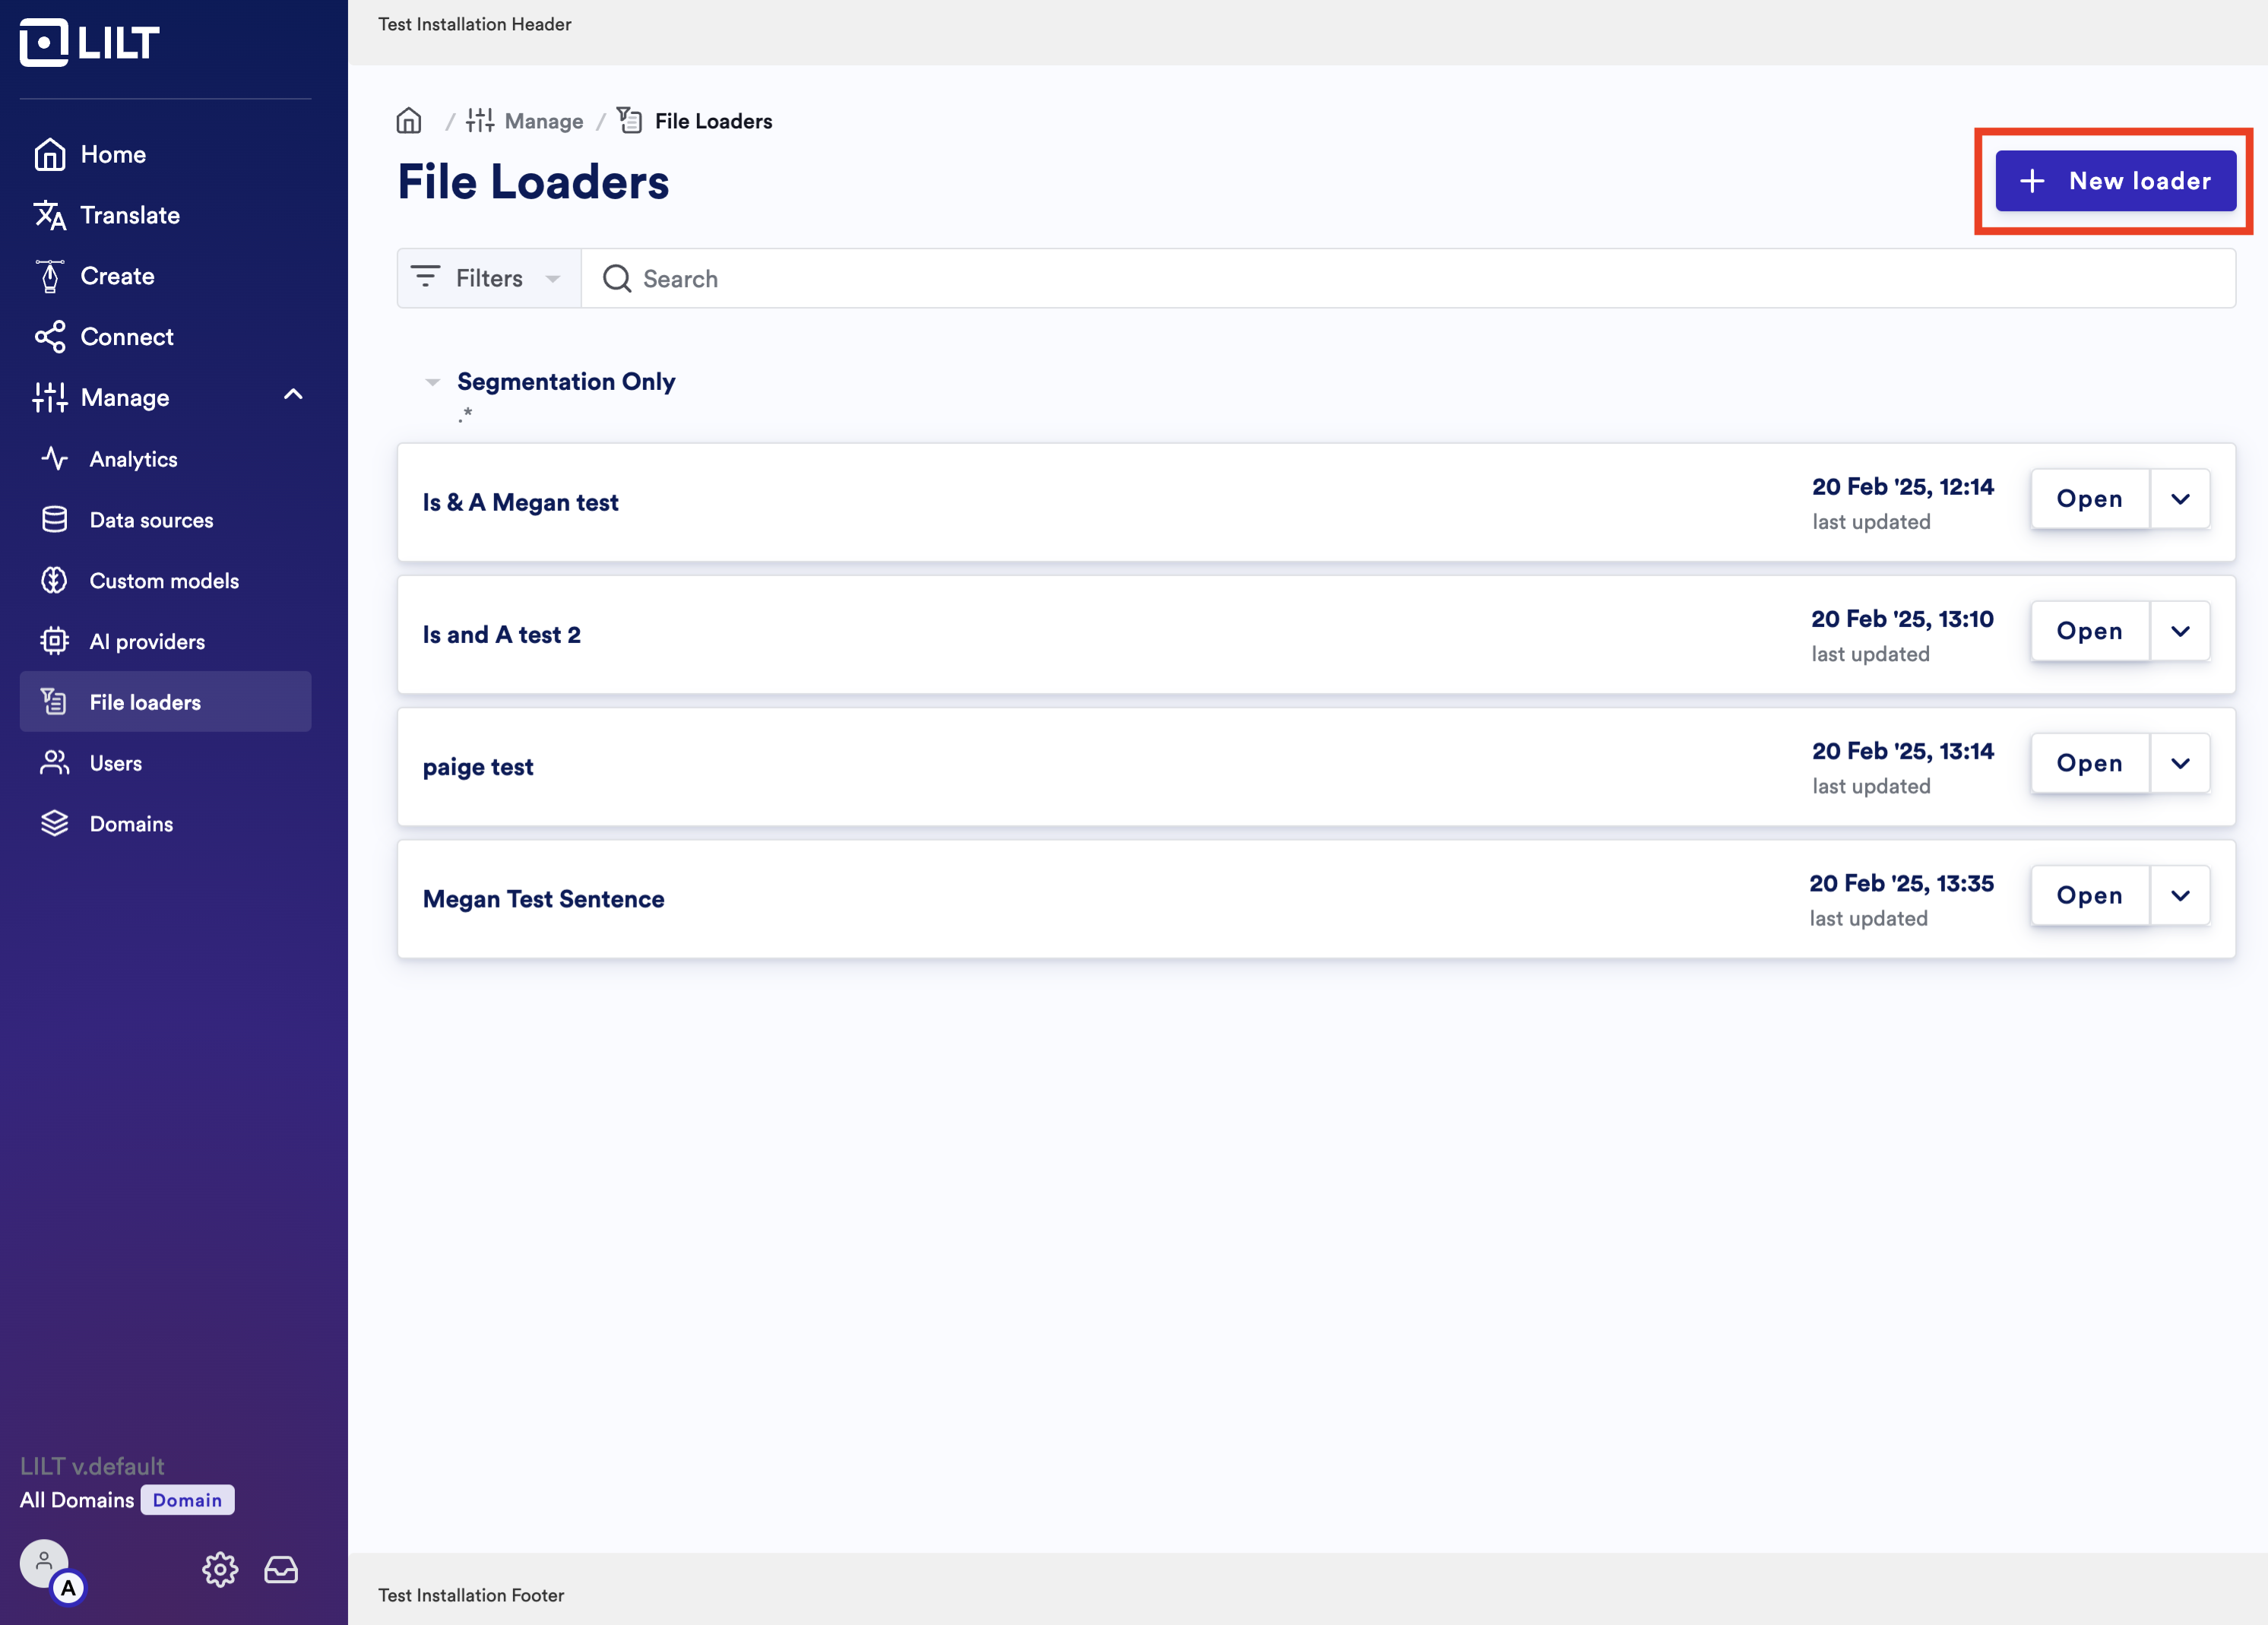
 3. Click on “+ New Loader” in the top right corner
 4\. Select “Segmentation Only”
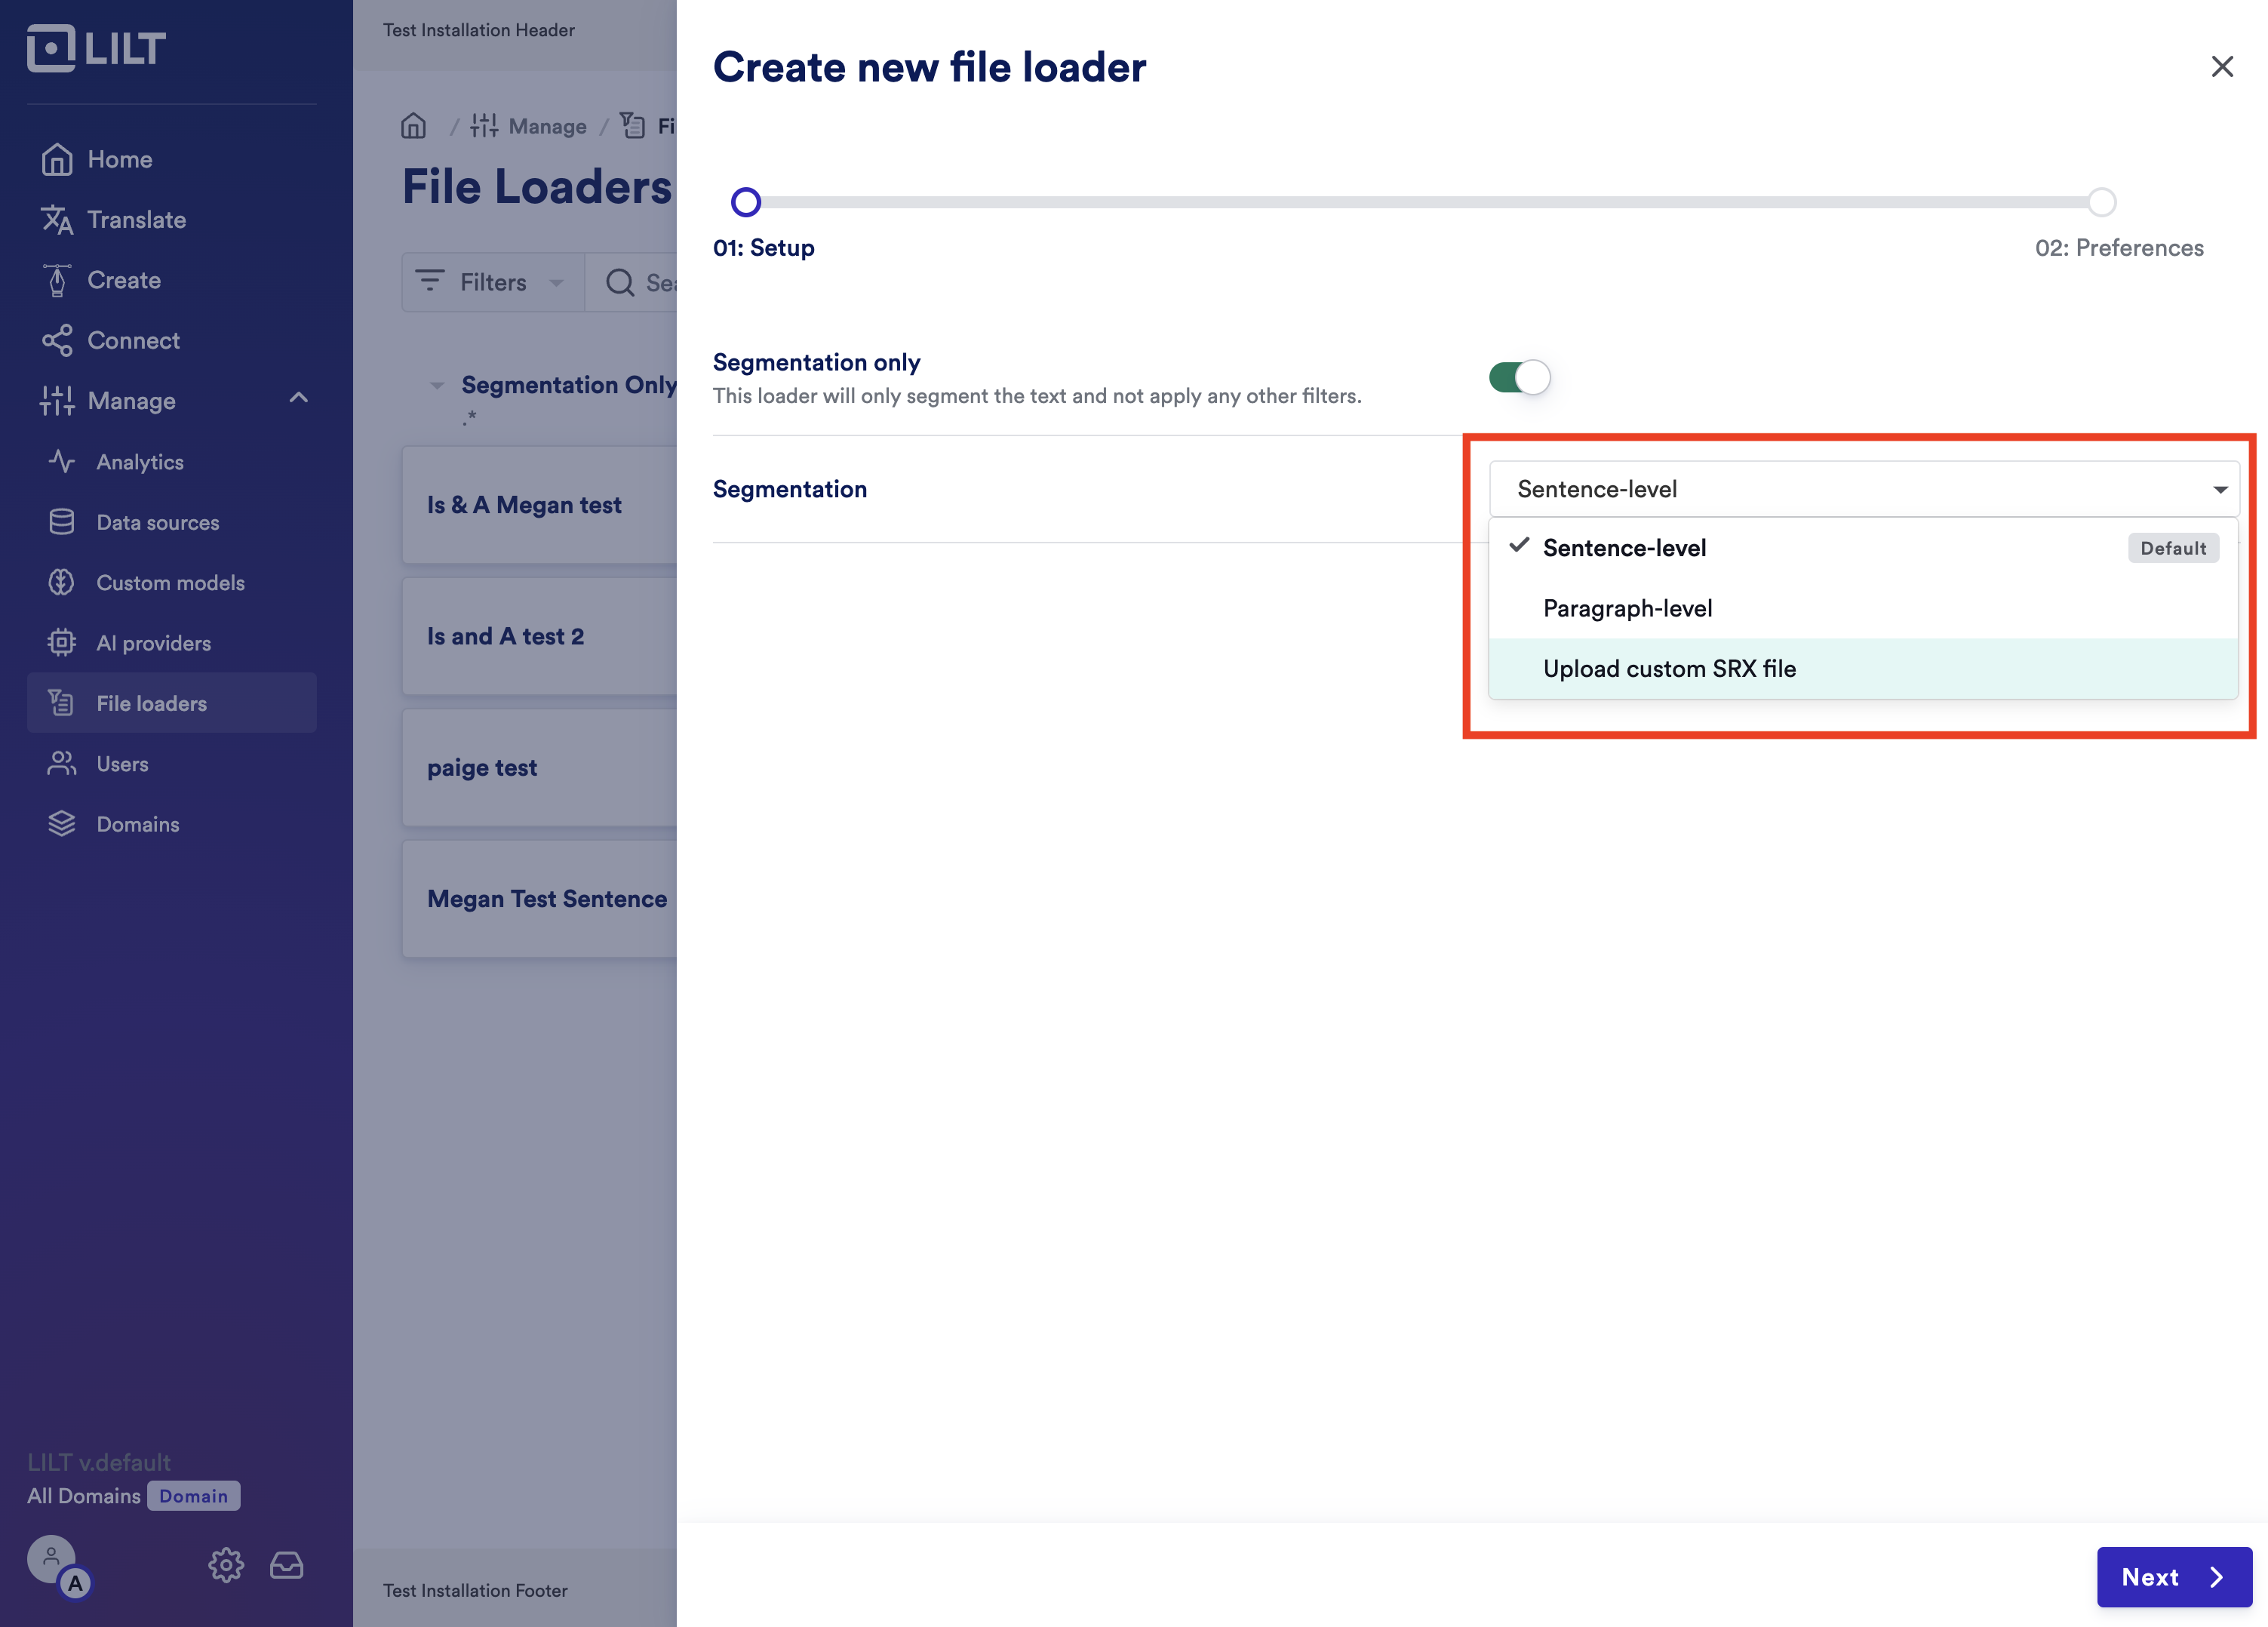
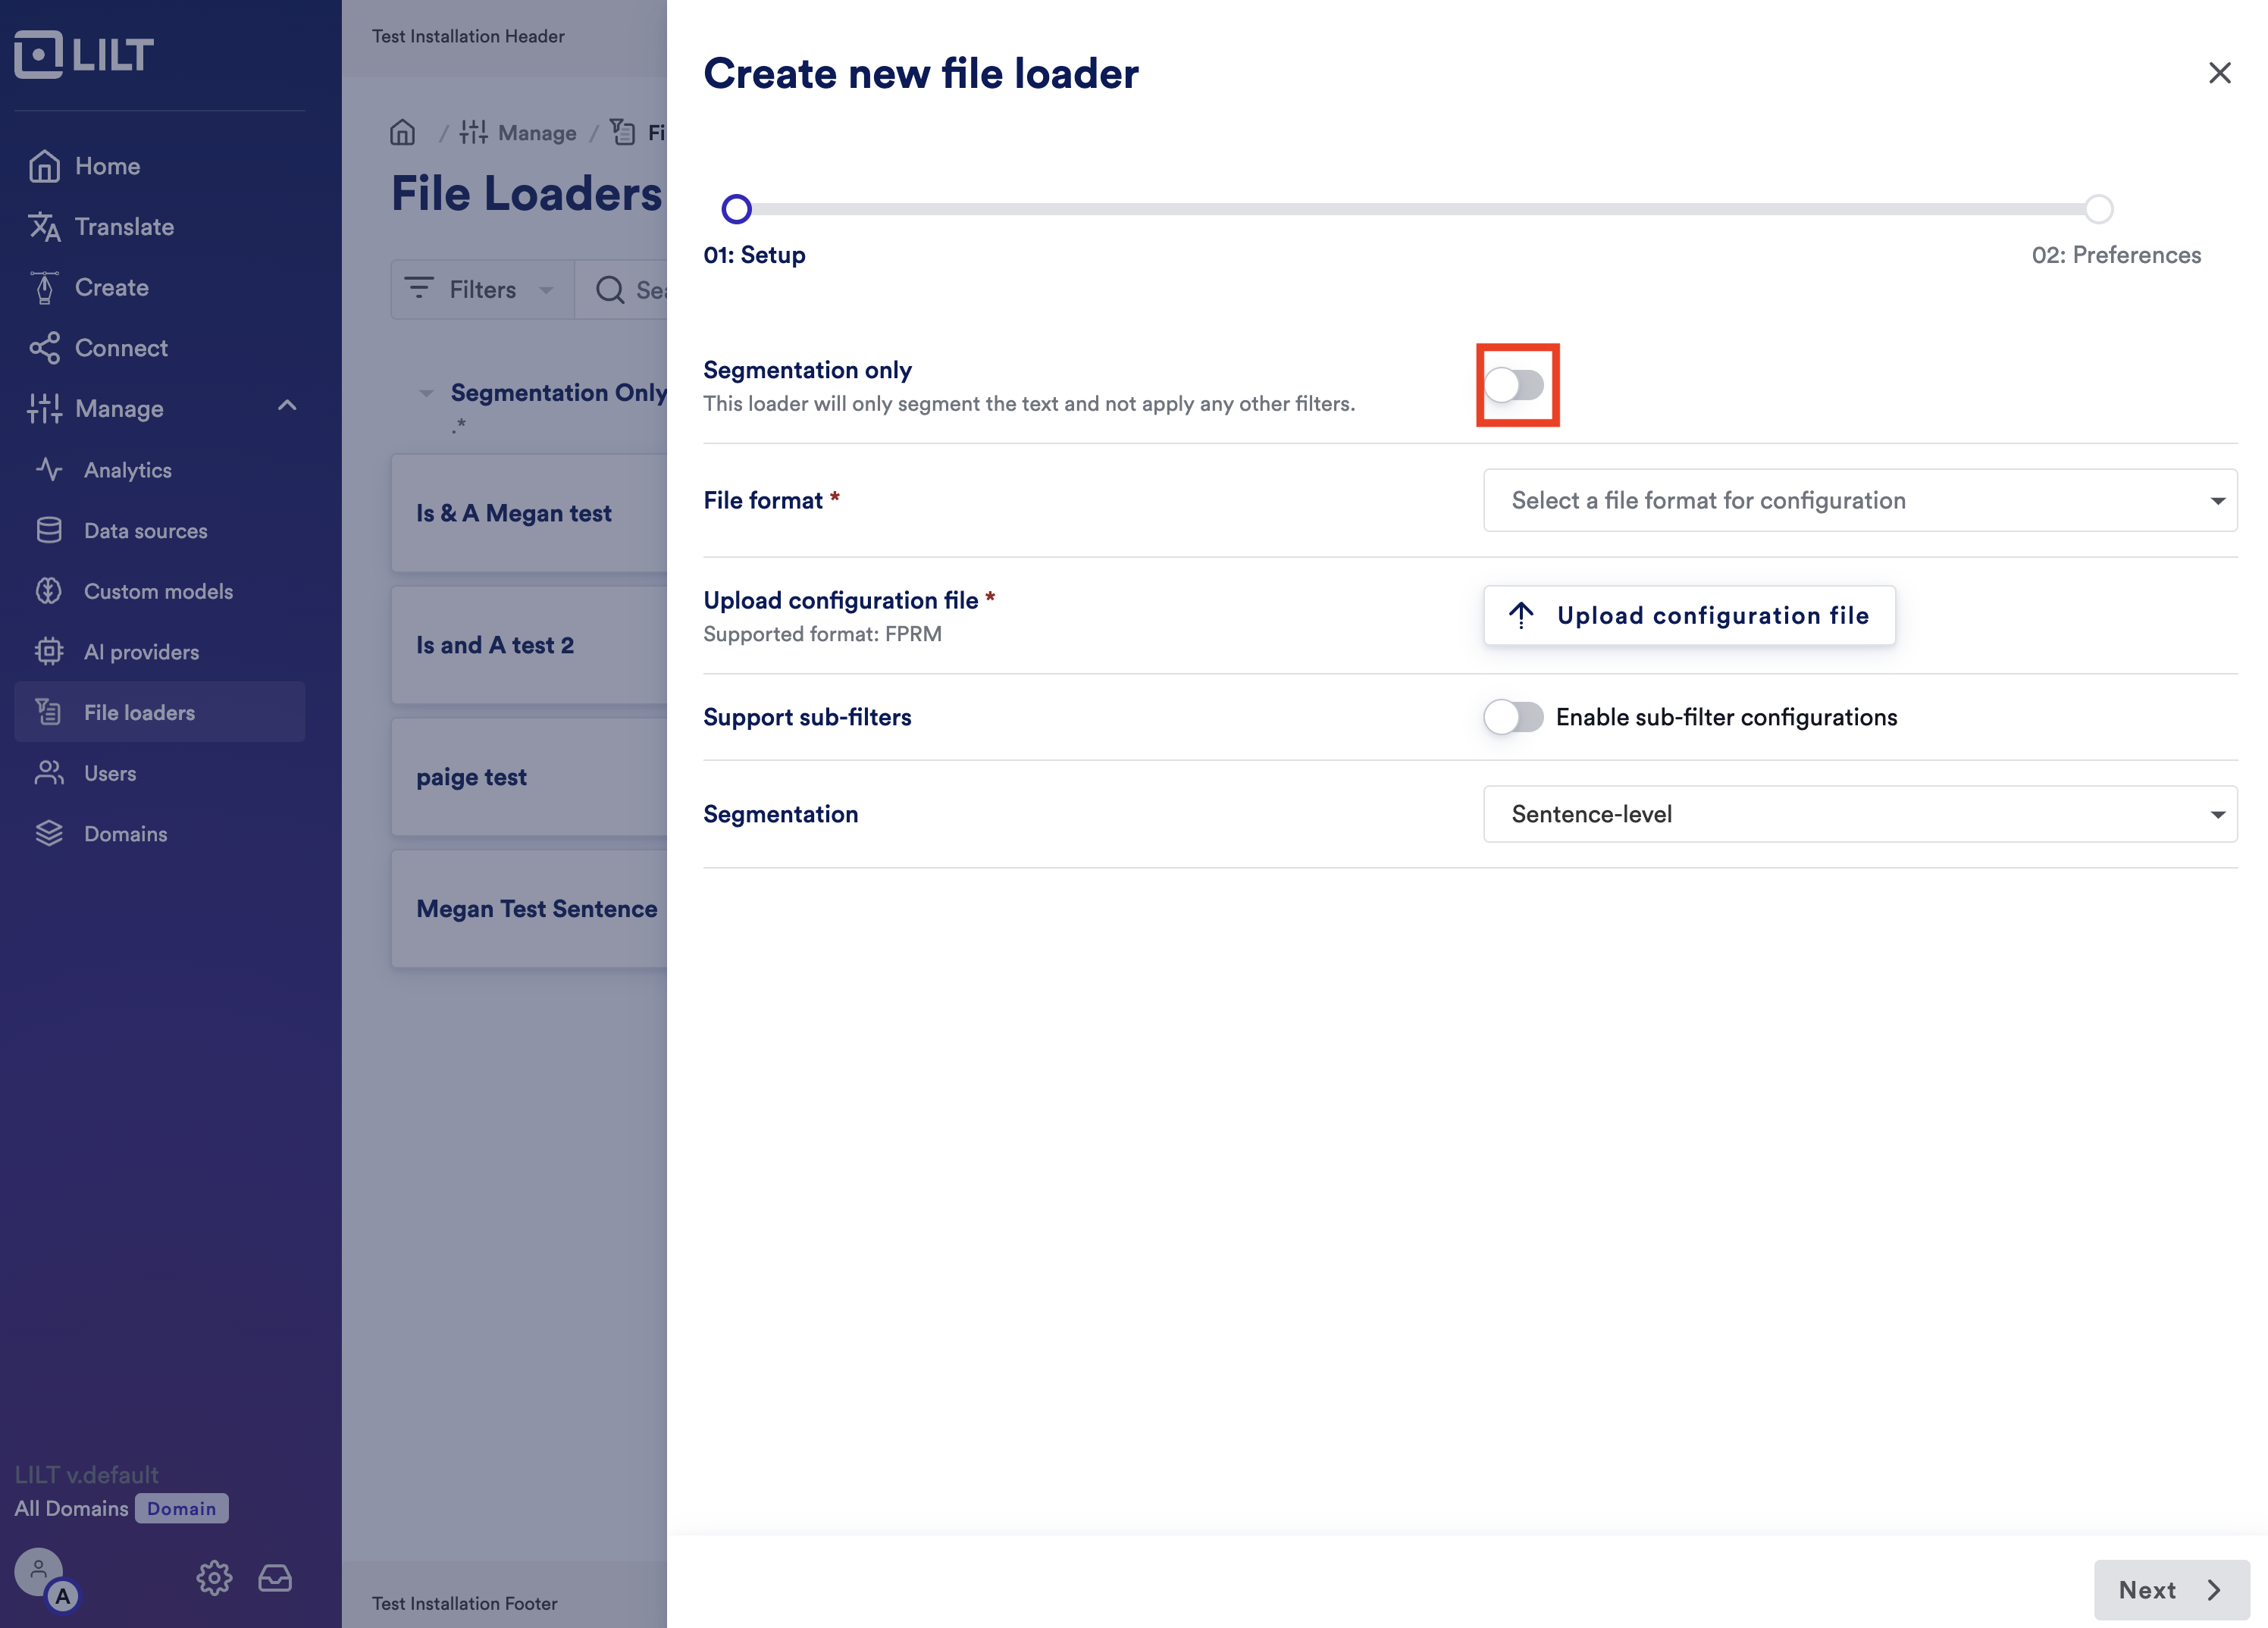 5\. In the Segmentation dropdown on the right section select “Upload Custom SRX File”
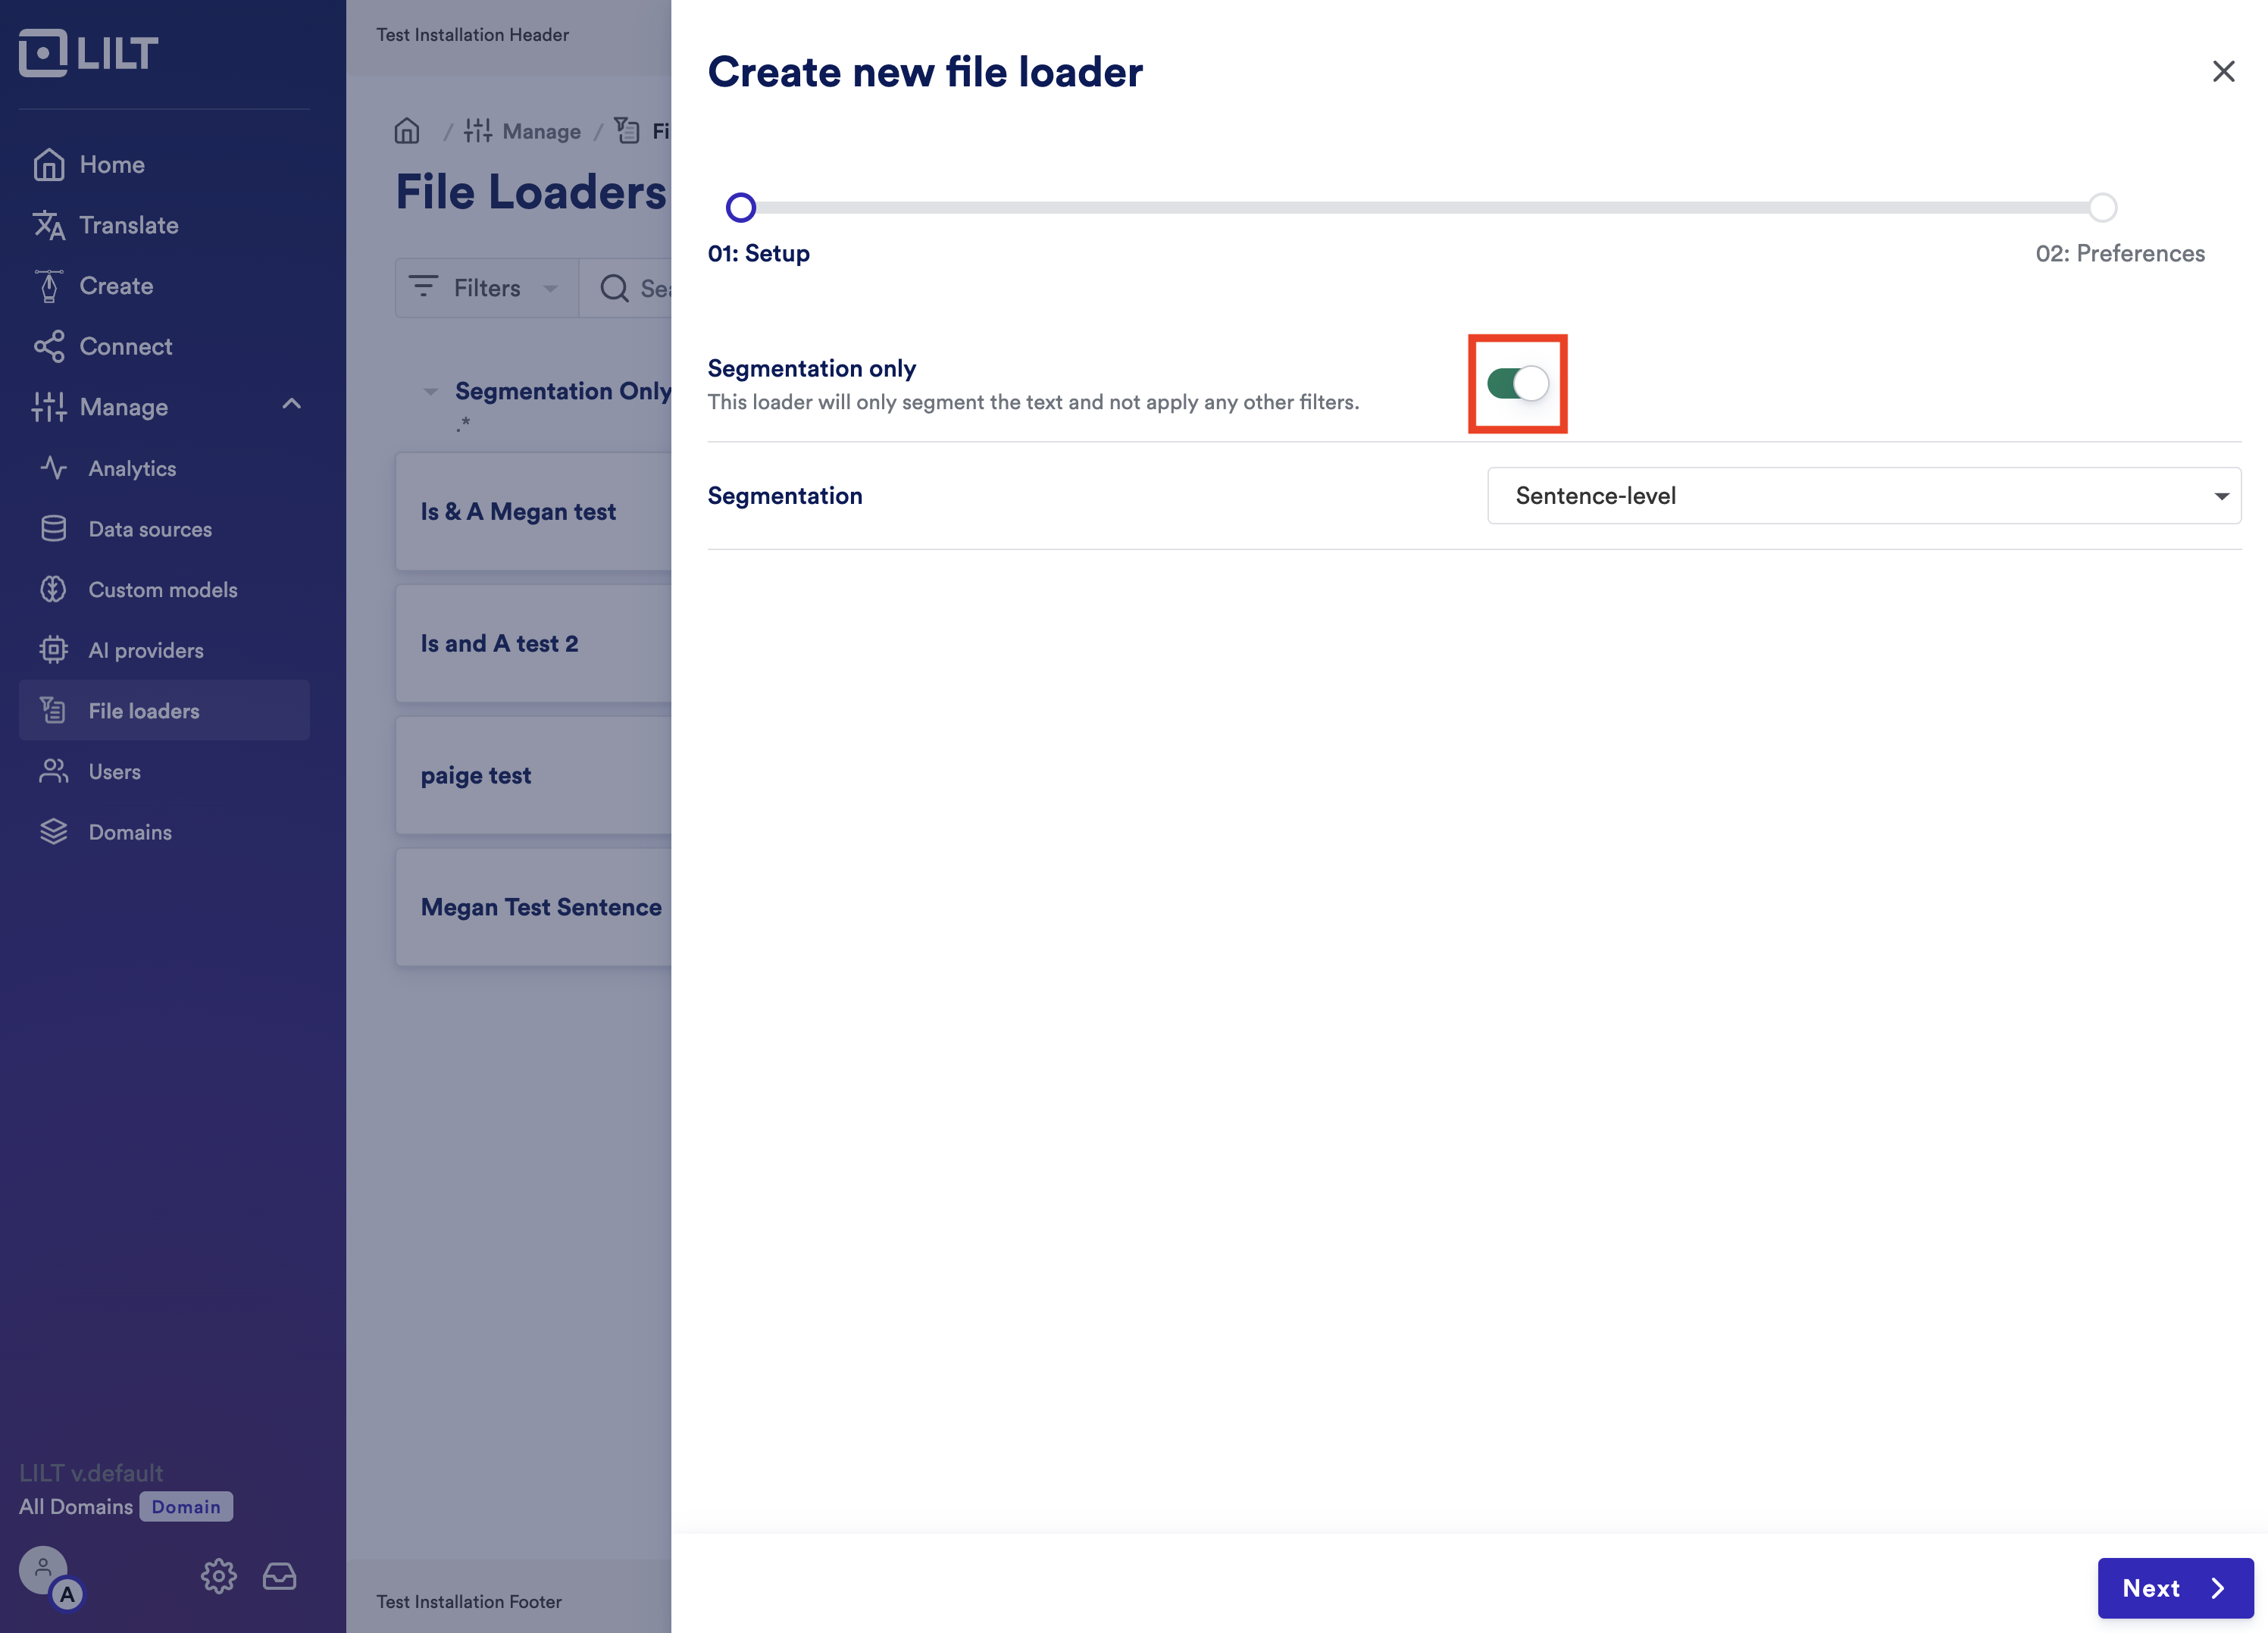 6. Click on “Upload custom SRX File” - click on that and in the new selection window - pick out the SRX file that you want to upload
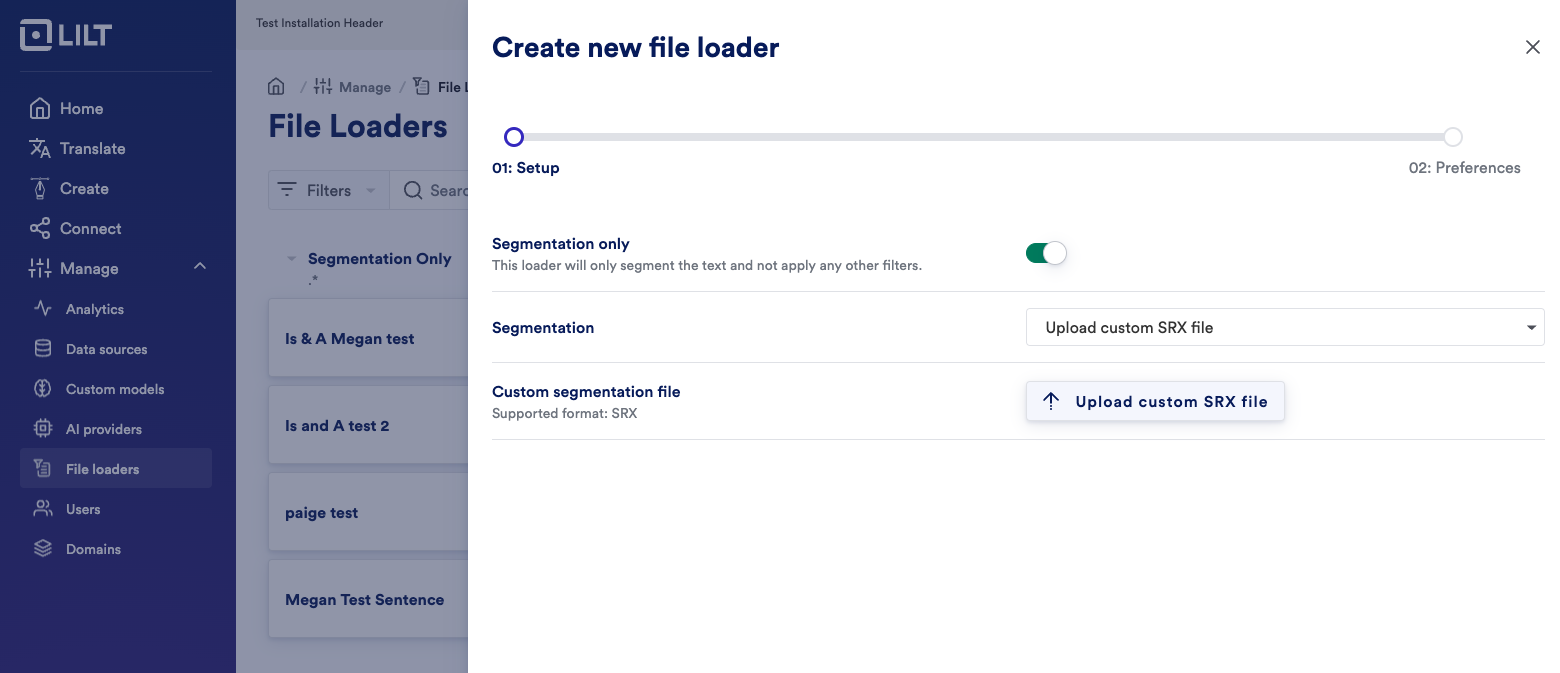 7. After uploading the file, click Next in the bottom right corner
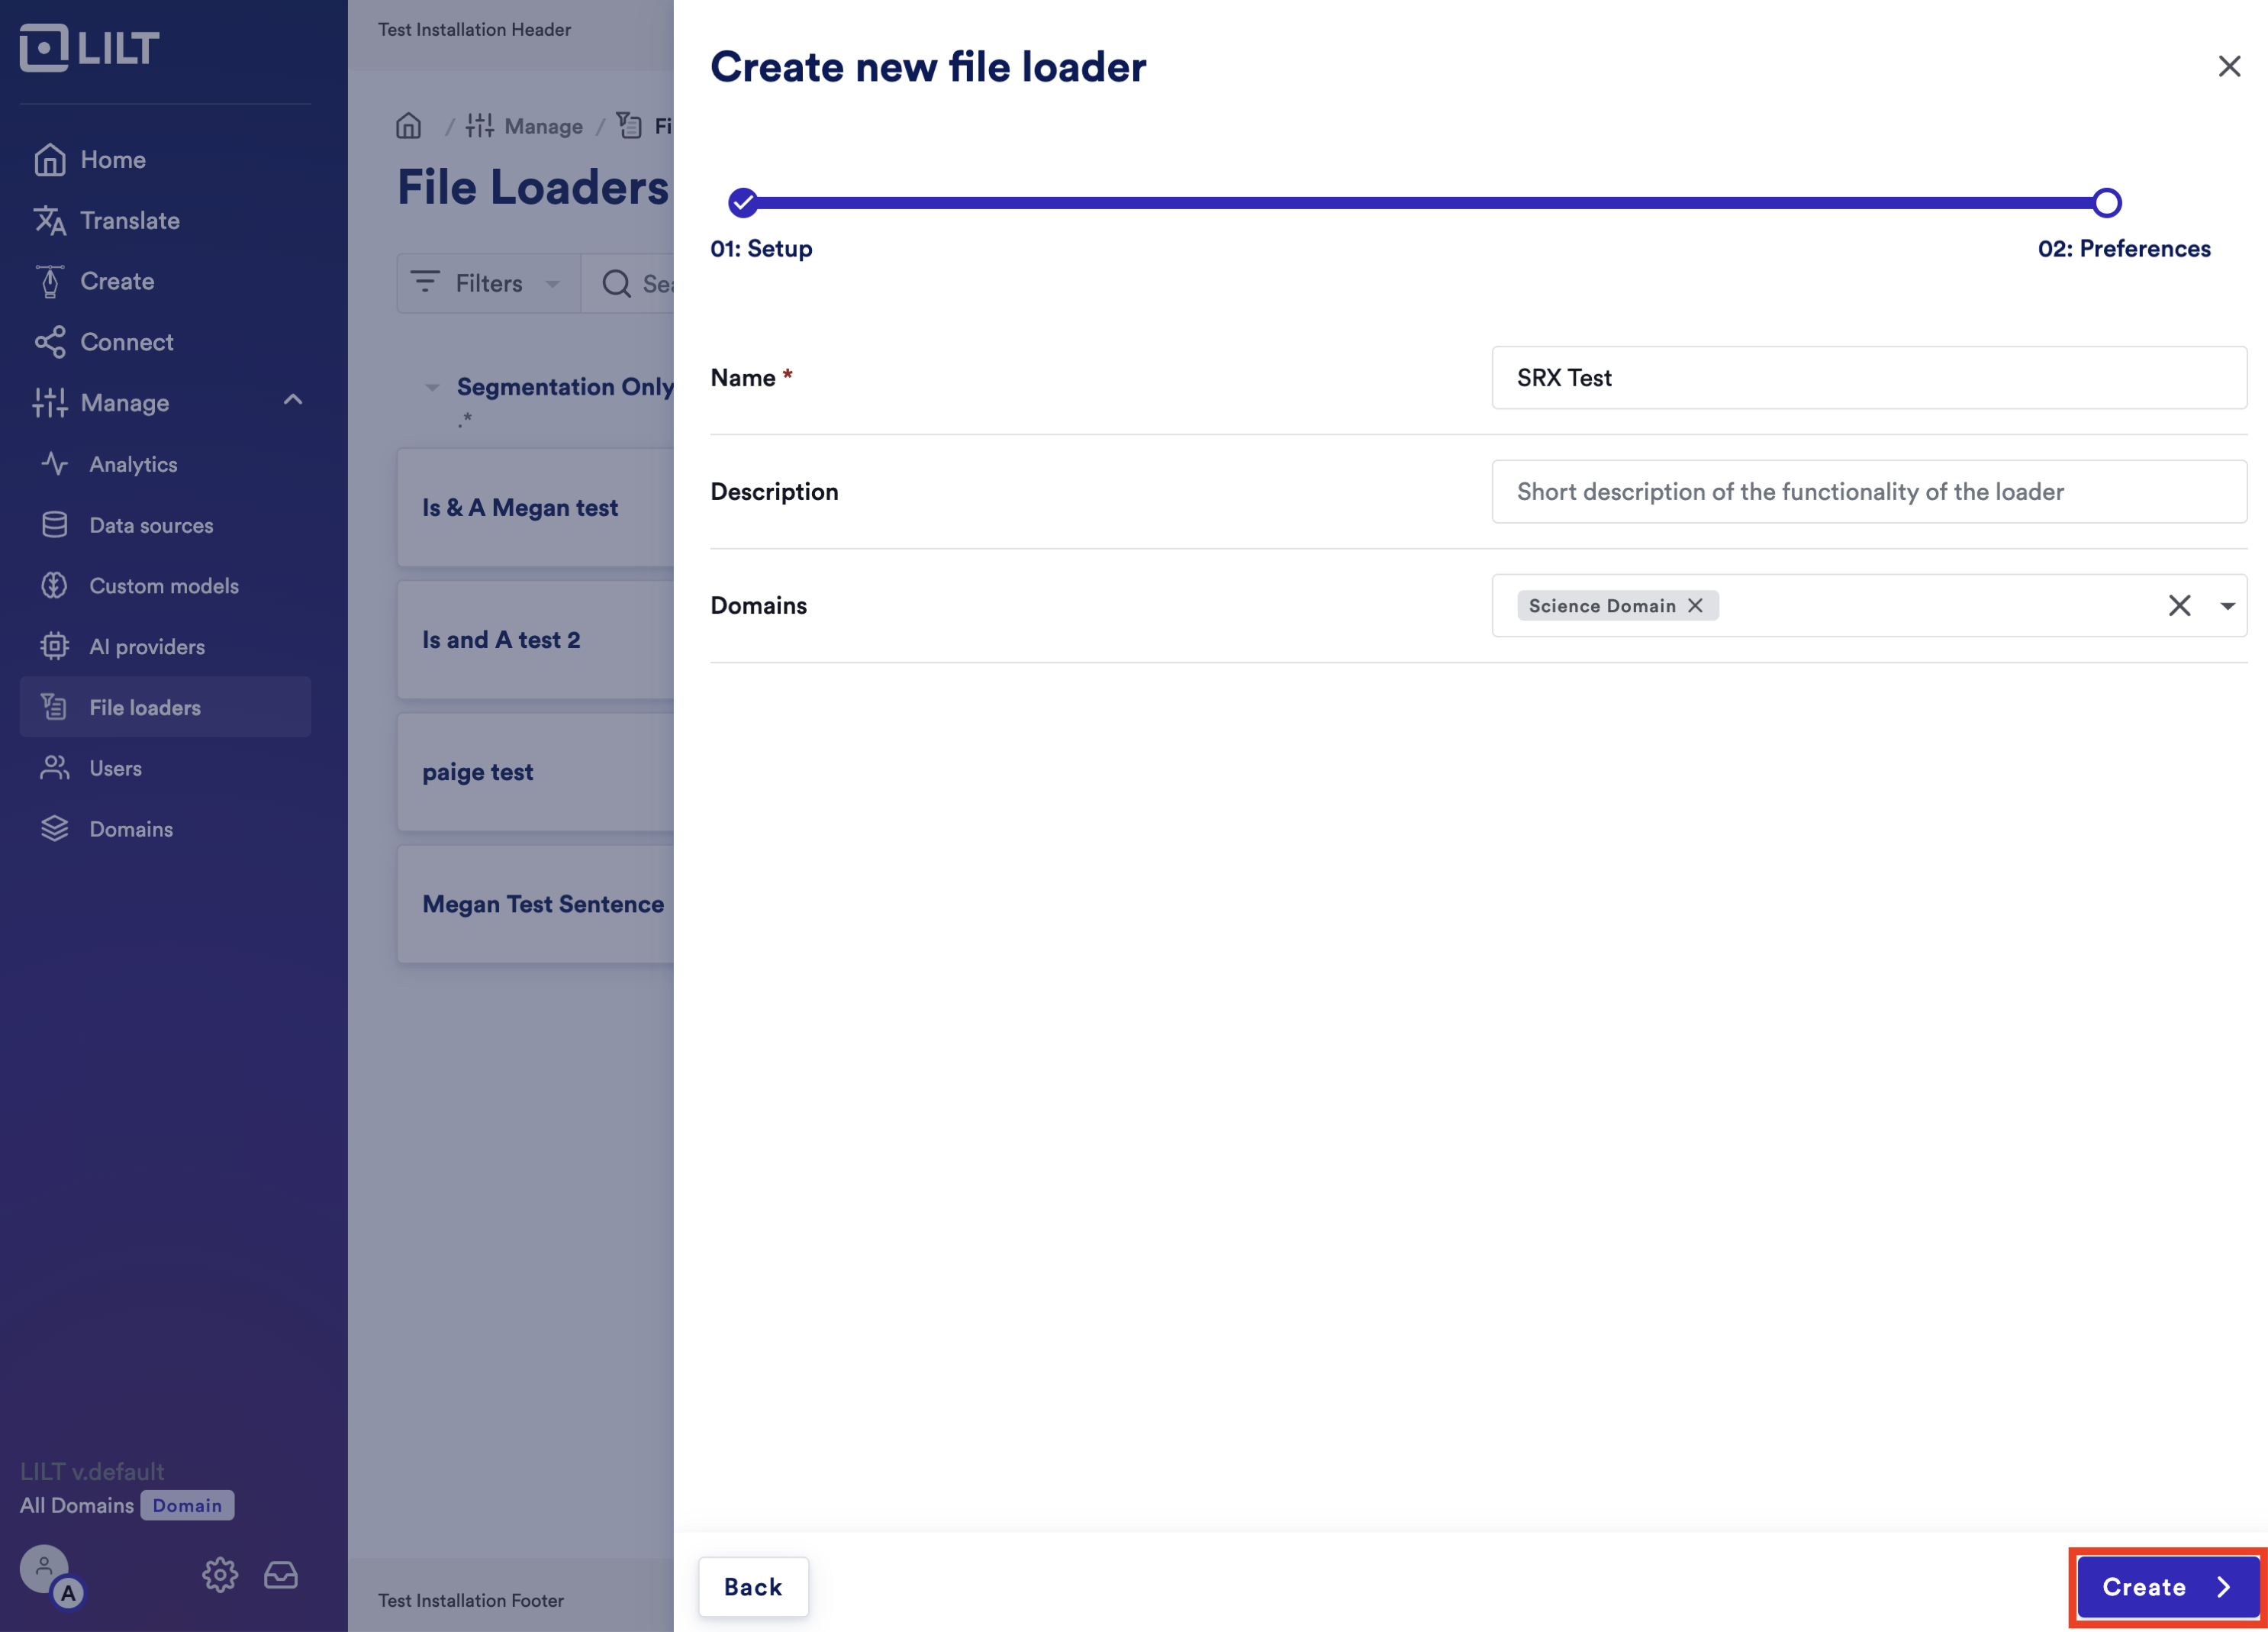 8. Name the loader. Optionally, you can:
1. Add a short description of the loader.
2. Add it to any domains that you want to apply this loader to. If you select specific domains, then the SRX file will only apply to those. Otherwise, it will apply to all users of the organization.
8. Name the loader. Optionally, you can:
1. Add a short description of the loader.
2. Add it to any domains that you want to apply this loader to. If you select specific domains, then the SRX file will only apply to those. Otherwise, it will apply to all users of the organization.
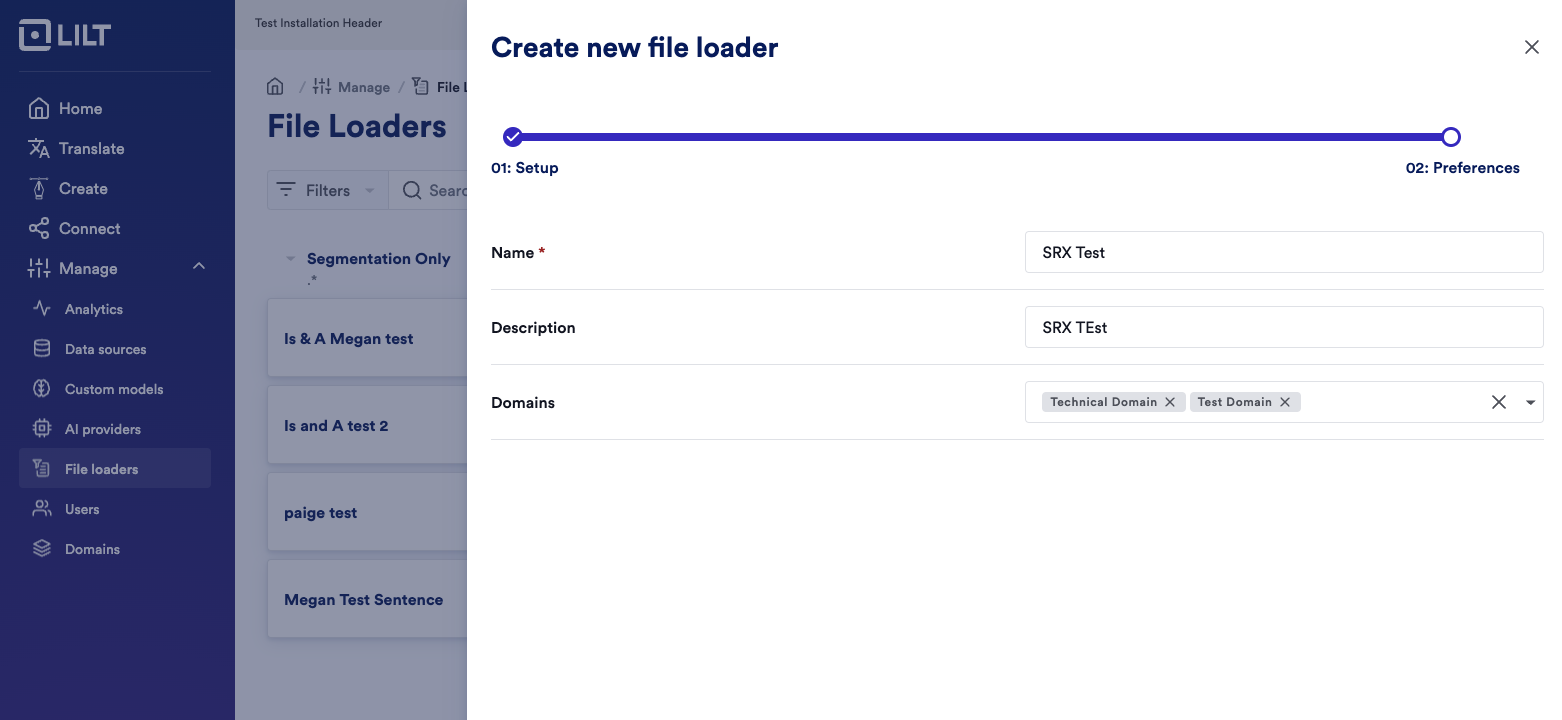 9. Click “Create” at the bottom of the screen and you SRX file loader will be ready to use.