> ## Documentation Index
> Fetch the complete documentation index at: https://support.lilt.com/llms.txt
> Use this file to discover all available pages before exploring further.
# Quick Start Guide
The LILT Playbook exercises require only basic knowledge of the LILT Platform and Instant Translate interface. This guide will help with the LILT features used in each exercise.
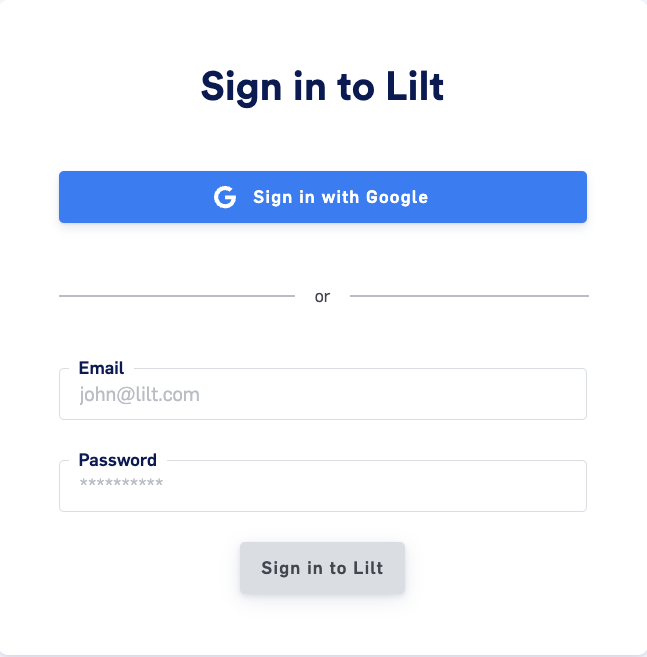 ## Logging into LILT
1. Navigate to [http://Lilt.com](http://Lilt.com) .
2. Select “Sign In” in the upper right-hand corner.
3. Sign in with the username and password provided by the LILT team.
## Creating a Job and Project
## Logging into LILT
1. Navigate to [http://Lilt.com](http://Lilt.com) .
2. Select “Sign In” in the upper right-hand corner.
3. Sign in with the username and password provided by the LILT team.
## Creating a Job and Project
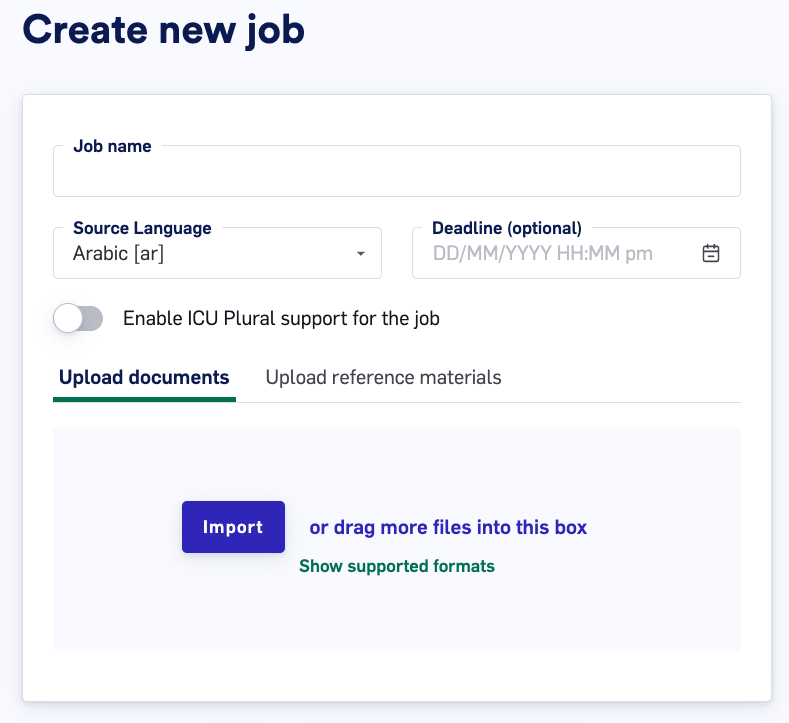
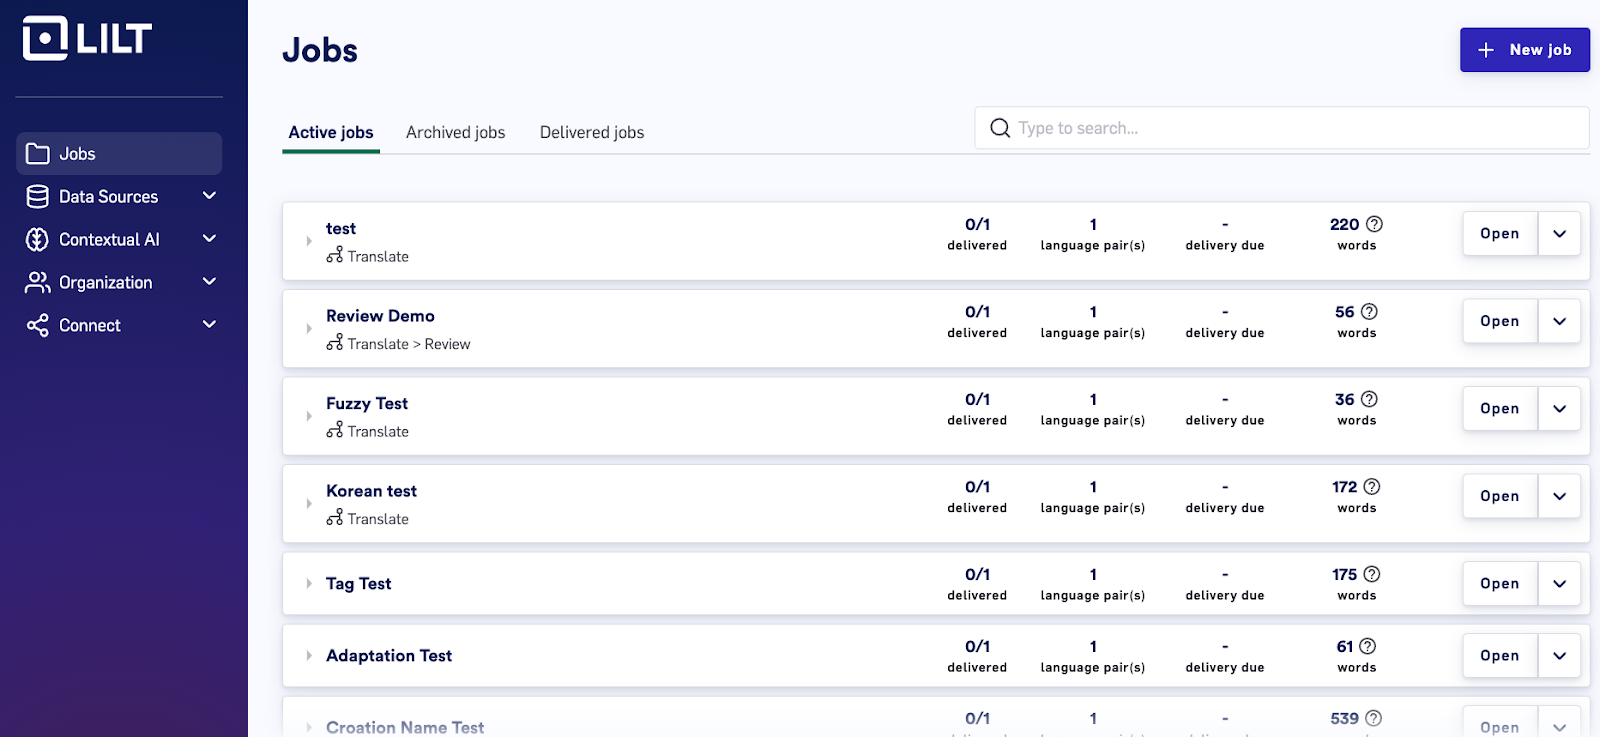 1. From the “Jobs” page, select “New Job” in the upper right corner
2. Name the Job
3. Select Source Language
4. Upload Source and Document
5. Select “Add Target Language”
6. Select Target Language
7. Select or create Data Source
8. Select “Add Target Language”
9. Select “Create Job”
1. From the “Jobs” page, select “New Job” in the upper right corner
2. Name the Job
3. Select Source Language
4. Upload Source and Document
5. Select “Add Target Language”
6. Select Target Language
7. Select or create Data Source
8. Select “Add Target Language”
9. Select “Create Job”
 ## Instant Translate
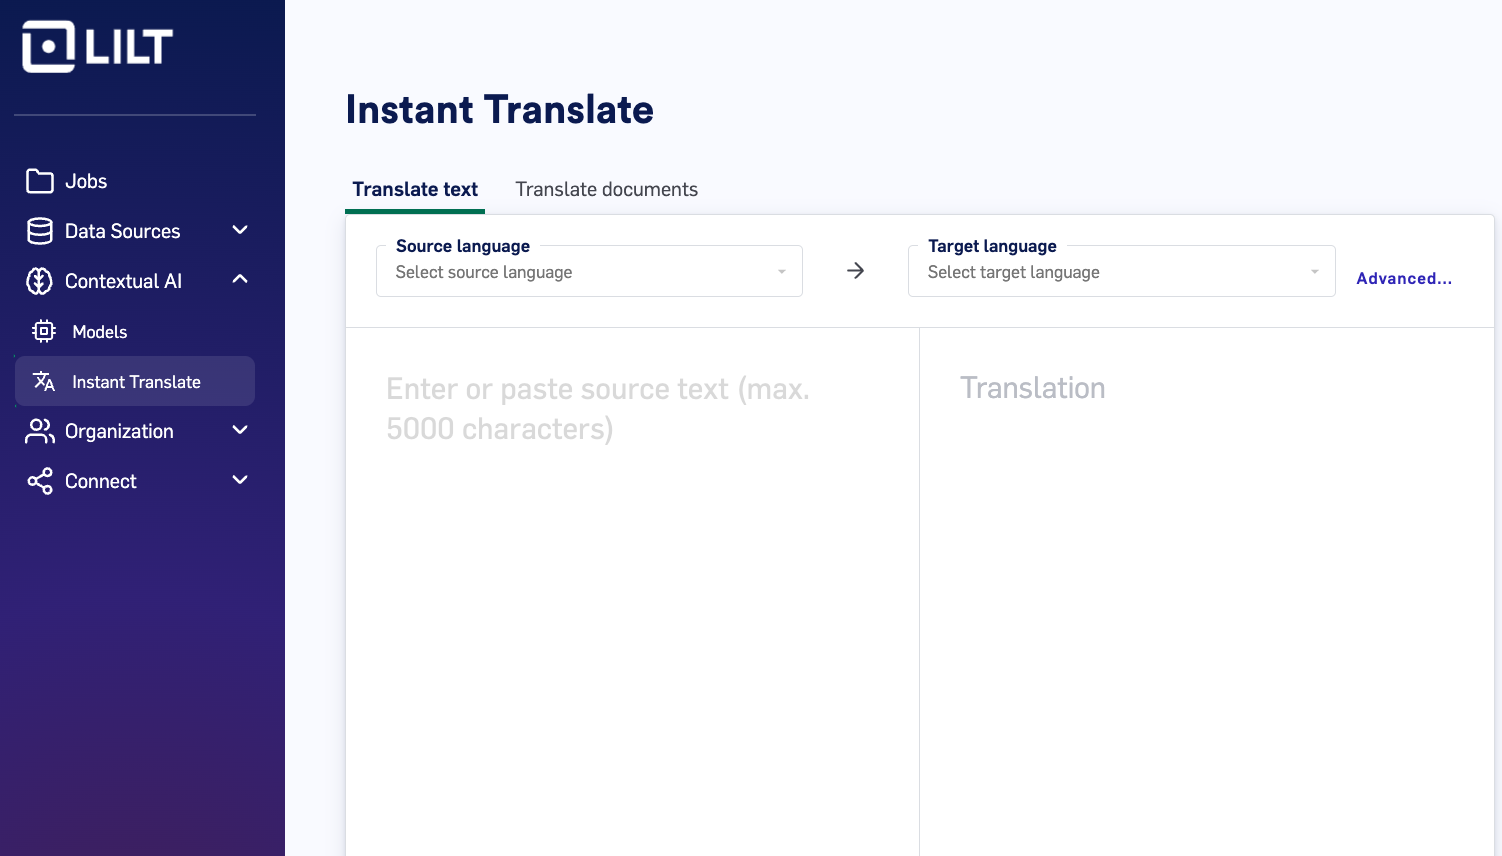 1. Click “Contextual AI” on the left side of the LILT interface
2. Select “Instant Translate”
3. Select the correct Source and Target language
a. Click “Advanced” to select memory
4. Paste text for translation
5. Click “Translate”
## Review Mode
1. Click “Contextual AI” on the left side of the LILT interface
2. Select “Instant Translate”
3. Select the correct Source and Target language
a. Click “Advanced” to select memory
4. Paste text for translation
5. Click “Translate”
## Review Mode
 ### Assigning a reviewer
1. Instructors can view student projects
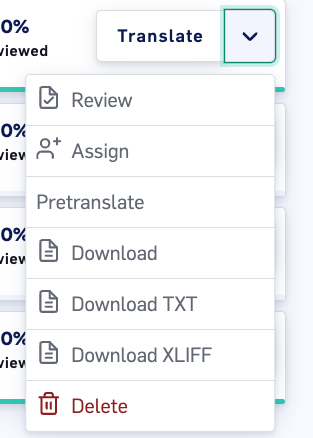
2. From the project level click the down arrow to the right of “Translate”
3. Click “Assign”
4. Enter the username of the reviewer
5. Click “Update Settings”
6. The chosen reviewer will receive notification to accept the document for review
7. Reviewer should click “Accept”
8. Next the Reviewer should click “Review” from the notifications tab.
a. If clicking Review does not open the document, click it one more time.
### Exporting Revision Report
### Assigning a reviewer
1. Instructors can view student projects
2. From the project level click the down arrow to the right of “Translate”
3. Click “Assign”
4. Enter the username of the reviewer
5. Click “Update Settings”
6. The chosen reviewer will receive notification to accept the document for review
7. Reviewer should click “Accept”
8. Next the Reviewer should click “Review” from the notifications tab.
a. If clicking Review does not open the document, click it one more time.
### Exporting Revision Report
 1. Open Job and Project
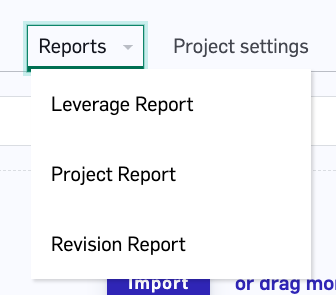
2. On the top of the page click “Reports” and then “Revision Report”
1. Open Job and Project
2. On the top of the page click “Reports” and then “Revision Report”
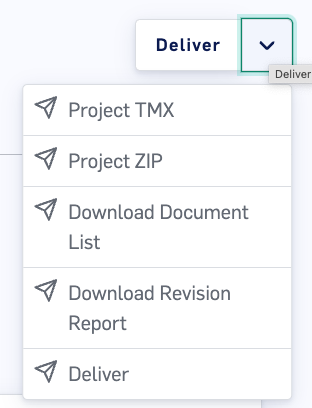 3. Click “Deliver”
4. Choose “Download Revision Report”
## Creating a vocabulary list (LILT Termbase)
3. Click “Deliver”
4. Choose “Download Revision Report”
## Creating a vocabulary list (LILT Termbase)
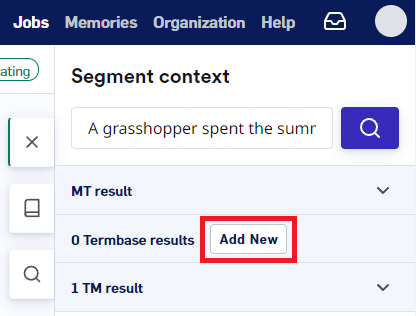 1. Users can add terms to a vocabulary list in order to keep track of new words encountered in a difficult translation
2. Click “New Term” on the right-hand side of the screen
3. Users can also use Windows shortcut: Alt+A; Mac shortcut: Option+A to open the same screen
4. Enter/Paste in the desired source and target meaning
5. Select “Add Entry”
## Context Search (LILT Concordance)
Concordance assists translators and reviewers by providing quick access to information about word and phrase usage in a target language
1. Users can add terms to a vocabulary list in order to keep track of new words encountered in a difficult translation
2. Click “New Term” on the right-hand side of the screen
3. Users can also use Windows shortcut: Alt+A; Mac shortcut: Option+A to open the same screen
4. Enter/Paste in the desired source and target meaning
5. Select “Add Entry”
## Context Search (LILT Concordance)
Concordance assists translators and reviewers by providing quick access to information about word and phrase usage in a target language
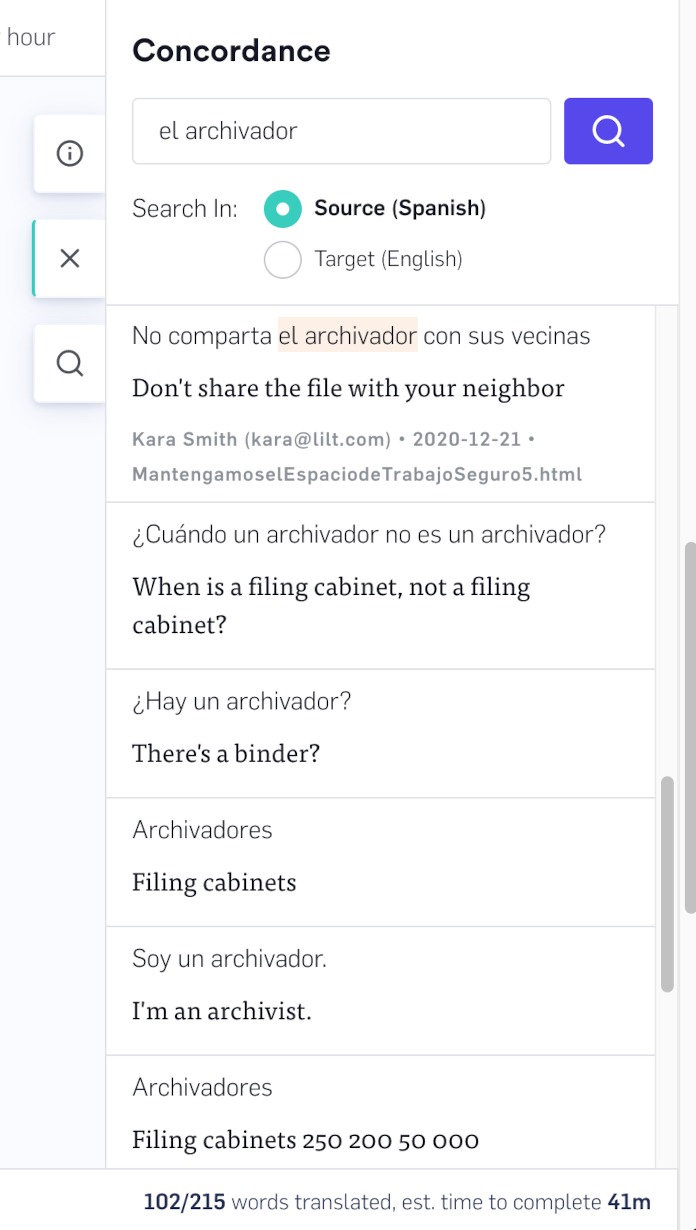 1. Click the book icon on the right side of the screen to open the concordance search.
2. Type in a term or phrase
3. Indicate which language it is, Arabic or English
4. Click the magnifying glass icon to search
## Source Text Editing
Source text editing allows a user to change the text to be translated.
1. Click the book icon on the right side of the screen to open the concordance search.
2. Type in a term or phrase
3. Indicate which language it is, Arabic or English
4. Click the magnifying glass icon to search
## Source Text Editing
Source text editing allows a user to change the text to be translated.
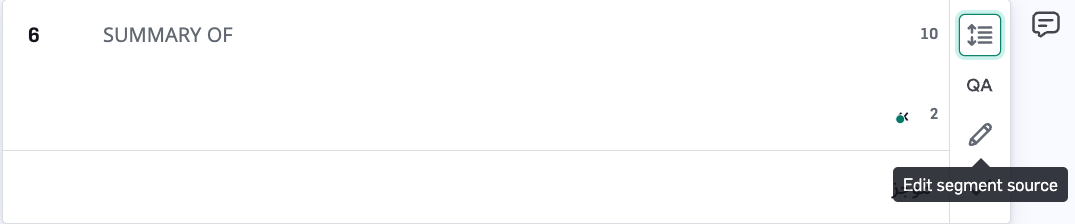 1. Click the pencil icon to the right of the segment
2. Edit the source text
3. Click “Save Changes”
## Segment Editing
Segment editing is available to the right of each segment
### Split Segment
Ability to break larger segments into smaller segments
1. Click the pencil icon to the right of the segment
2. Edit the source text
3. Click “Save Changes”
## Segment Editing
Segment editing is available to the right of each segment
### Split Segment
Ability to break larger segments into smaller segments
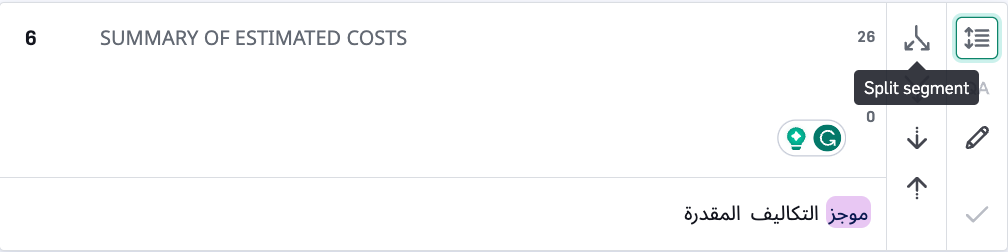 1. Select the desired segment
2. On the right of the selected segment, select “Segment Editing Tools” and then “Split Segment”
3. Drag and drop the green vertical marker to where the segment should be split
4. Confirm the split by selecting the checkmark, or cancel the split by clicking the X
1. Select the desired segment
2. On the right of the selected segment, select “Segment Editing Tools” and then “Split Segment”
3. Drag and drop the green vertical marker to where the segment should be split
4. Confirm the split by selecting the checkmark, or cancel the split by clicking the X
 ### Merging Segments
Can only be performed on split segments, or segments where there are no line breaks in the original formatting
### Merging Segments
Can only be performed on split segments, or segments where there are no line breaks in the original formatting
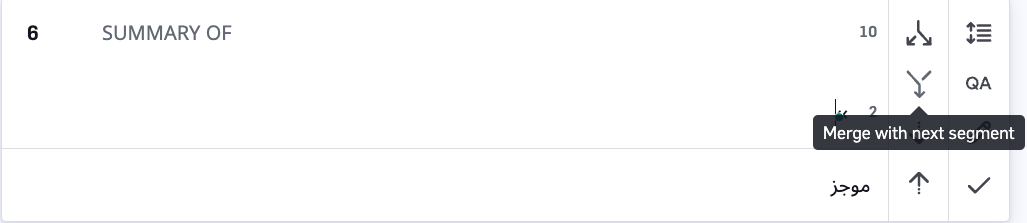 1. Select the desired segment
2. On the right of the selected segment, select “Merge with next segment.
3. If the merge button is grayed out and not selectable, there is a character break prohibiting the merge (Ex: background paragraph break)
1. Select the desired segment
2. On the right of the selected segment, select “Merge with next segment.
3. If the merge button is grayed out and not selectable, there is a character break prohibiting the merge (Ex: background paragraph break)