> ## Documentation Index
> Fetch the complete documentation index at: https://support.lilt.com/llms.txt
> Use this file to discover all available pages before exploring further.
# Salesforce Commerce Cloud
> The Salesforce Commerce Cloud Connector allows you to seamlessly translate your product catalog and content directly from within Salesforce, eliminating manual exports and enabling faster global launches. Read below for configuration information.
## **Prerequisites**
* Access to **Salesforce Account Manager** ([account.demandware.com](https://account.demandware.com/)) with permissions to create and manage API clients.
* Access to **Business Manager** for your Commerce Cloud instance (for cartridge registration and code deployment, if applicable).
* Your **organization ID** and **instance short code** (e.g. from your SFCC project or Account Manager).
* For cartridge installation: **Node.js** and **npm**, and (if using the upload CLI) a cartridge archive and optional `dw.json` configuration.
***
## **1. Enable SCAPI and API credentials**
The connector uses **SCAPI (Salesforce Commerce API)** with OAuth 2.0. You need to create an API client in Account Manager, assign the **Salesforce Commerce API** role, and configure it for your organization and instance(s). Use your SFCC/Account Manager documentation for the exact steps.
***
## **2. Enable product write and catalog read**
For the connector to read and update product data (including translating products in bunches), your API client must have **product write** and **catalog read** permissions enabled in Account Manager. Configure the required OAuth scopes according to your SFCC documentation.
***
## **3. Configure the connector**
You need to provide the following details so Lilt can set up the connector configuration on the Lilt side. All of these are required for connector setup.
* `sfcc_data_url` — SCAPI Data API base URL (e.g. `https://shortcode.api.commercecloud.salesforce.com`).
* `sfcc_auth_url` — OAuth token URL (e.g. `https://account.demandware.com/dwsso/oauth2/access_token` or the SLAS/Account Manager URL in use).
* `sfcc_client_id` — API client ID from Account Manager.
* `sfcc_client_secret` — API client password (client secret).
* `sfcc_organization_id` — Organization ID.
* `sfcc_bm_user_id` / `sfcc_bm_user_password` — Business Manager user credentials (used when using BM user grant instead of client credentials).
***
## **4. Install cartridge from archive**
To deploy the connector cartridge to your SFCC instance, use the **Salesforce Commerce Cloud CLI** (`sfcc-ci`). Install it if needed (`npm install -g sfcc-ci`), then run:
```
sfcc-ci code:deploy $(ZIP_FILE) --activate
```
Replace `$(ZIP_FILE)` with the path to your cartridge zip (e.g. `./connector-cartridge.zip`). The `--activate` flag activates the deployed code version. Ensure your environment is configured for your instance (e.g. via `dw.json` or environment variables as required by `sfcc-ci`).
***
## **5. How to use the connector**
To start working with the connector, in the **right vertical navbar** in SFCC go to **Lilt** and open the **Orders** page.
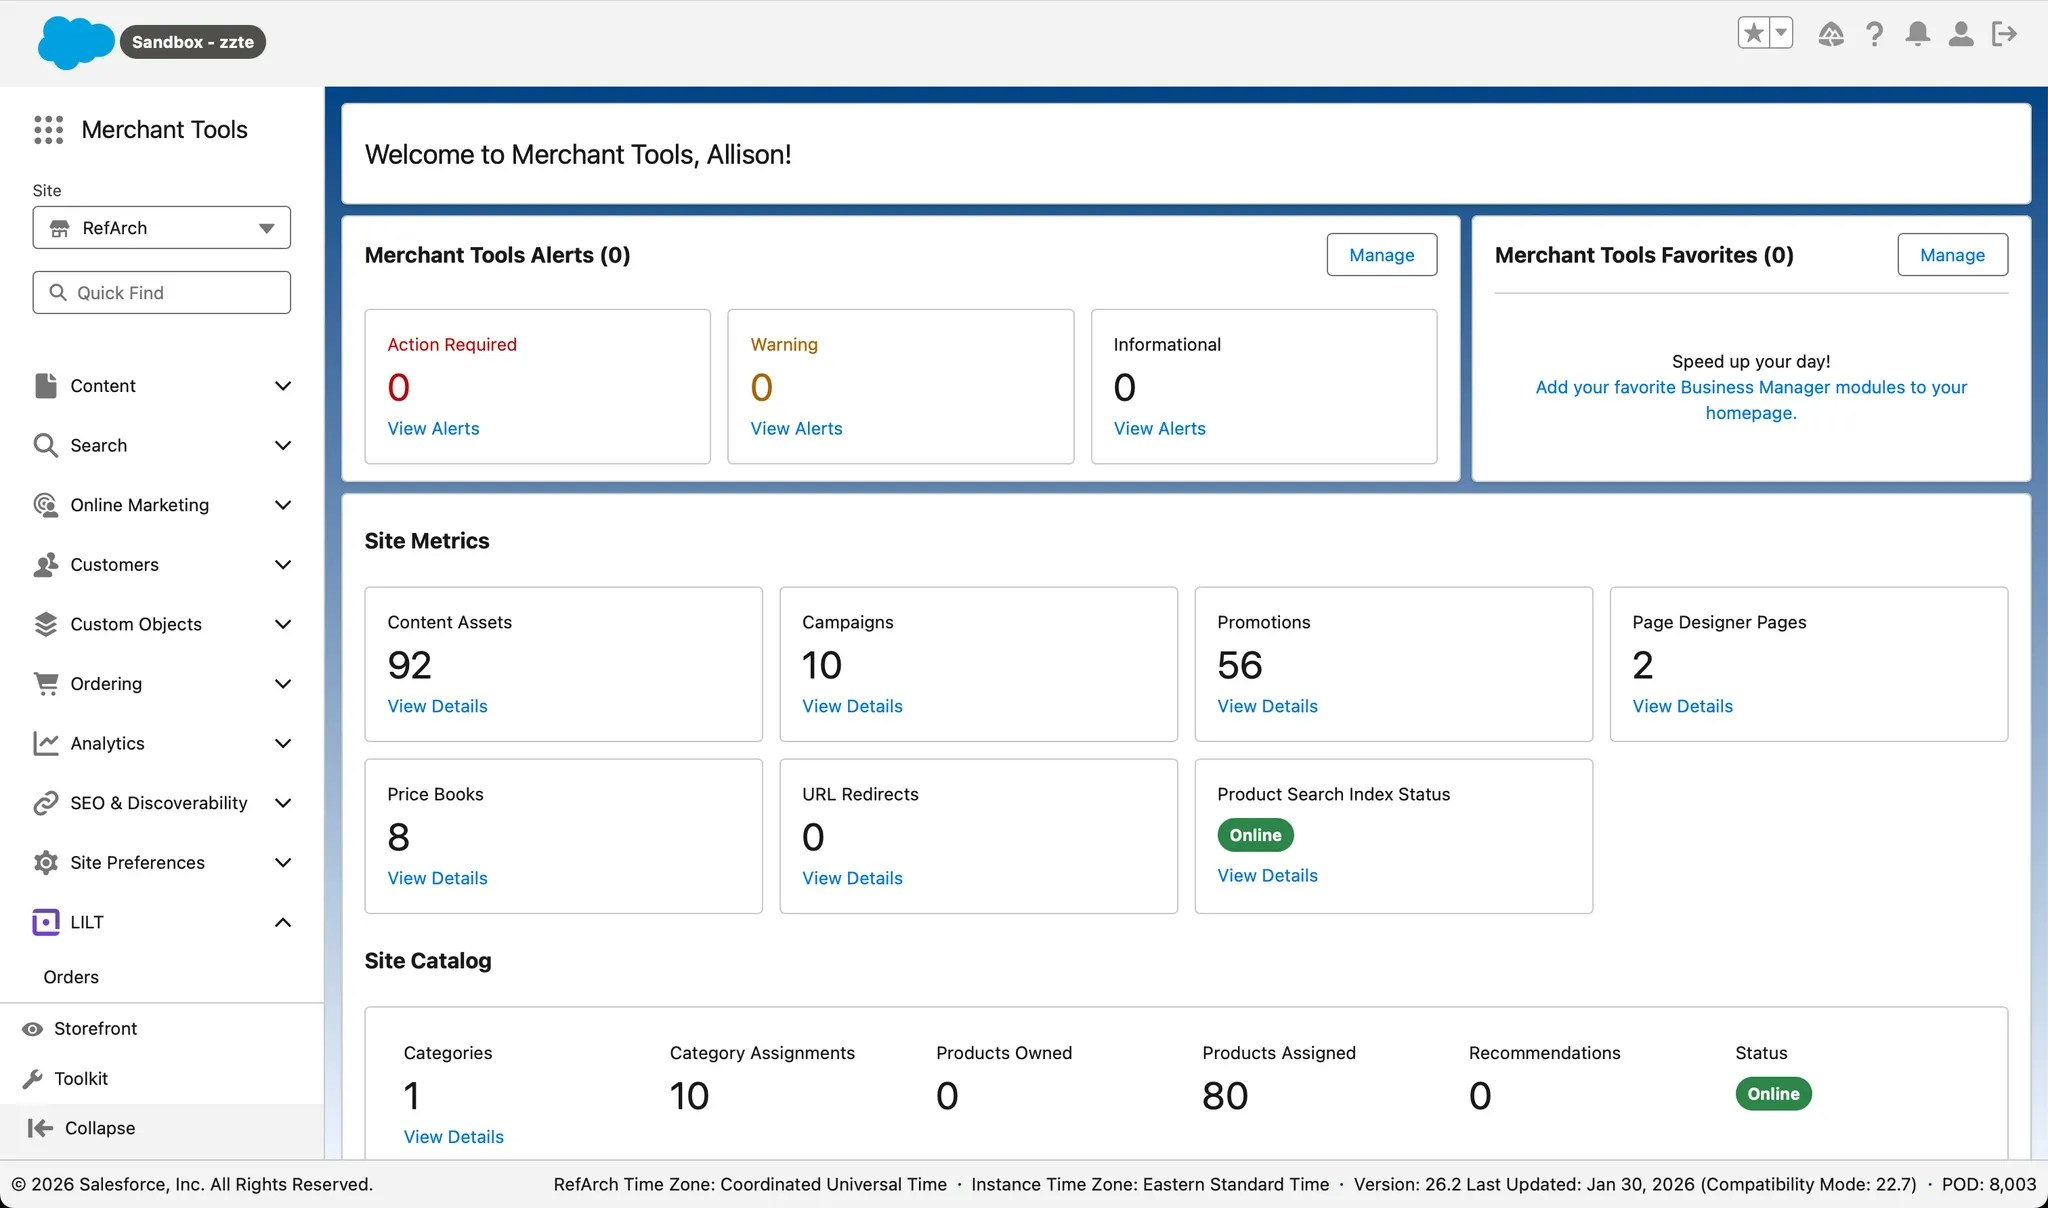 If it is your first time, you will be prompted to enter your **Lilt Plugin API** token. Enter it and click **Save**.
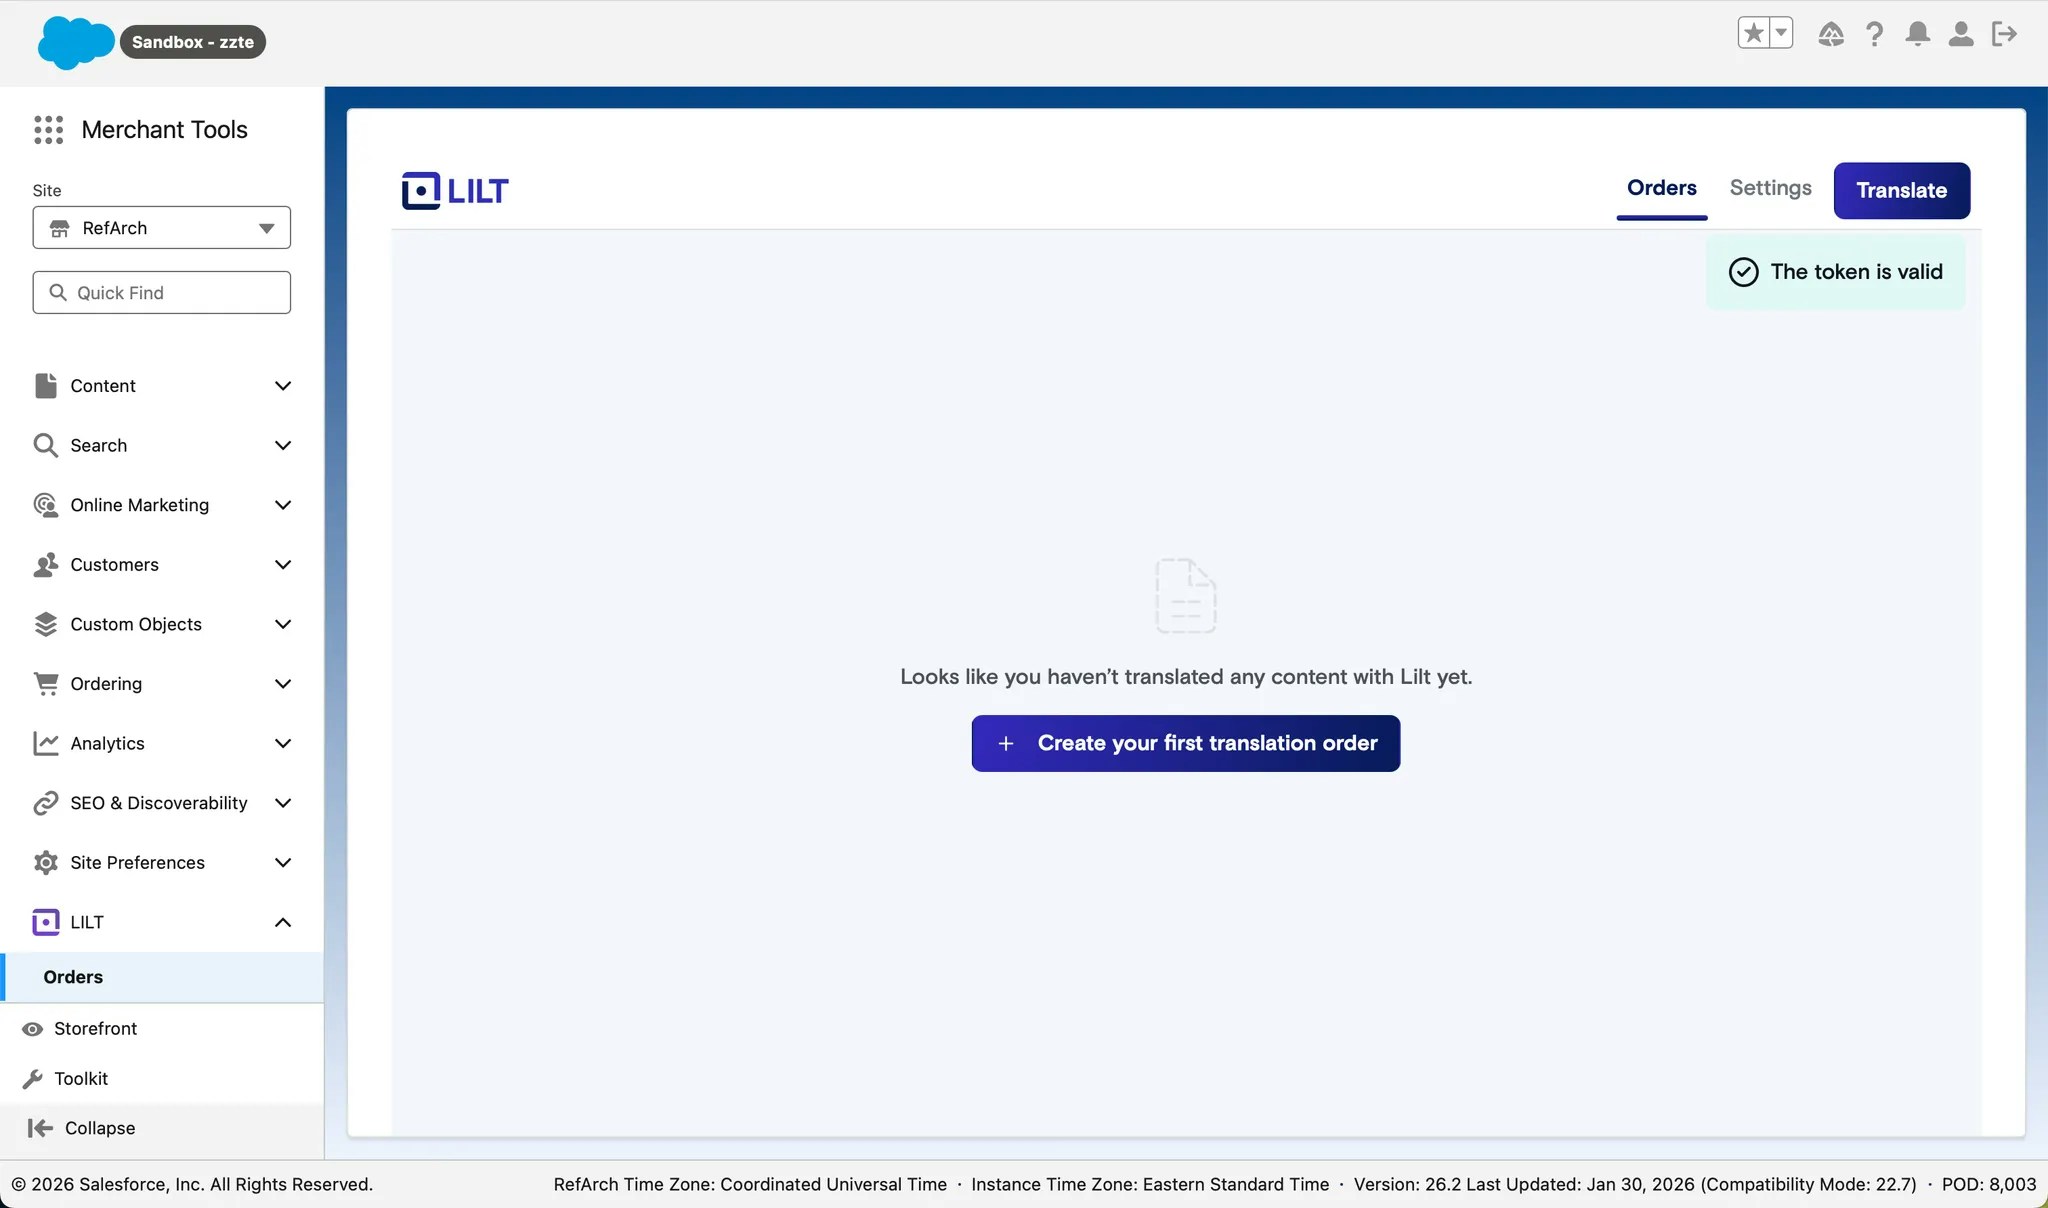
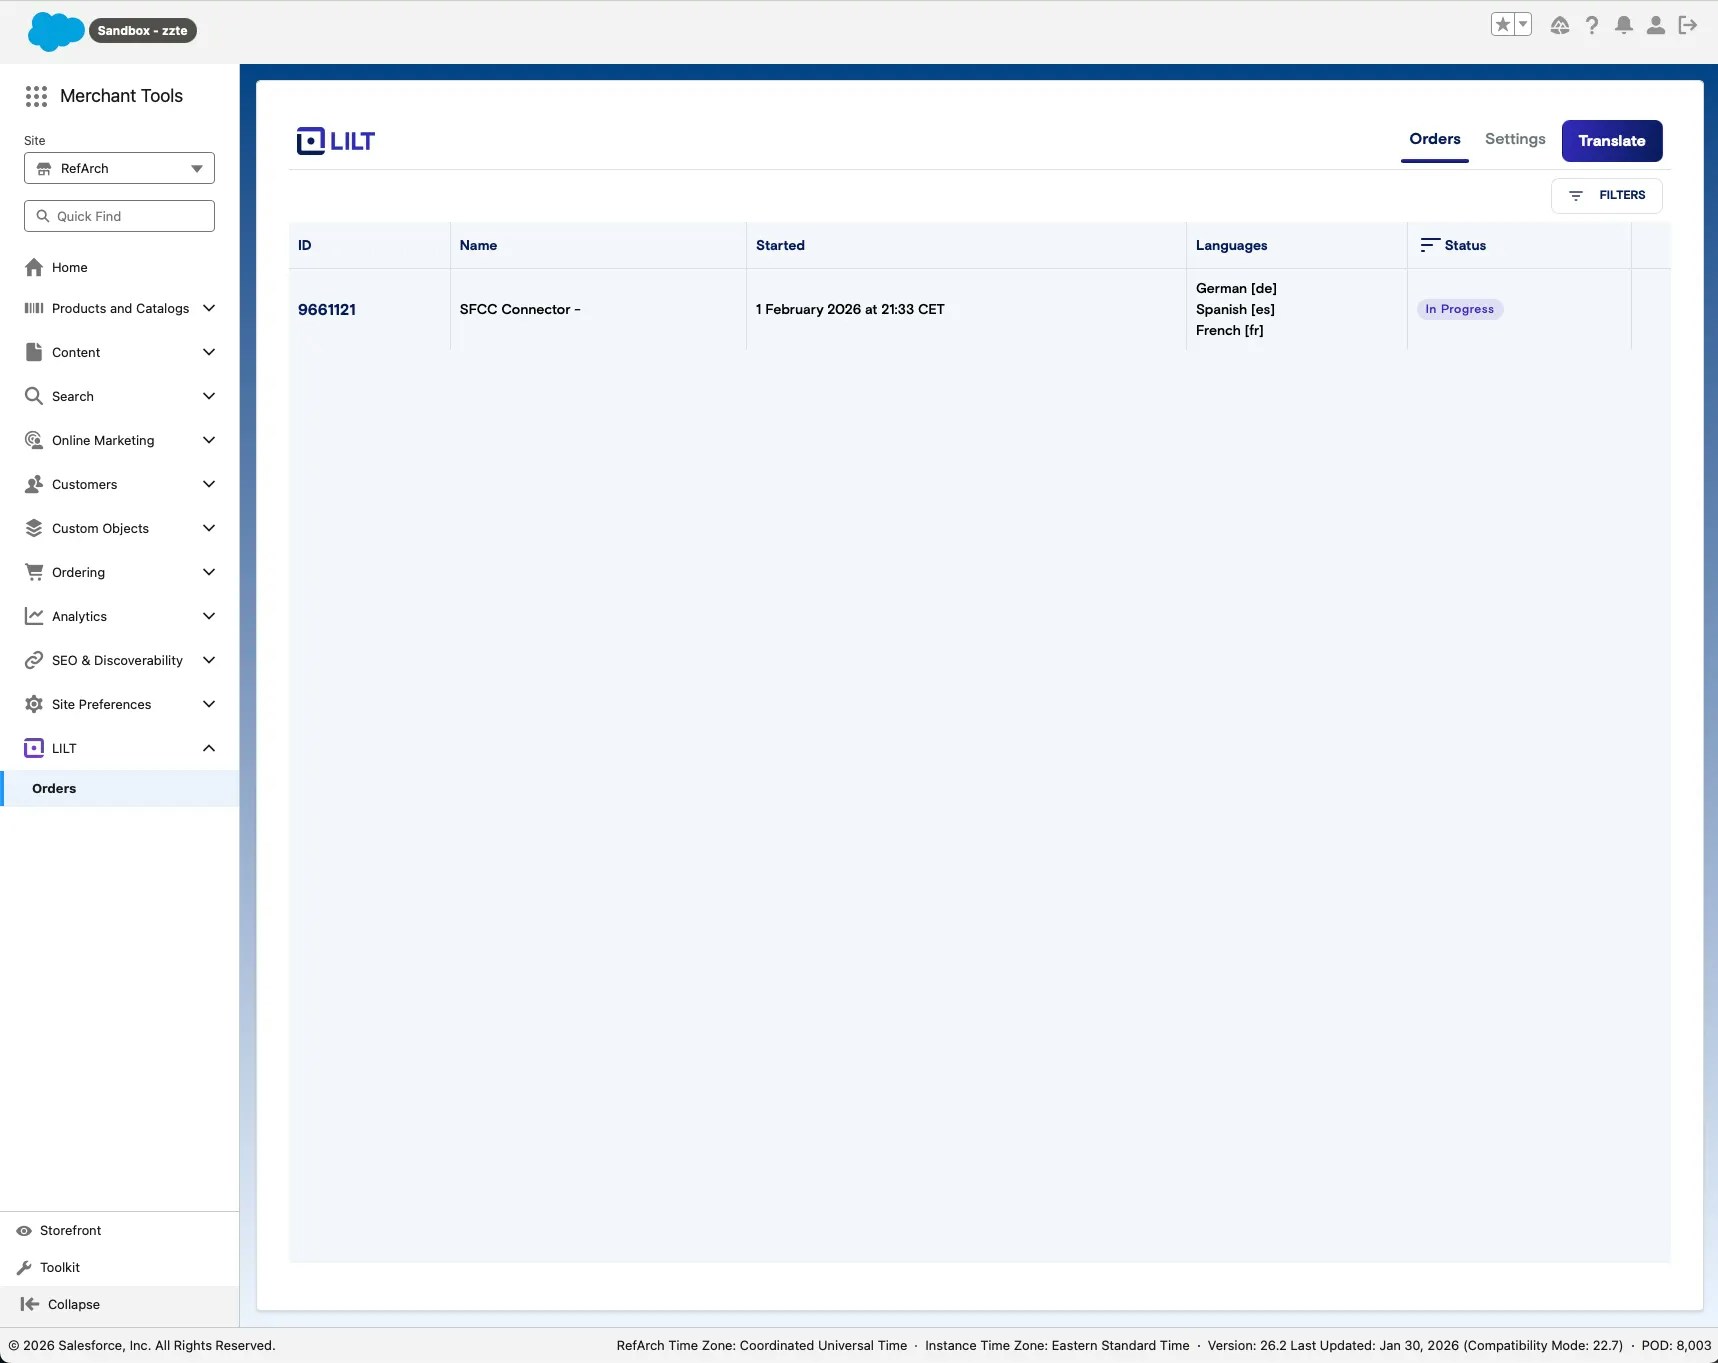
 After the token is saved, you will be redirected to the Orders page, where you can create your first order or see the list of already submitted orders.
 ### **Creating a new order**
To create a new order, choose **Translate** or **Create your first translation order**.
**Choose the flow:**
* **Instant** — Translation runs instantly without human involvement.
* **Verified** — The order is created on the Lilt platform and requires linguists to translate or verify it, depending on your workflow.
In the new order form, choose **source and target languages**, enter an **order name**, and select **products or catalogs** you want to translate. Then click **Submit for translations**.
### **Creating a new order**
To create a new order, choose **Translate** or **Create your first translation order**.
**Choose the flow:**
* **Instant** — Translation runs instantly without human involvement.
* **Verified** — The order is created on the Lilt platform and requires linguists to translate or verify it, depending on your workflow.
In the new order form, choose **source and target languages**, enter an **order name**, and select **products or catalogs** you want to translate. Then click **Submit for translations**.
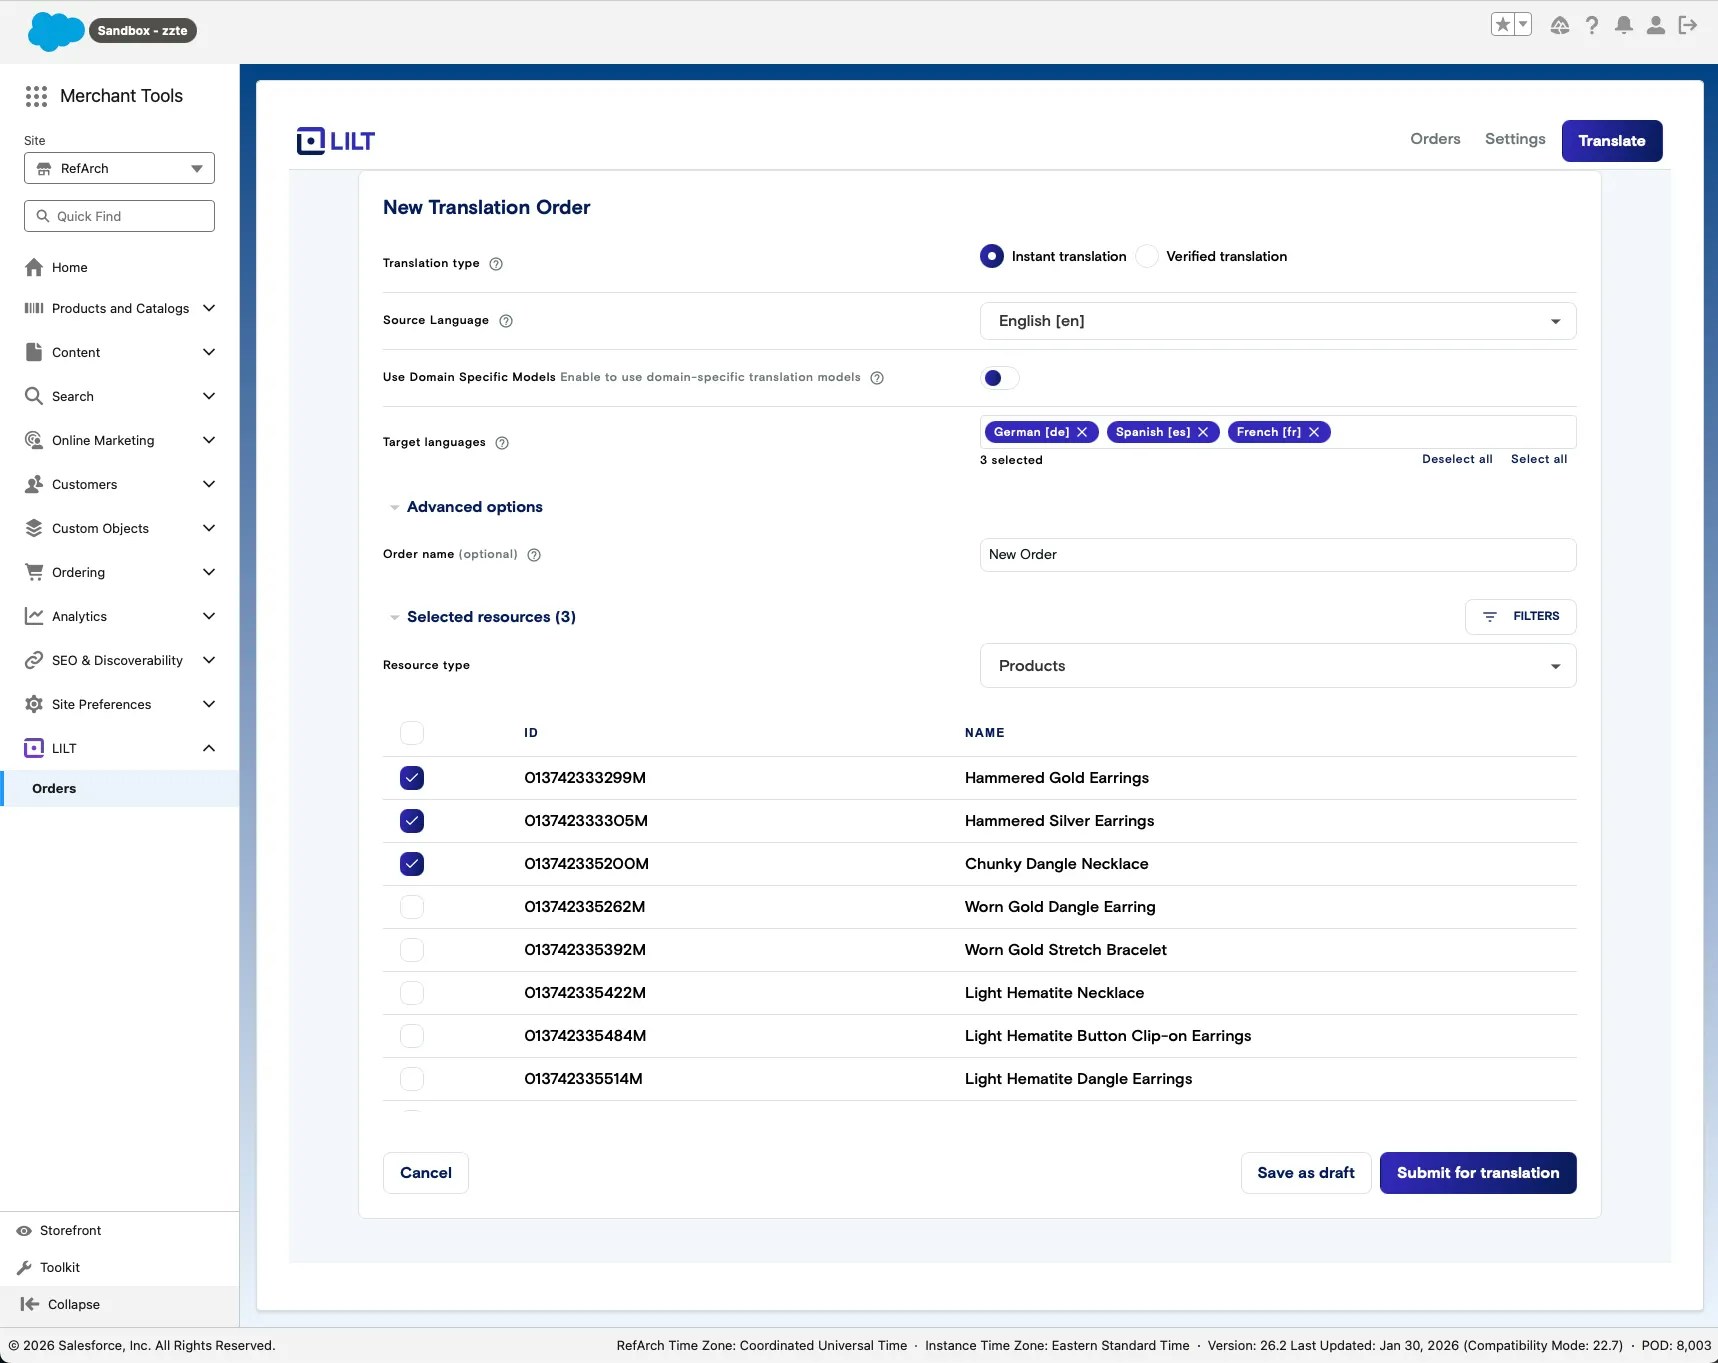 After you submit, the order is sent to the Lilt platform.
 ### **When the job is done**
When the job is done, you can **Preview** or **Deliver** it.
### **When the job is done**
When the job is done, you can **Preview** or **Deliver** it.
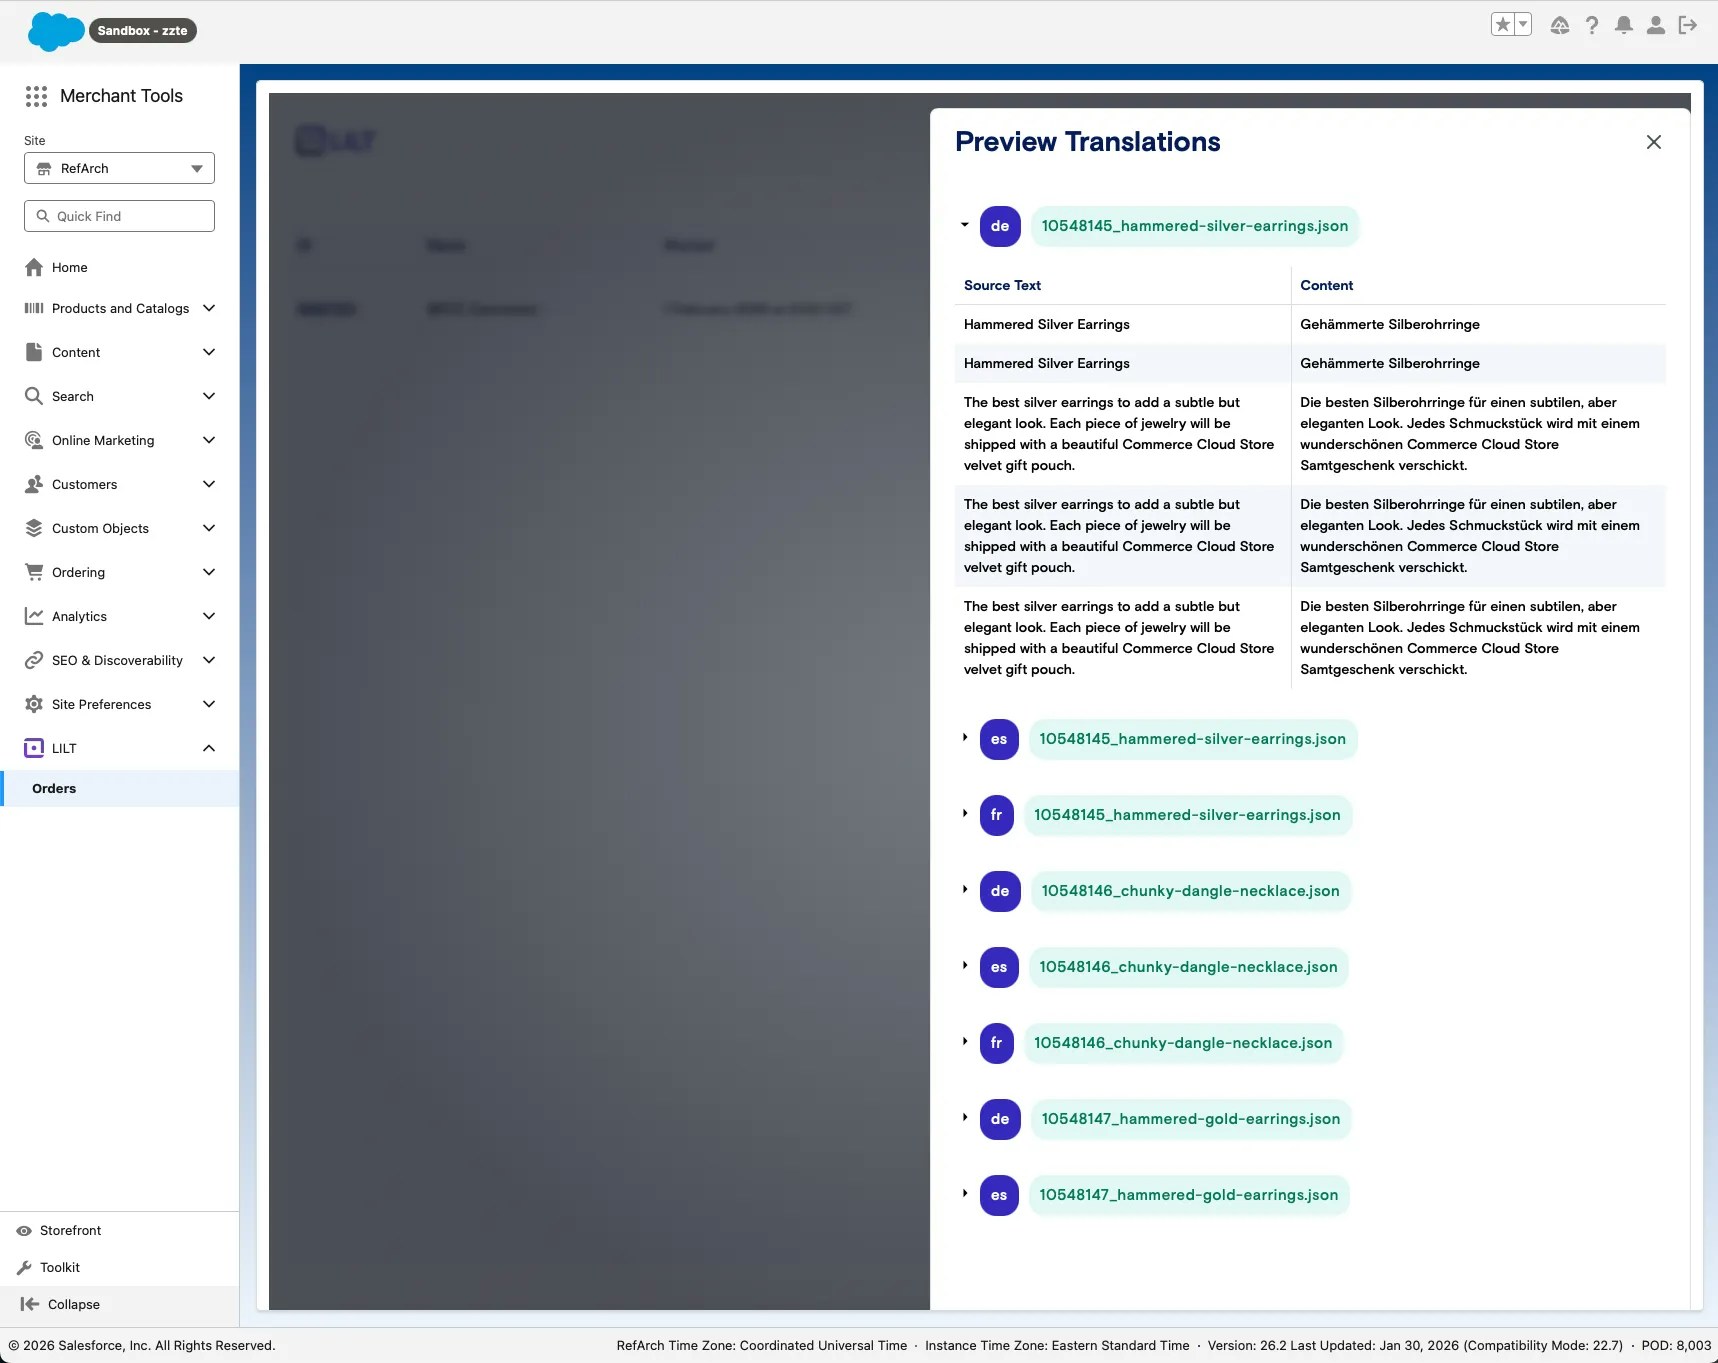
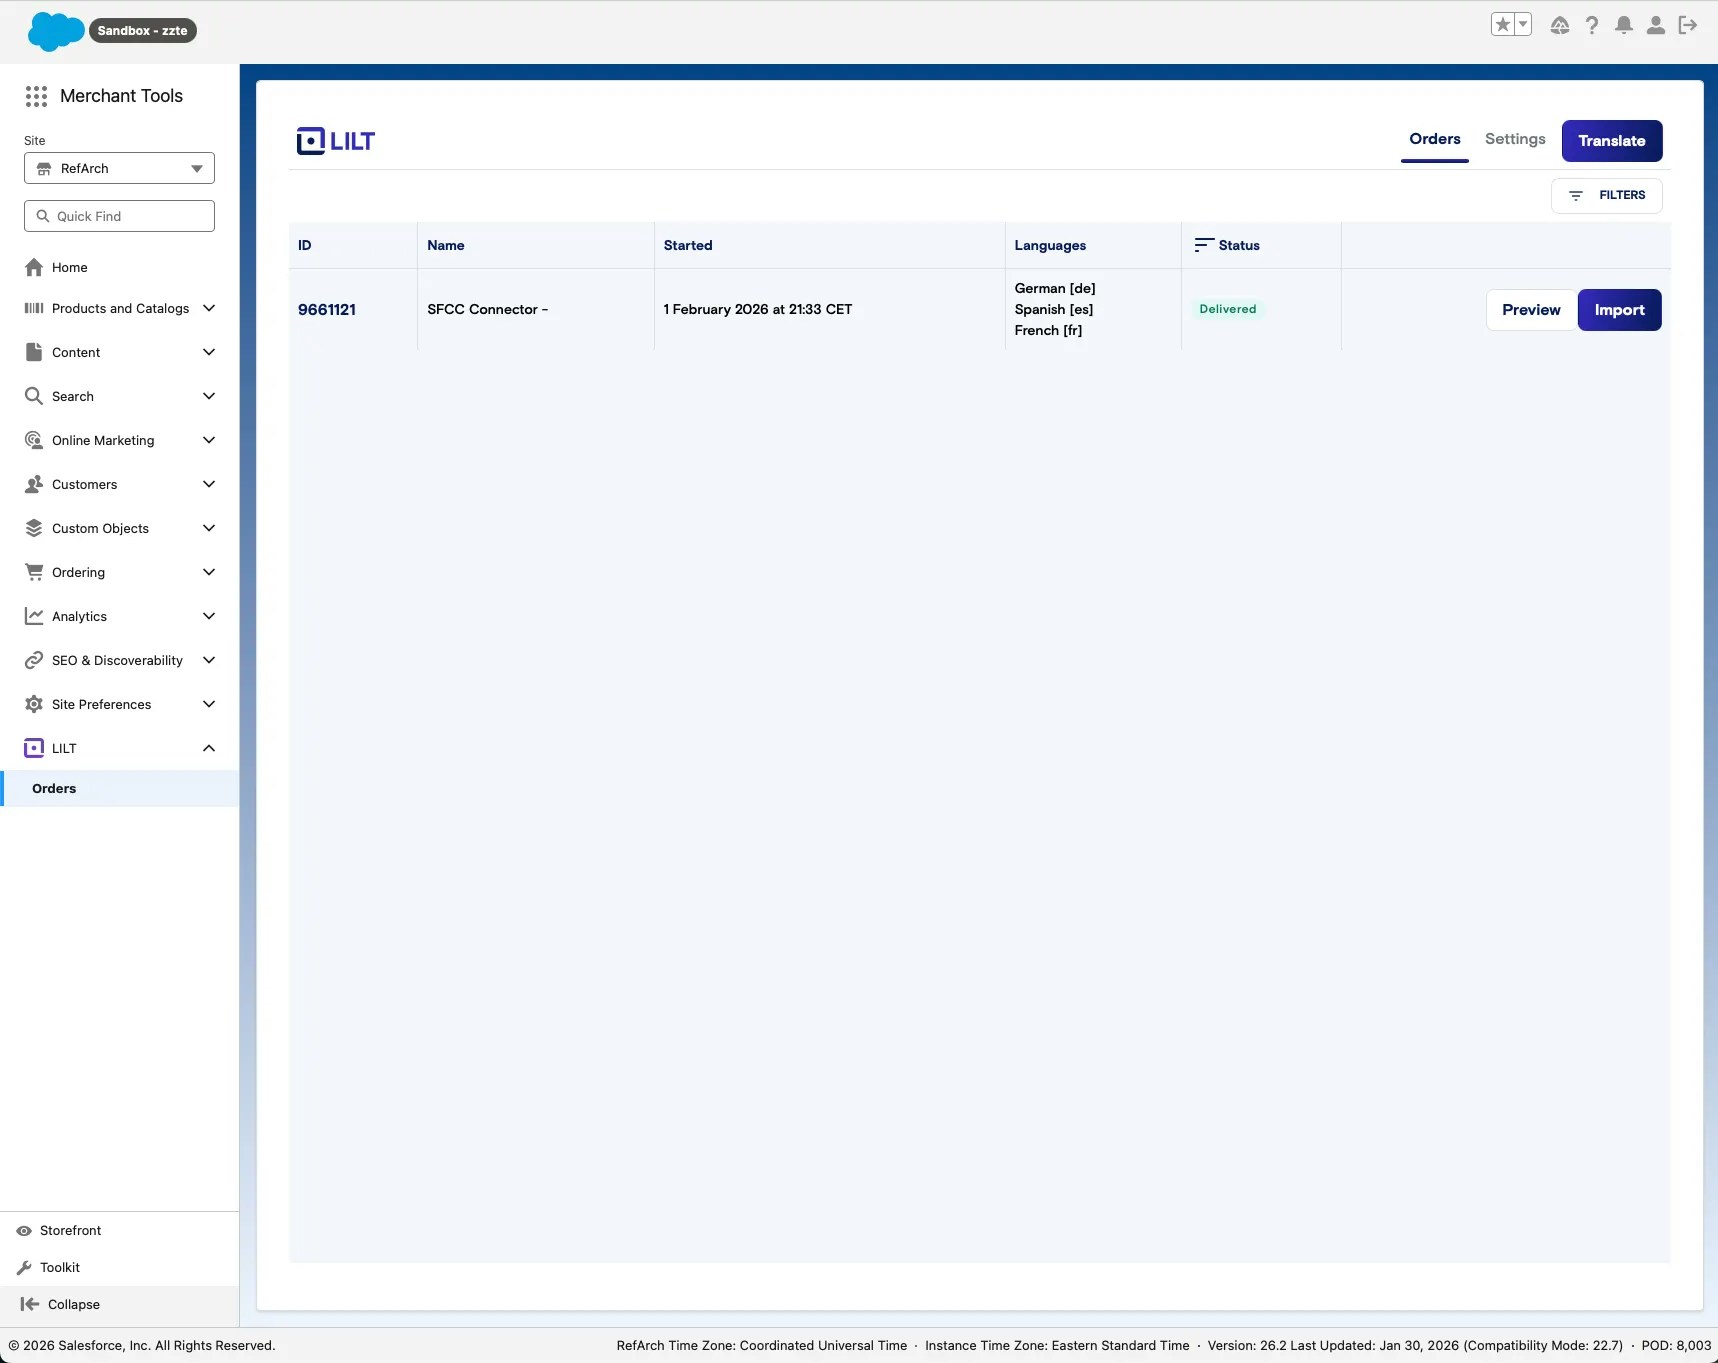 * **Preview** — Opens a modal with available files and languages. Open one of the files to see content **side by side**: source content on the left, target content on the right.
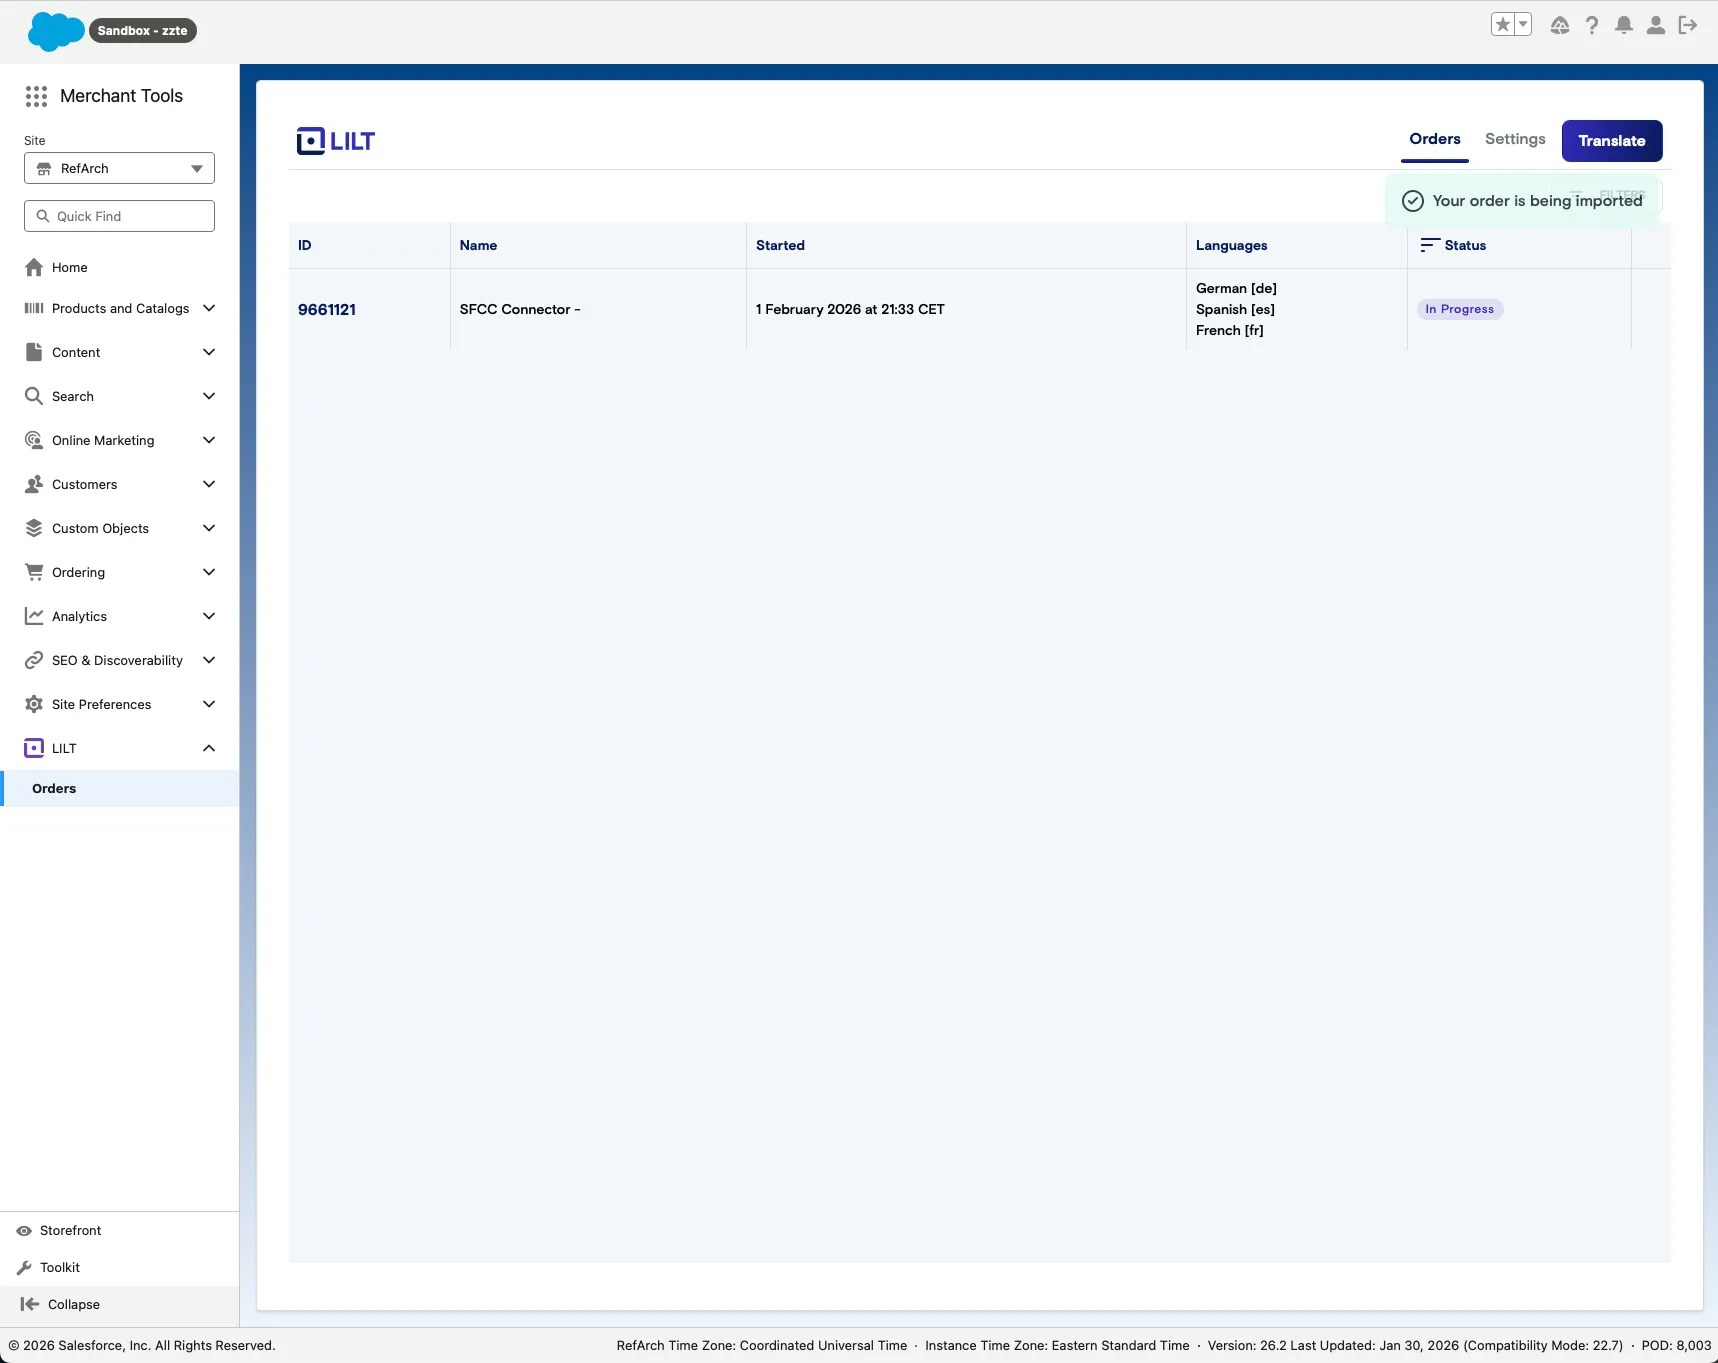
 * **Deliver** — If everything looks good, click **Deliver**. This starts the process of writing translations to your files.
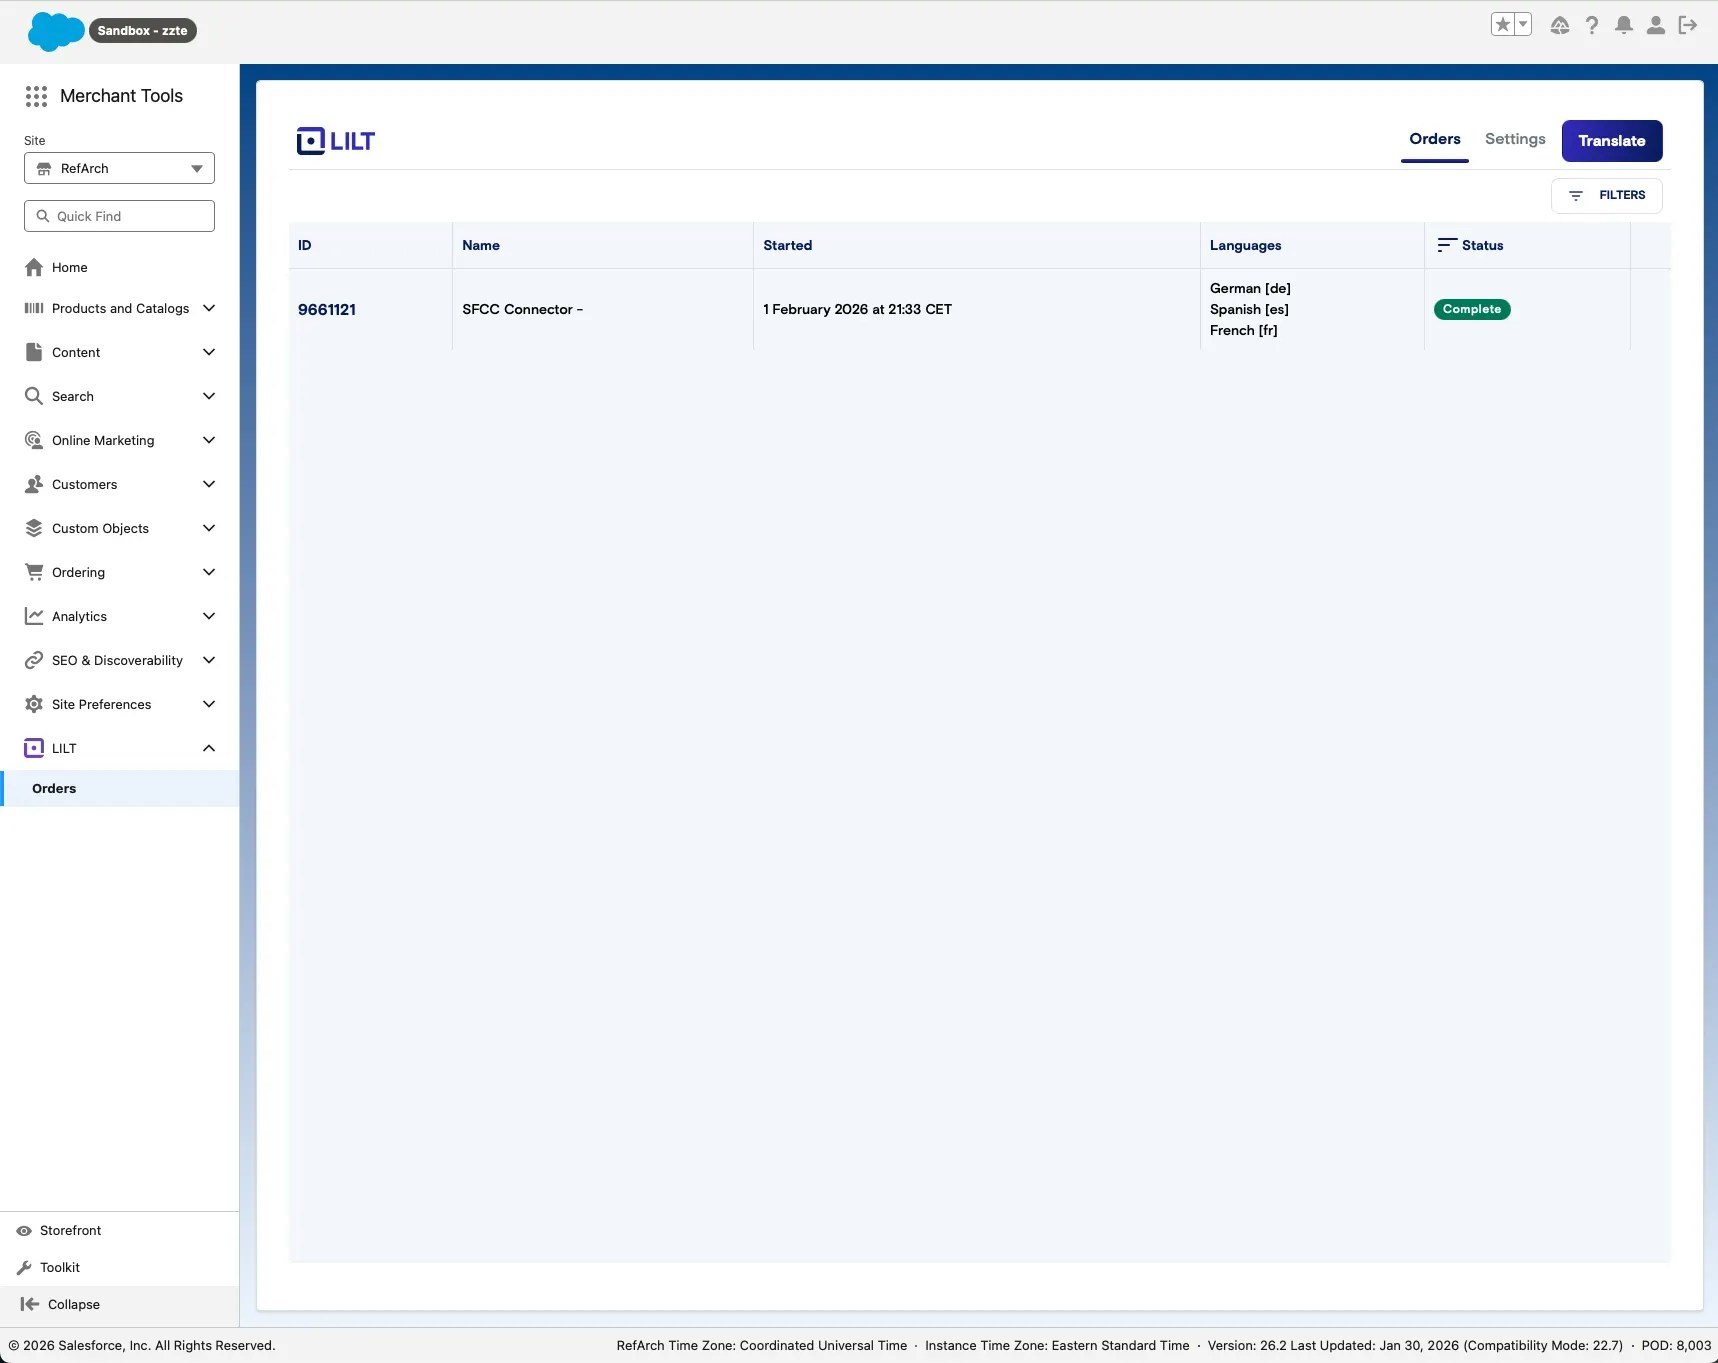
 Once delivery is complete, the order status changes to **Complete**.
 ***
## **6. References**
* [Use the API Clients API | Account Manager](https://developer.salesforce.com/docs/commerce/account-manager/guide/api-clients.html) – Create and manage API clients.
* [Authorization Scopes Catalog | SCAPI](https://developer.salesforce.com/docs/commerce/commerce-api/guide/auth-z-scope-catalog.html) – OAuth scopes for SCAPI (e.g. `sfcc.products`, `sfcc.products.rw`, `sfcc.catalogs`).
* [Authorization for SCAPI Admin APIs](https://developer.salesforce.com/docs/commerce/commerce-api/guide/authorization-for-admin-apis.html) – Admin API authentication.
* [Cartridges | B2C Commerce](https://developer.salesforce.com/docs/commerce/b2c-commerce/guide/b2c-cartridges.html) – Cartridge overview and structure.
* [Upload and Configure Cartridges (Trailhead)](https://trailhead.salesforce.com/content/learn/modules/b2c-cartridges/b2c-cartridges-upload-configure) – Upload and configure cartridges.
***
## **6. References**
* [Use the API Clients API | Account Manager](https://developer.salesforce.com/docs/commerce/account-manager/guide/api-clients.html) – Create and manage API clients.
* [Authorization Scopes Catalog | SCAPI](https://developer.salesforce.com/docs/commerce/commerce-api/guide/auth-z-scope-catalog.html) – OAuth scopes for SCAPI (e.g. `sfcc.products`, `sfcc.products.rw`, `sfcc.catalogs`).
* [Authorization for SCAPI Admin APIs](https://developer.salesforce.com/docs/commerce/commerce-api/guide/authorization-for-admin-apis.html) – Admin API authentication.
* [Cartridges | B2C Commerce](https://developer.salesforce.com/docs/commerce/b2c-commerce/guide/b2c-cartridges.html) – Cartridge overview and structure.
* [Upload and Configure Cartridges (Trailhead)](https://trailhead.salesforce.com/content/learn/modules/b2c-cartridges/b2c-cartridges-upload-configure) – Upload and configure cartridges.