> ## Documentation Index
> Fetch the complete documentation index at: https://support.lilt.com/llms.txt
> Use this file to discover all available pages before exploring further.
# SRX Upload Documentation
Here are the steps to set SRX files:
**Required Step!** Make sure that `EnableSubfiltersSegmentation` is enabled on your instance prior to uploading SRX. To learn more on how to enable it, follow to [Enable/Disable Features](/kb/enable-features)
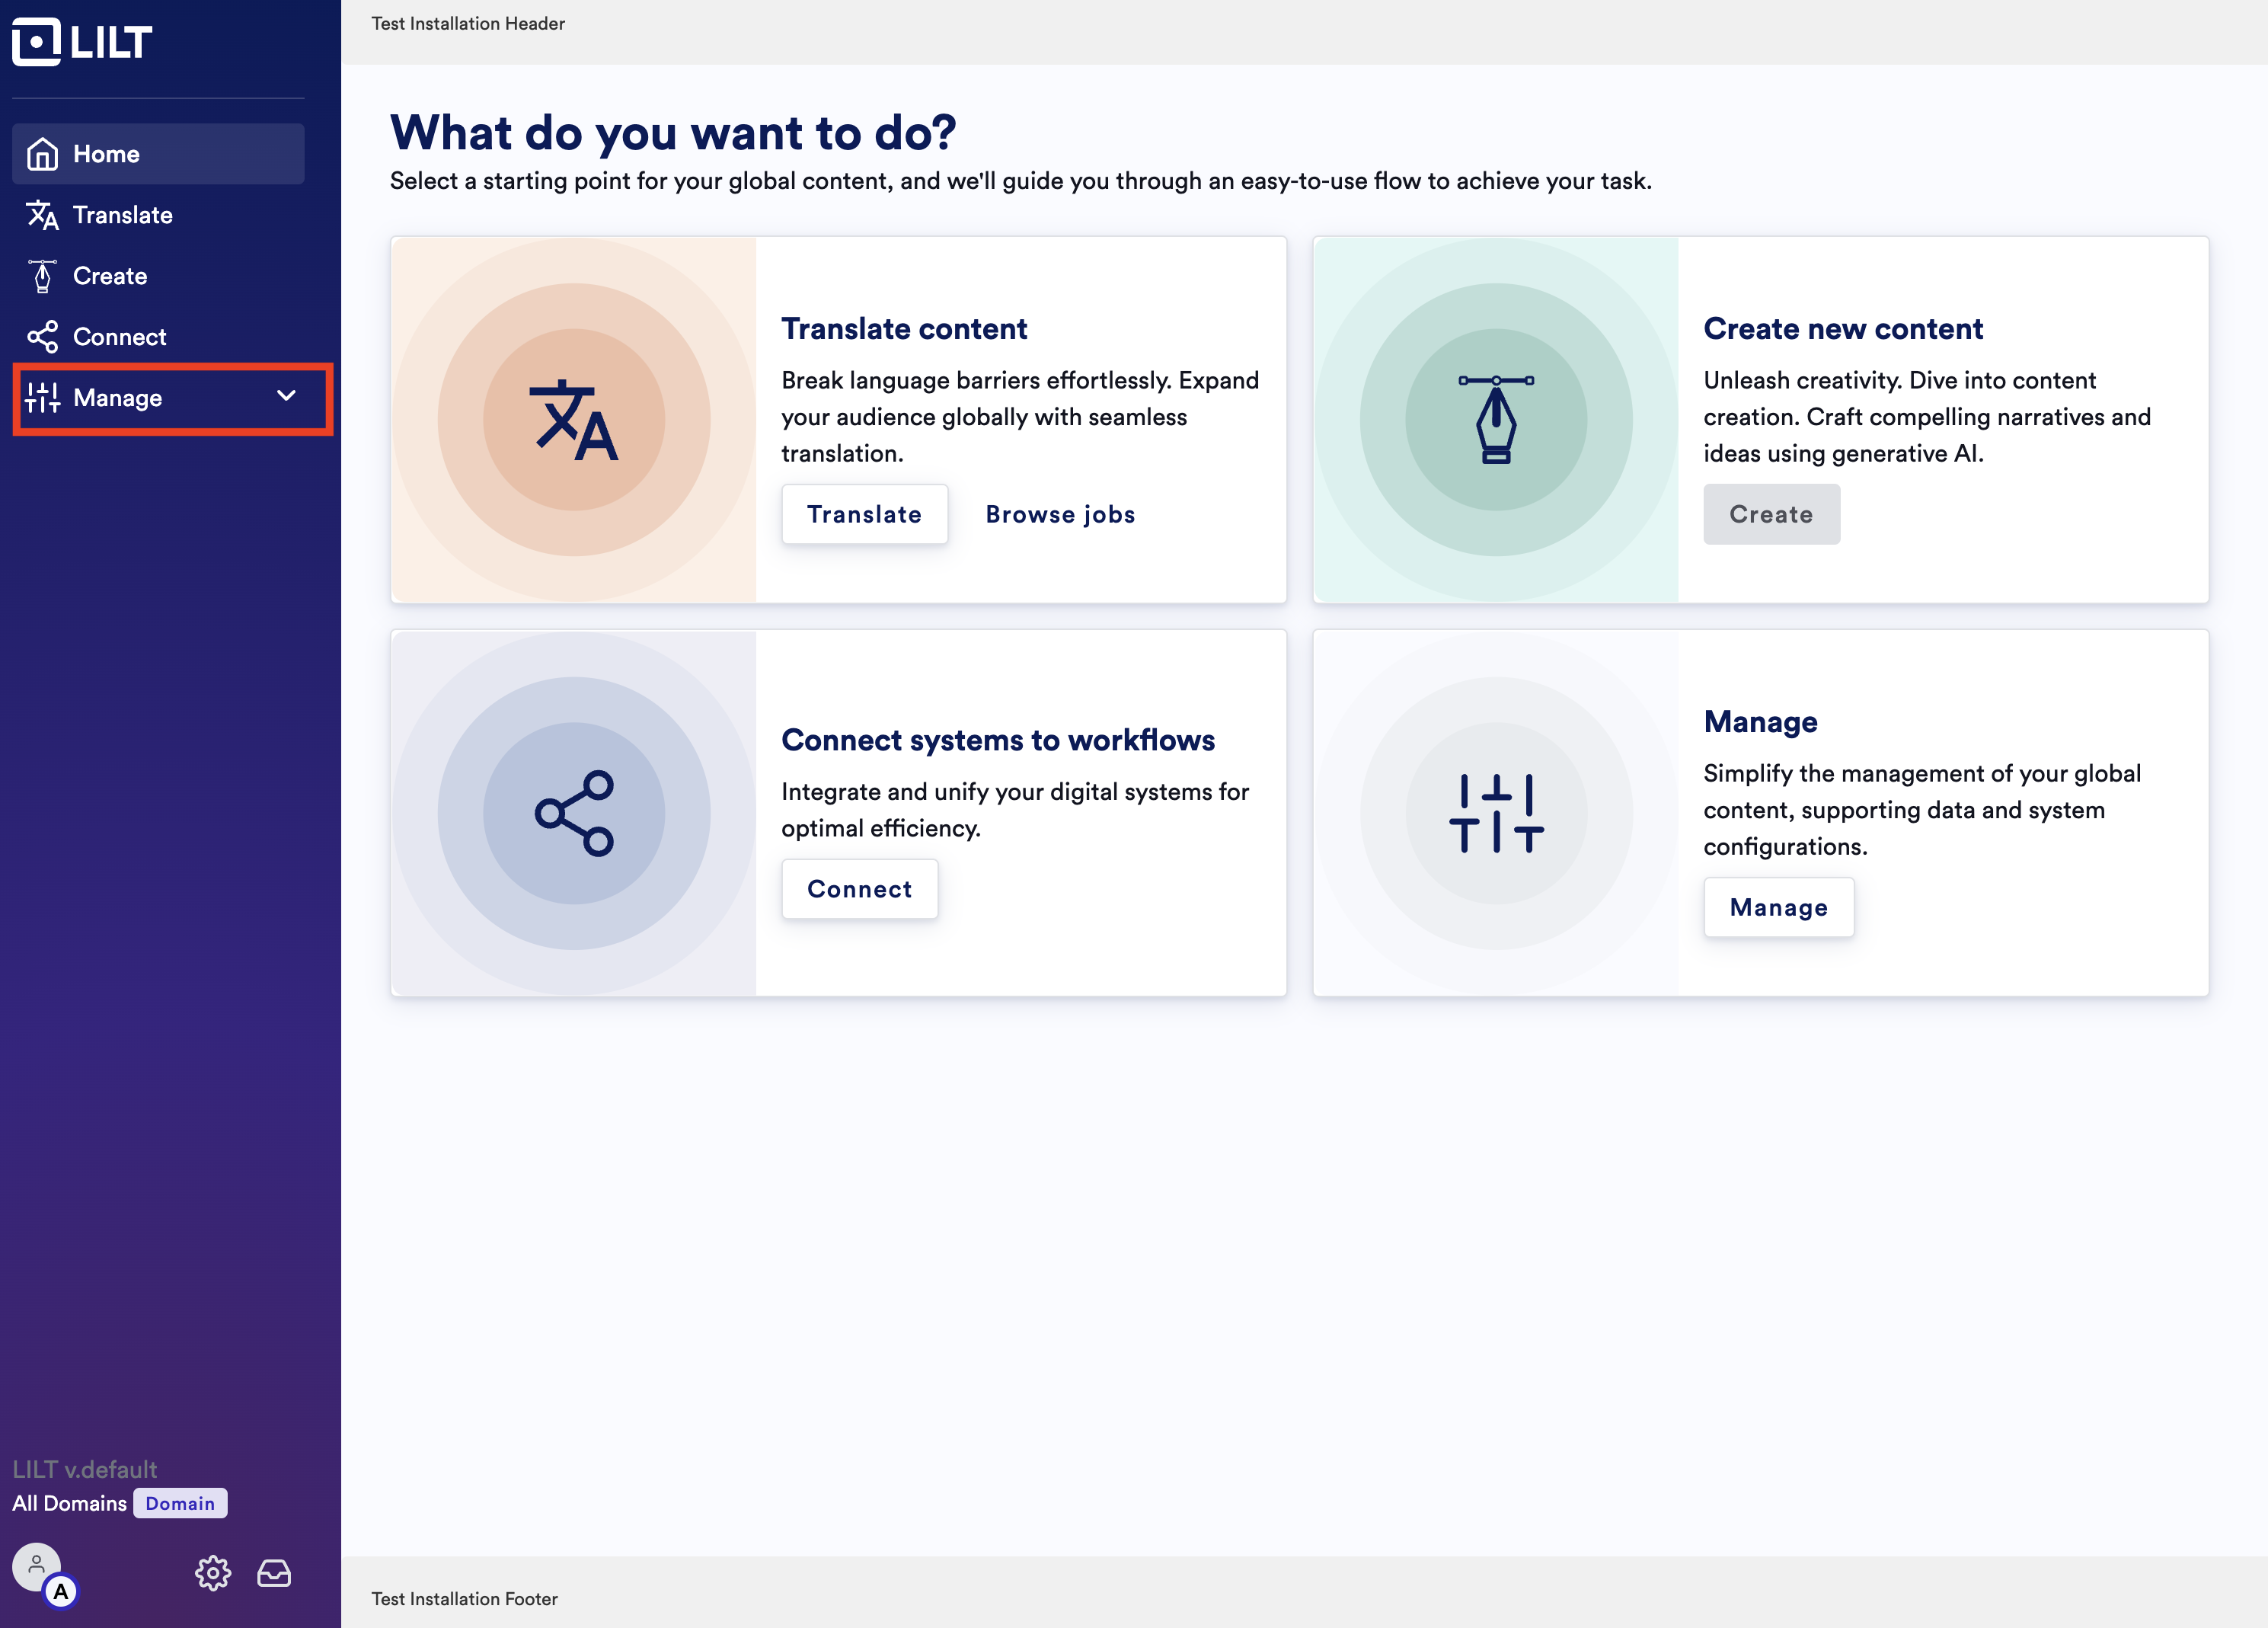
## Step 1: Click “Manage” on the left rail
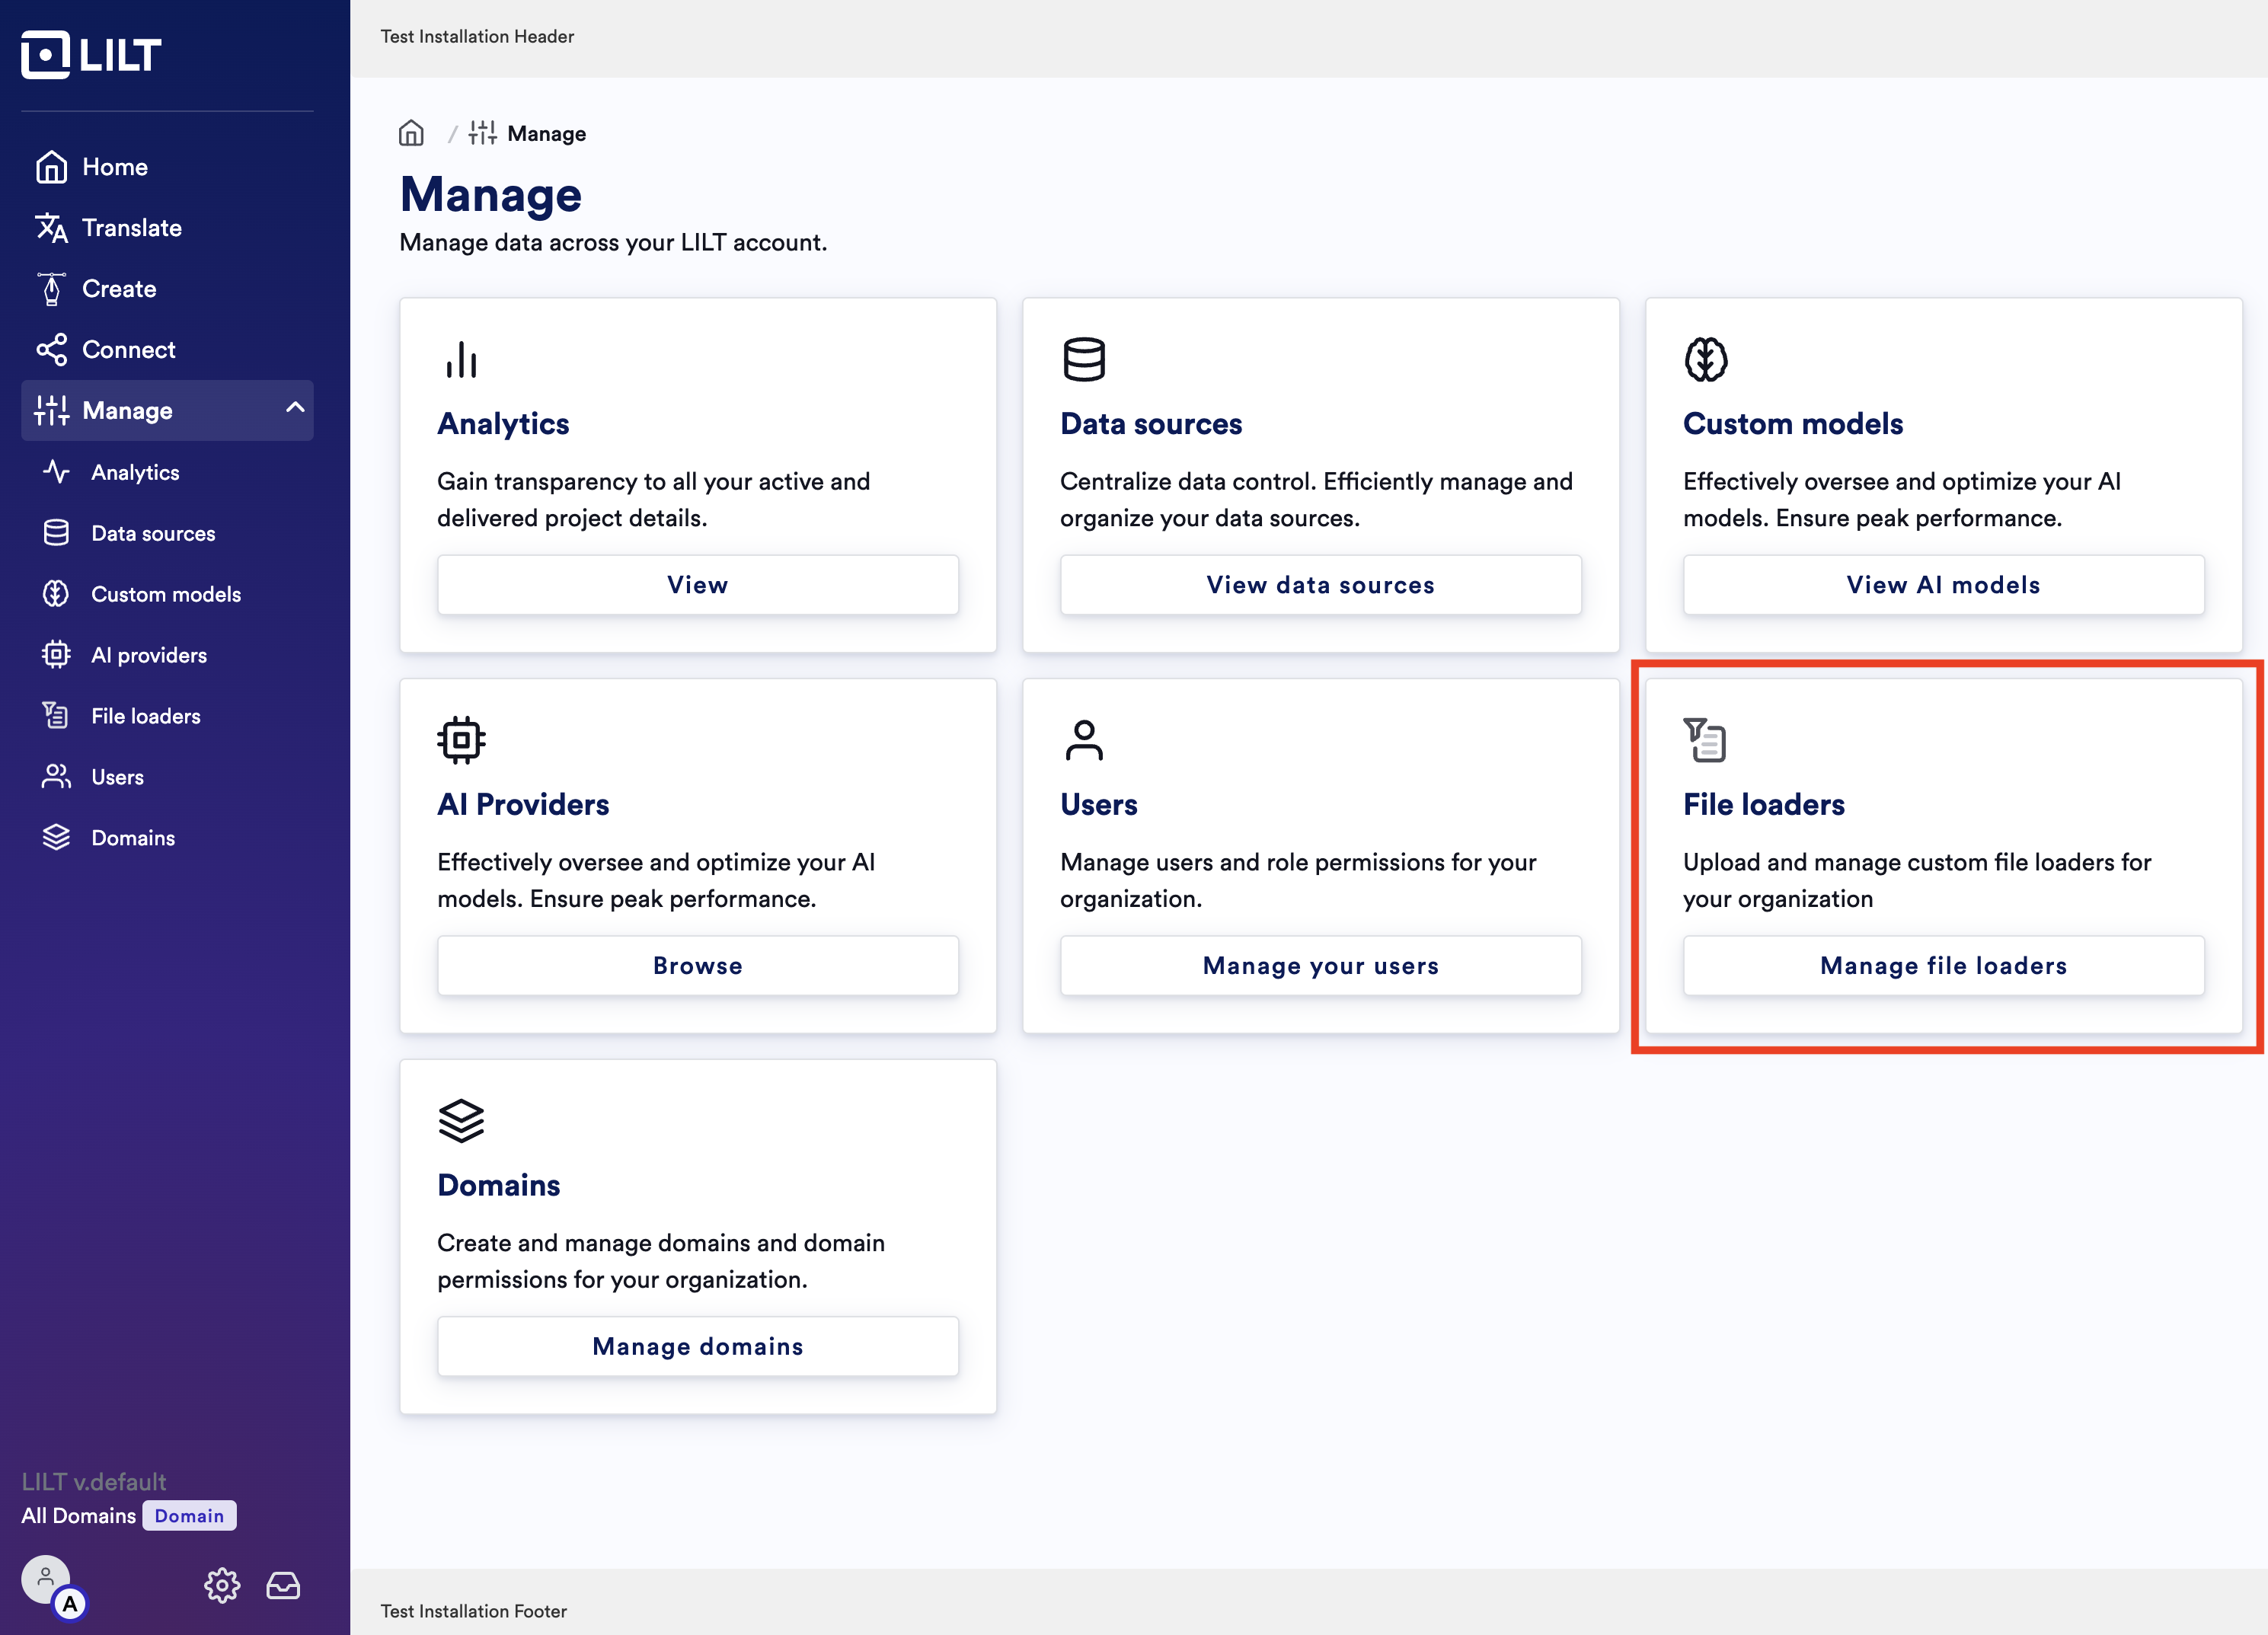
 ## Step 2: Click on “File Loaders”
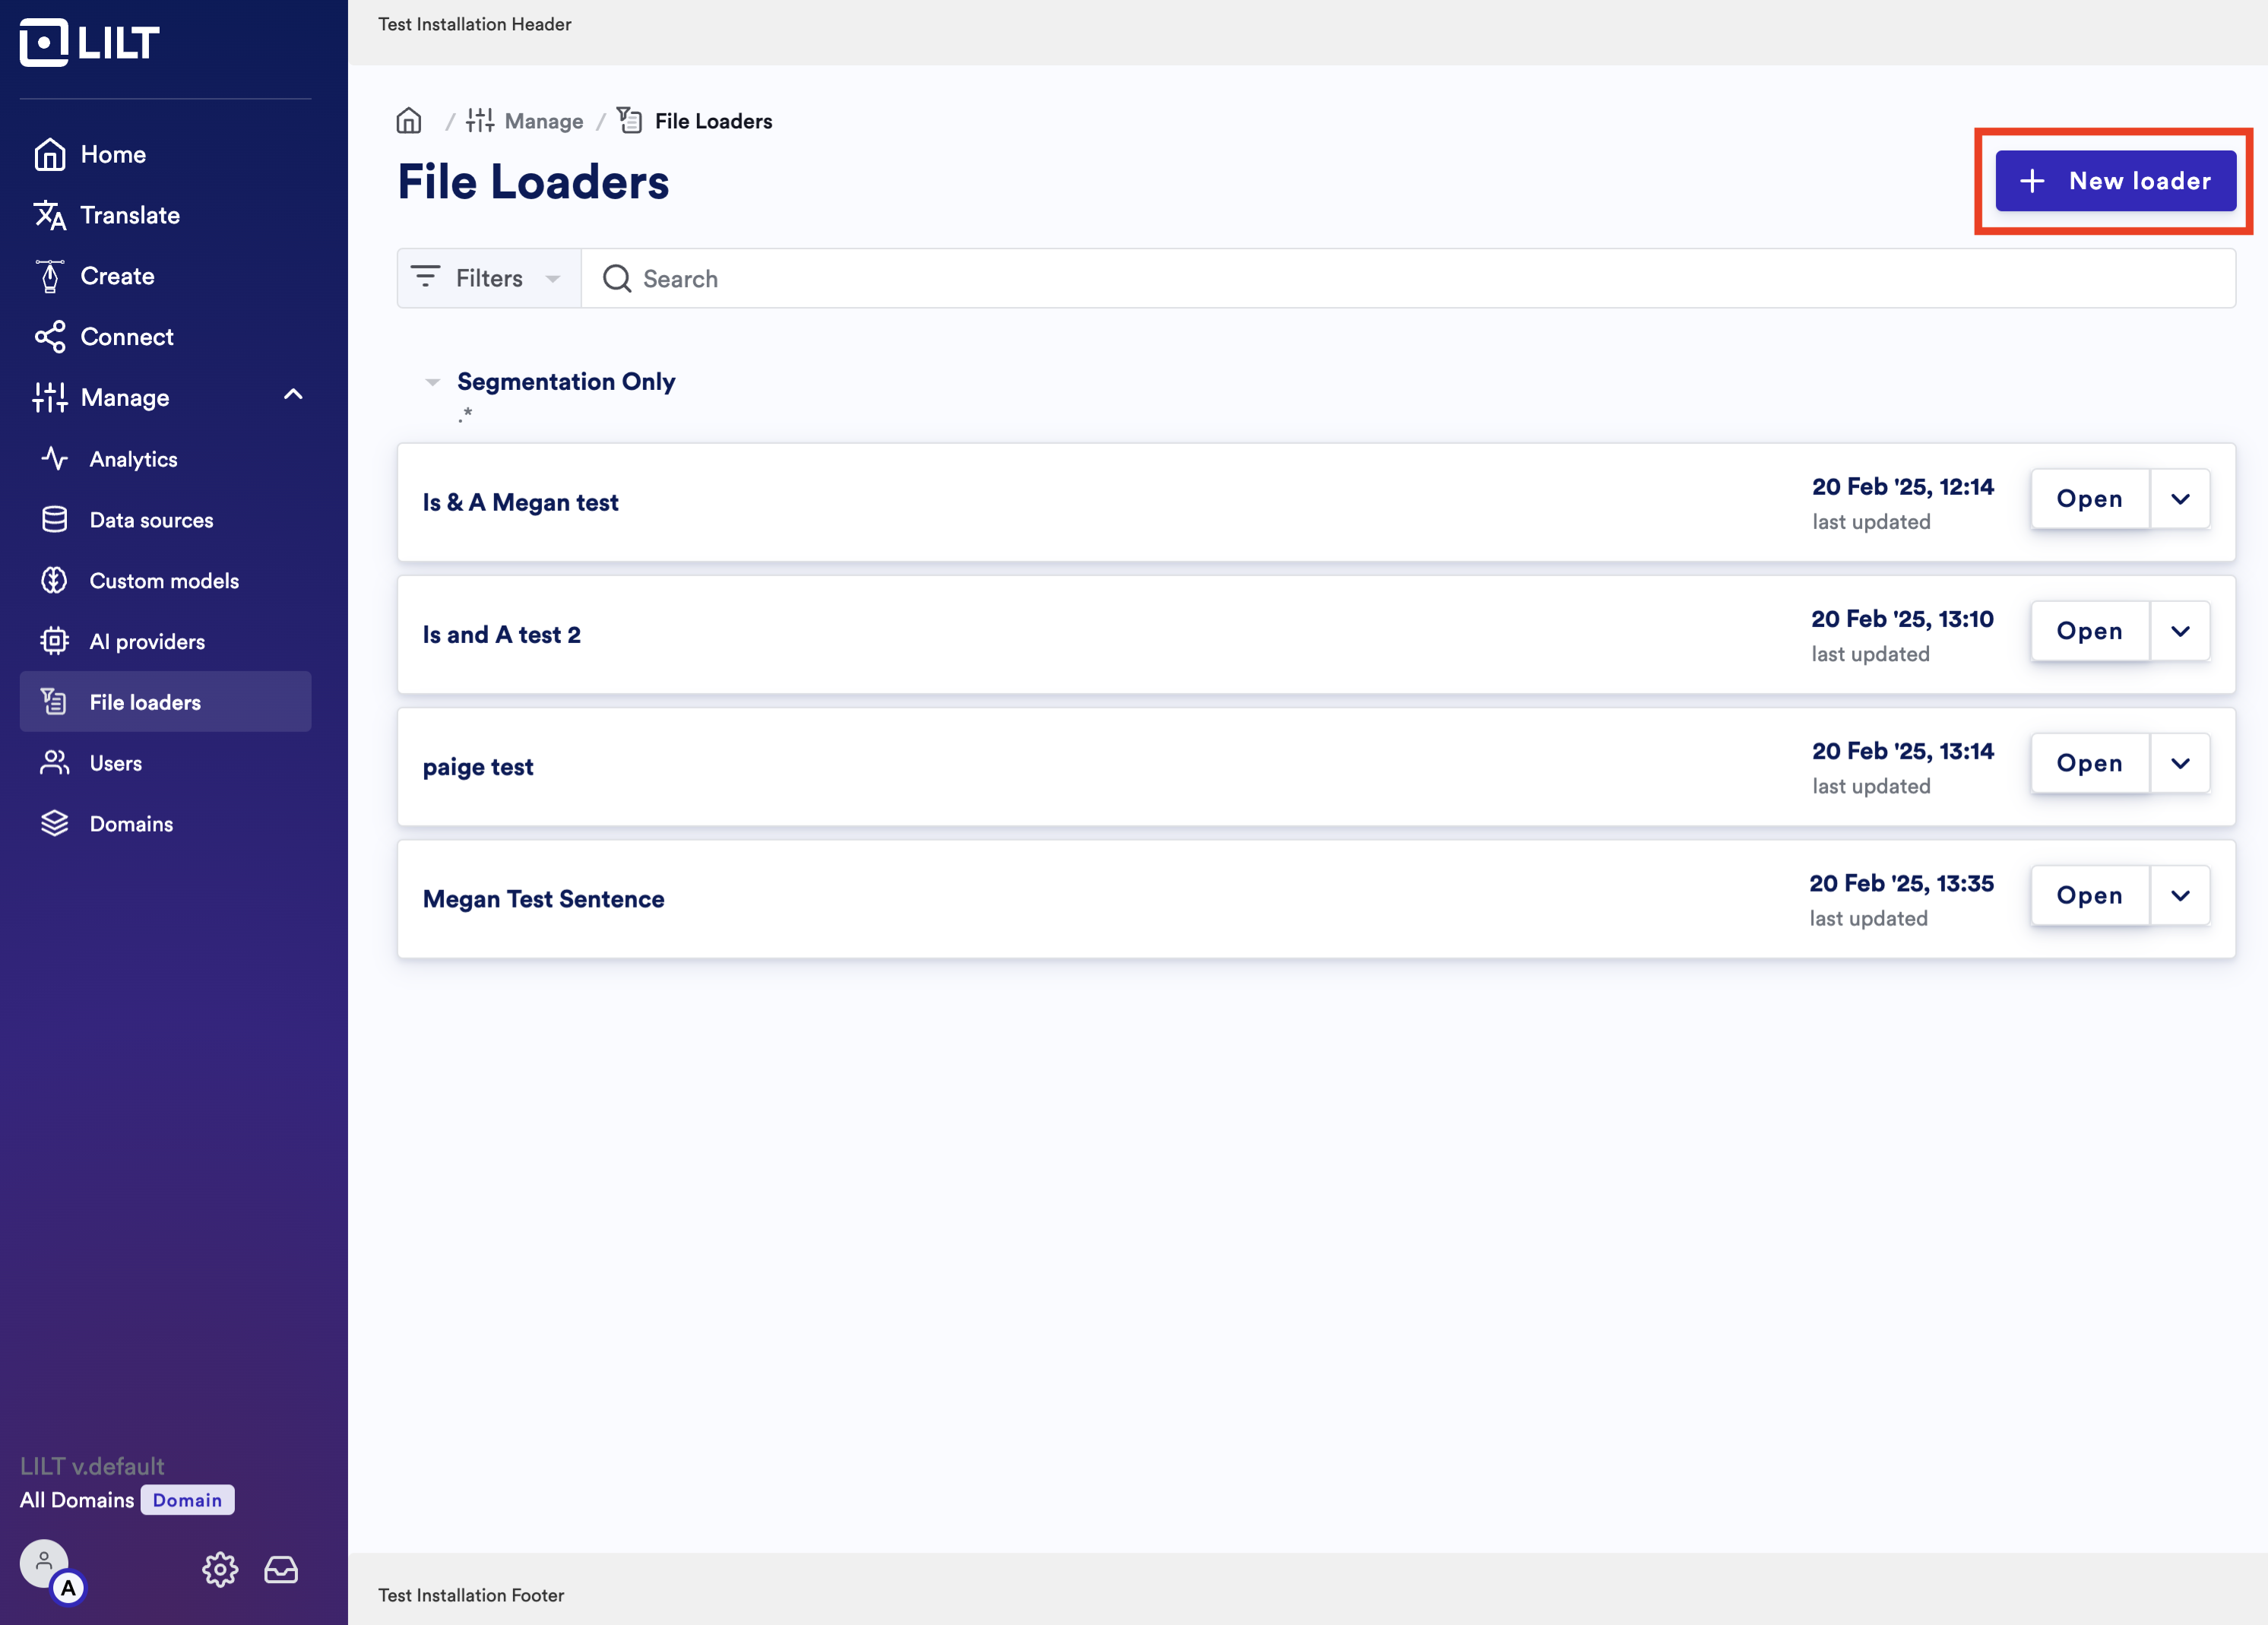
 ## Step 3: Click on “+ New Loader” in the top right corner
 ## Step 4: Select “Segmentation Only”
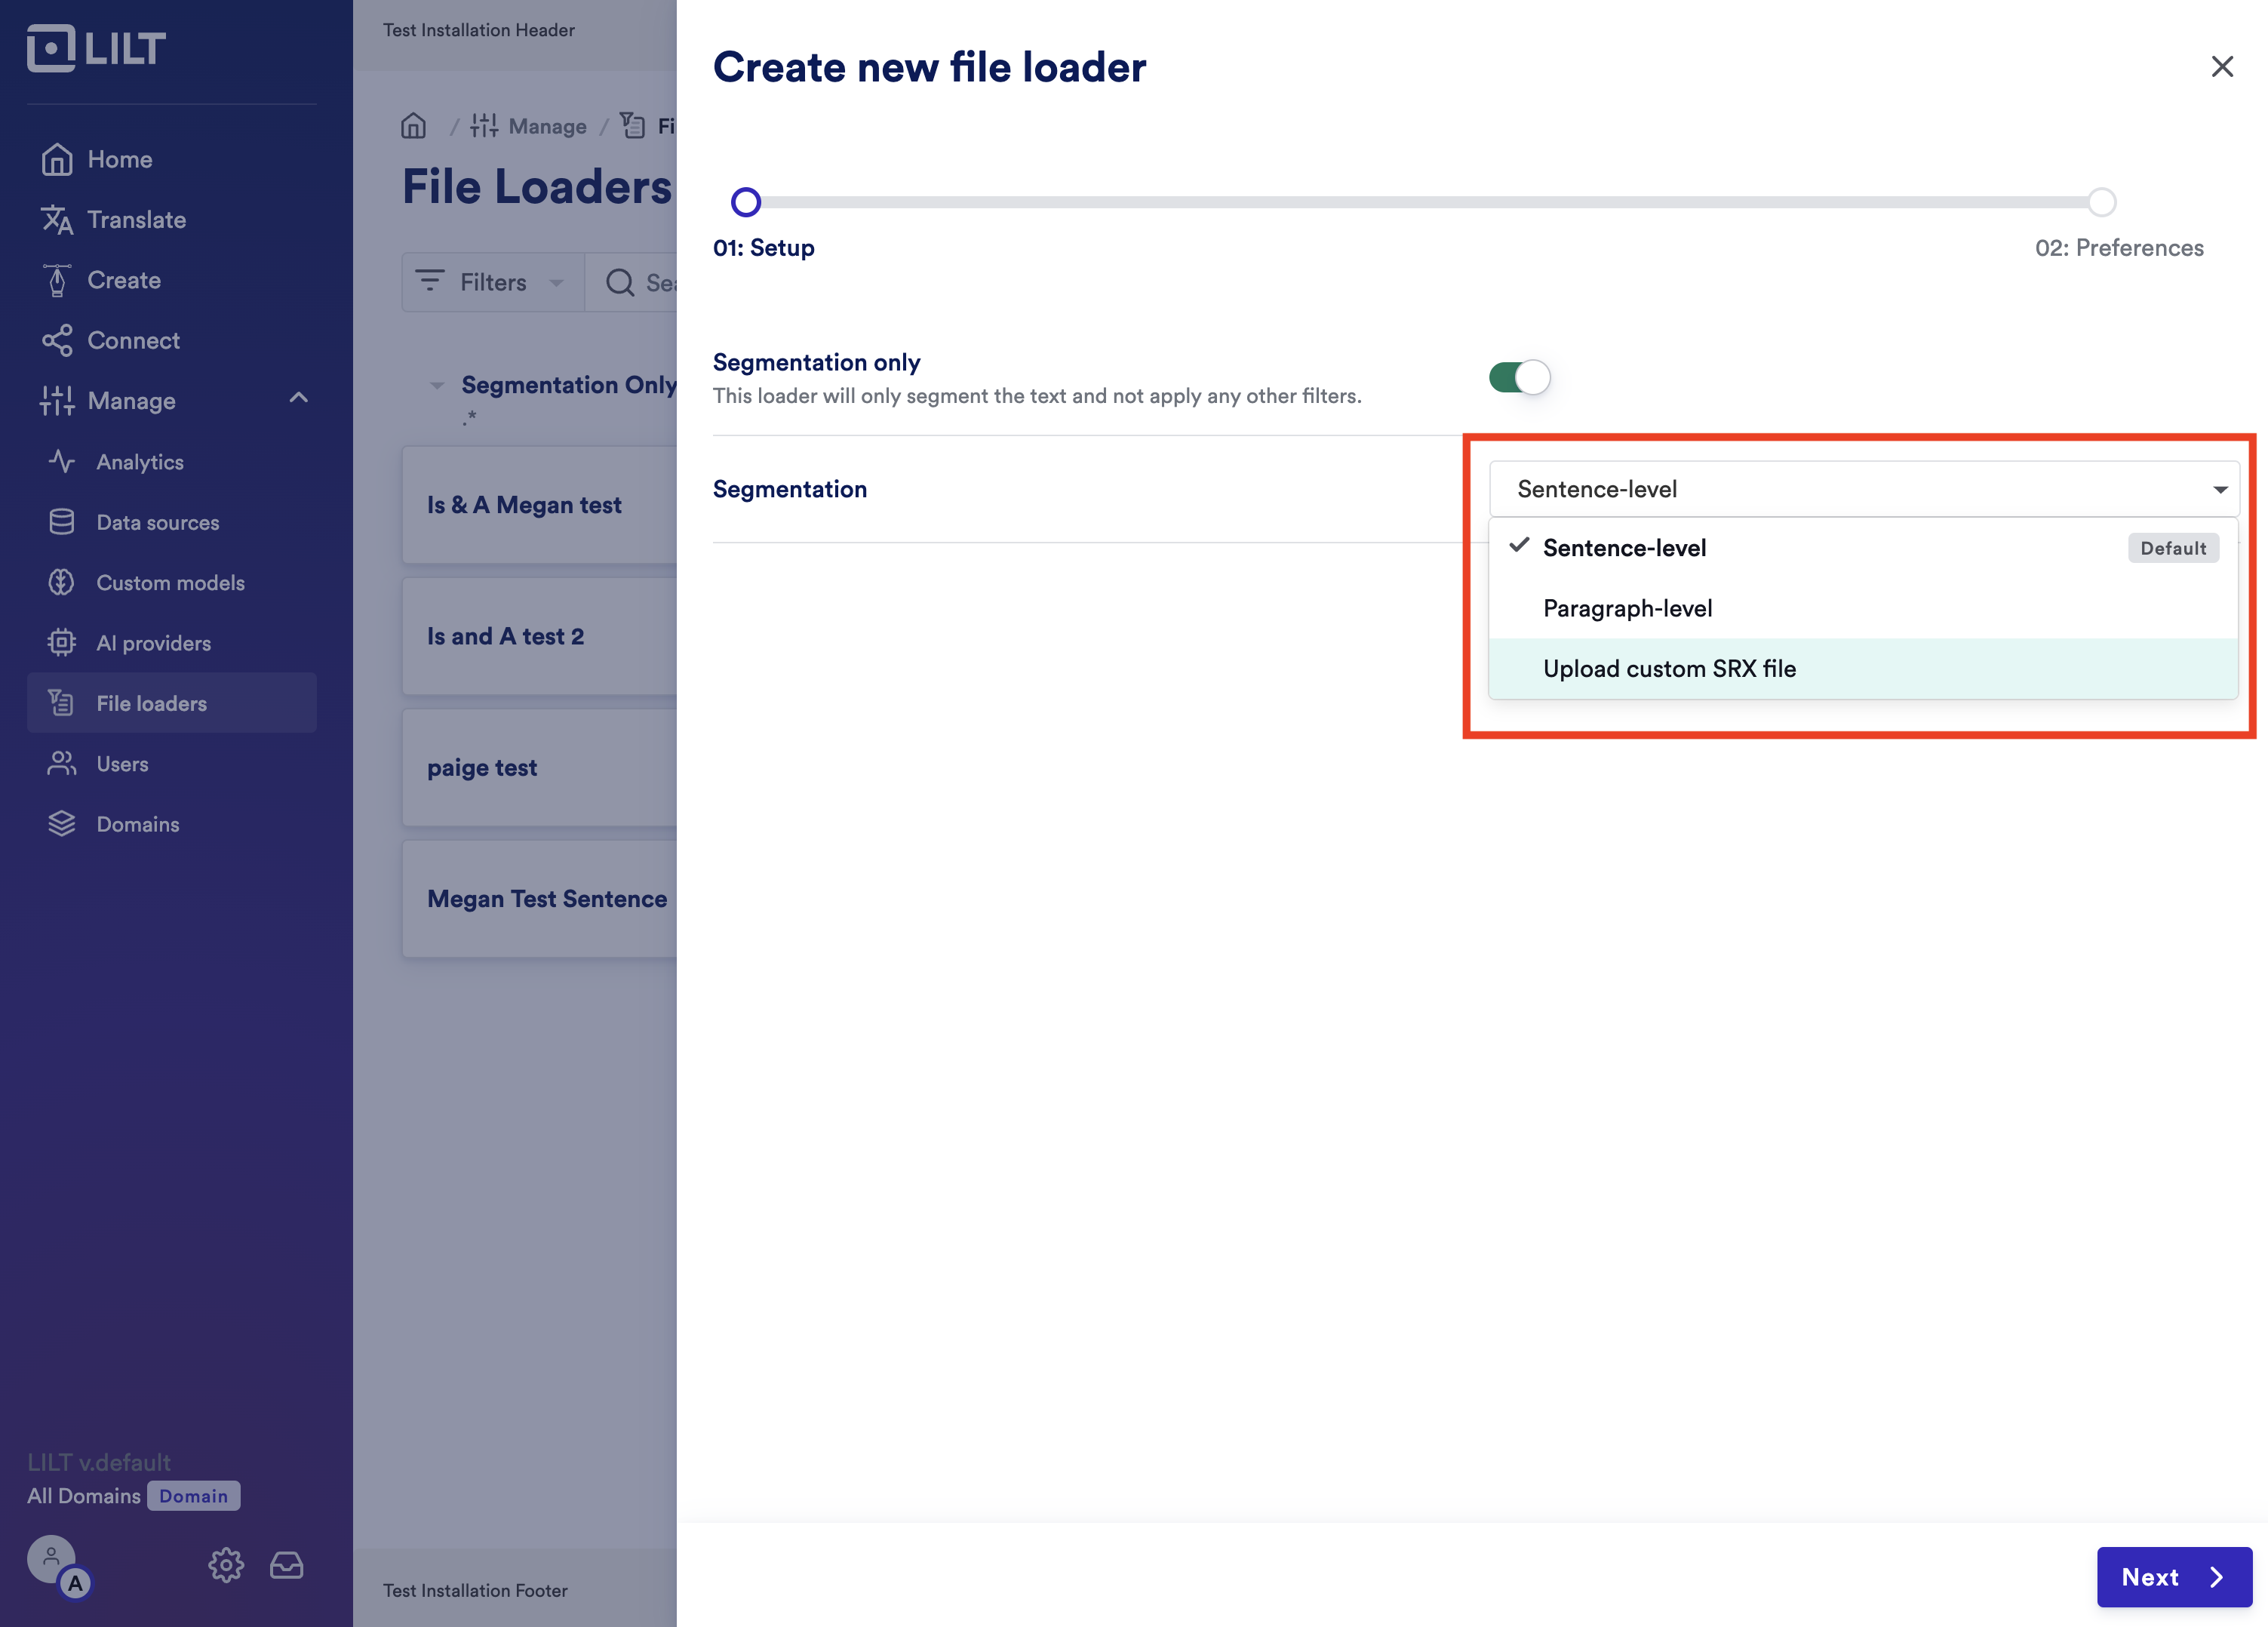
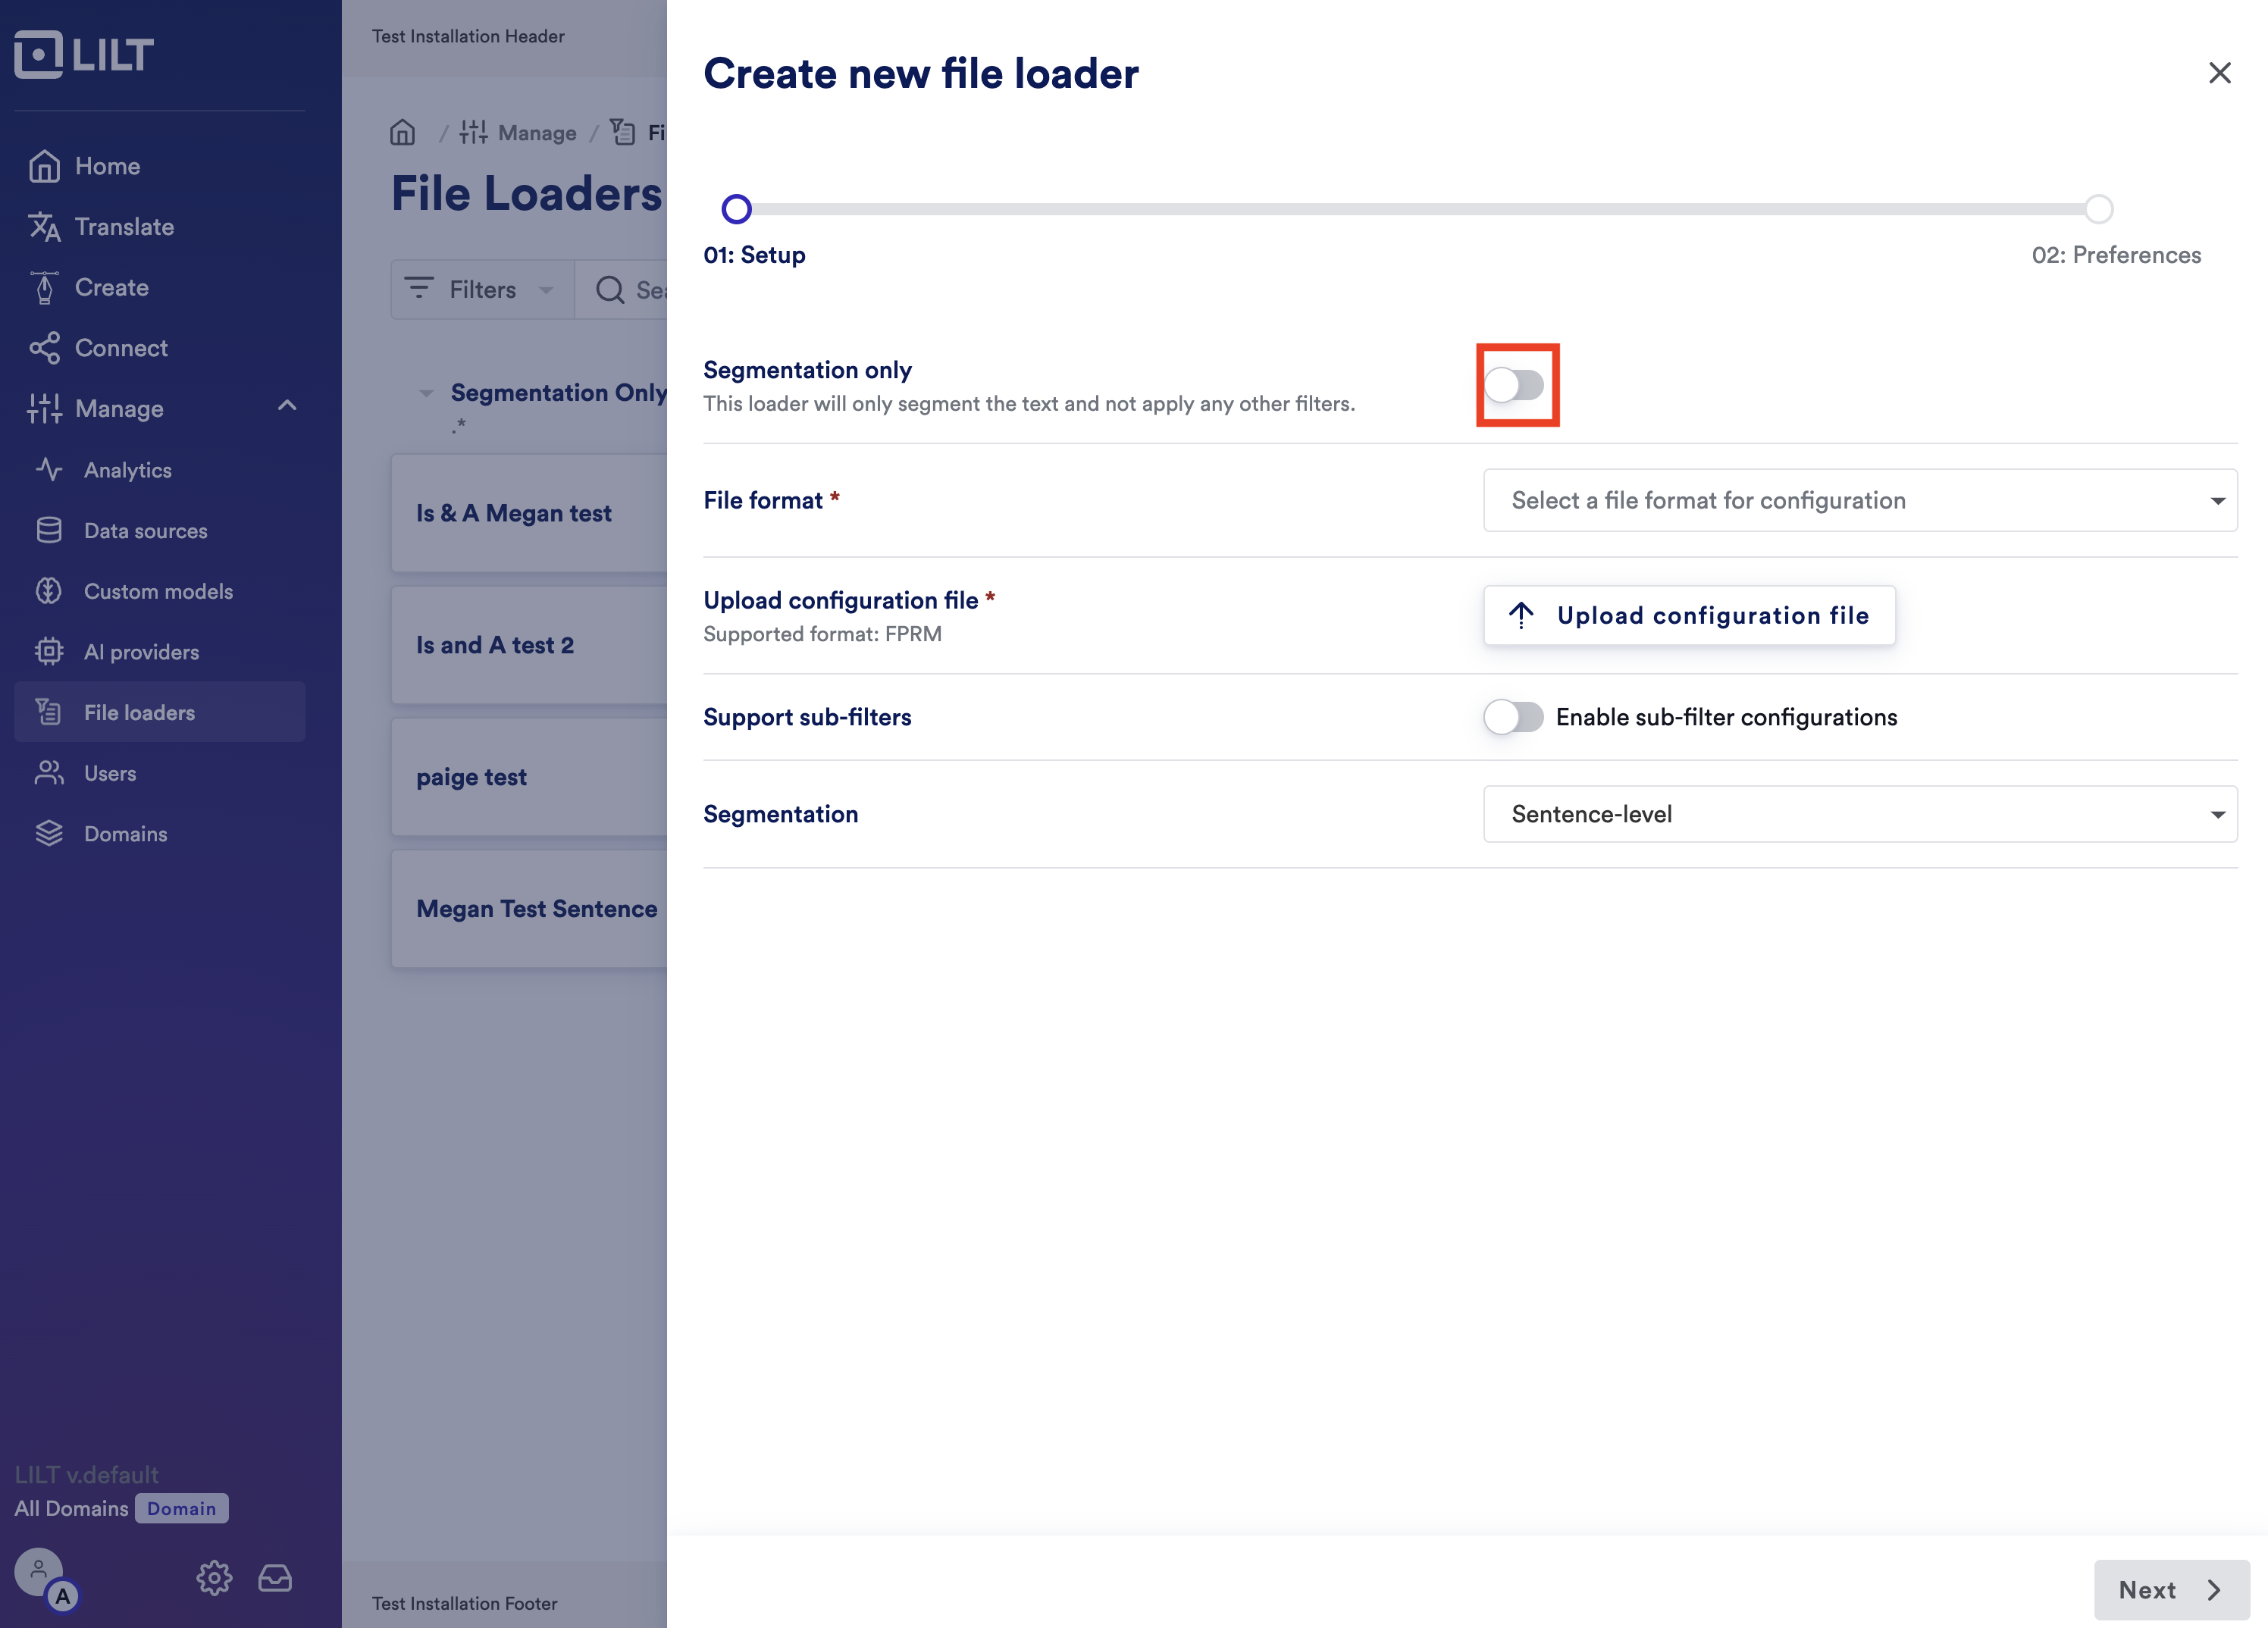 ## Step 5: In the Segmentation dropdown on the right section select “Upload Custom SRX File”
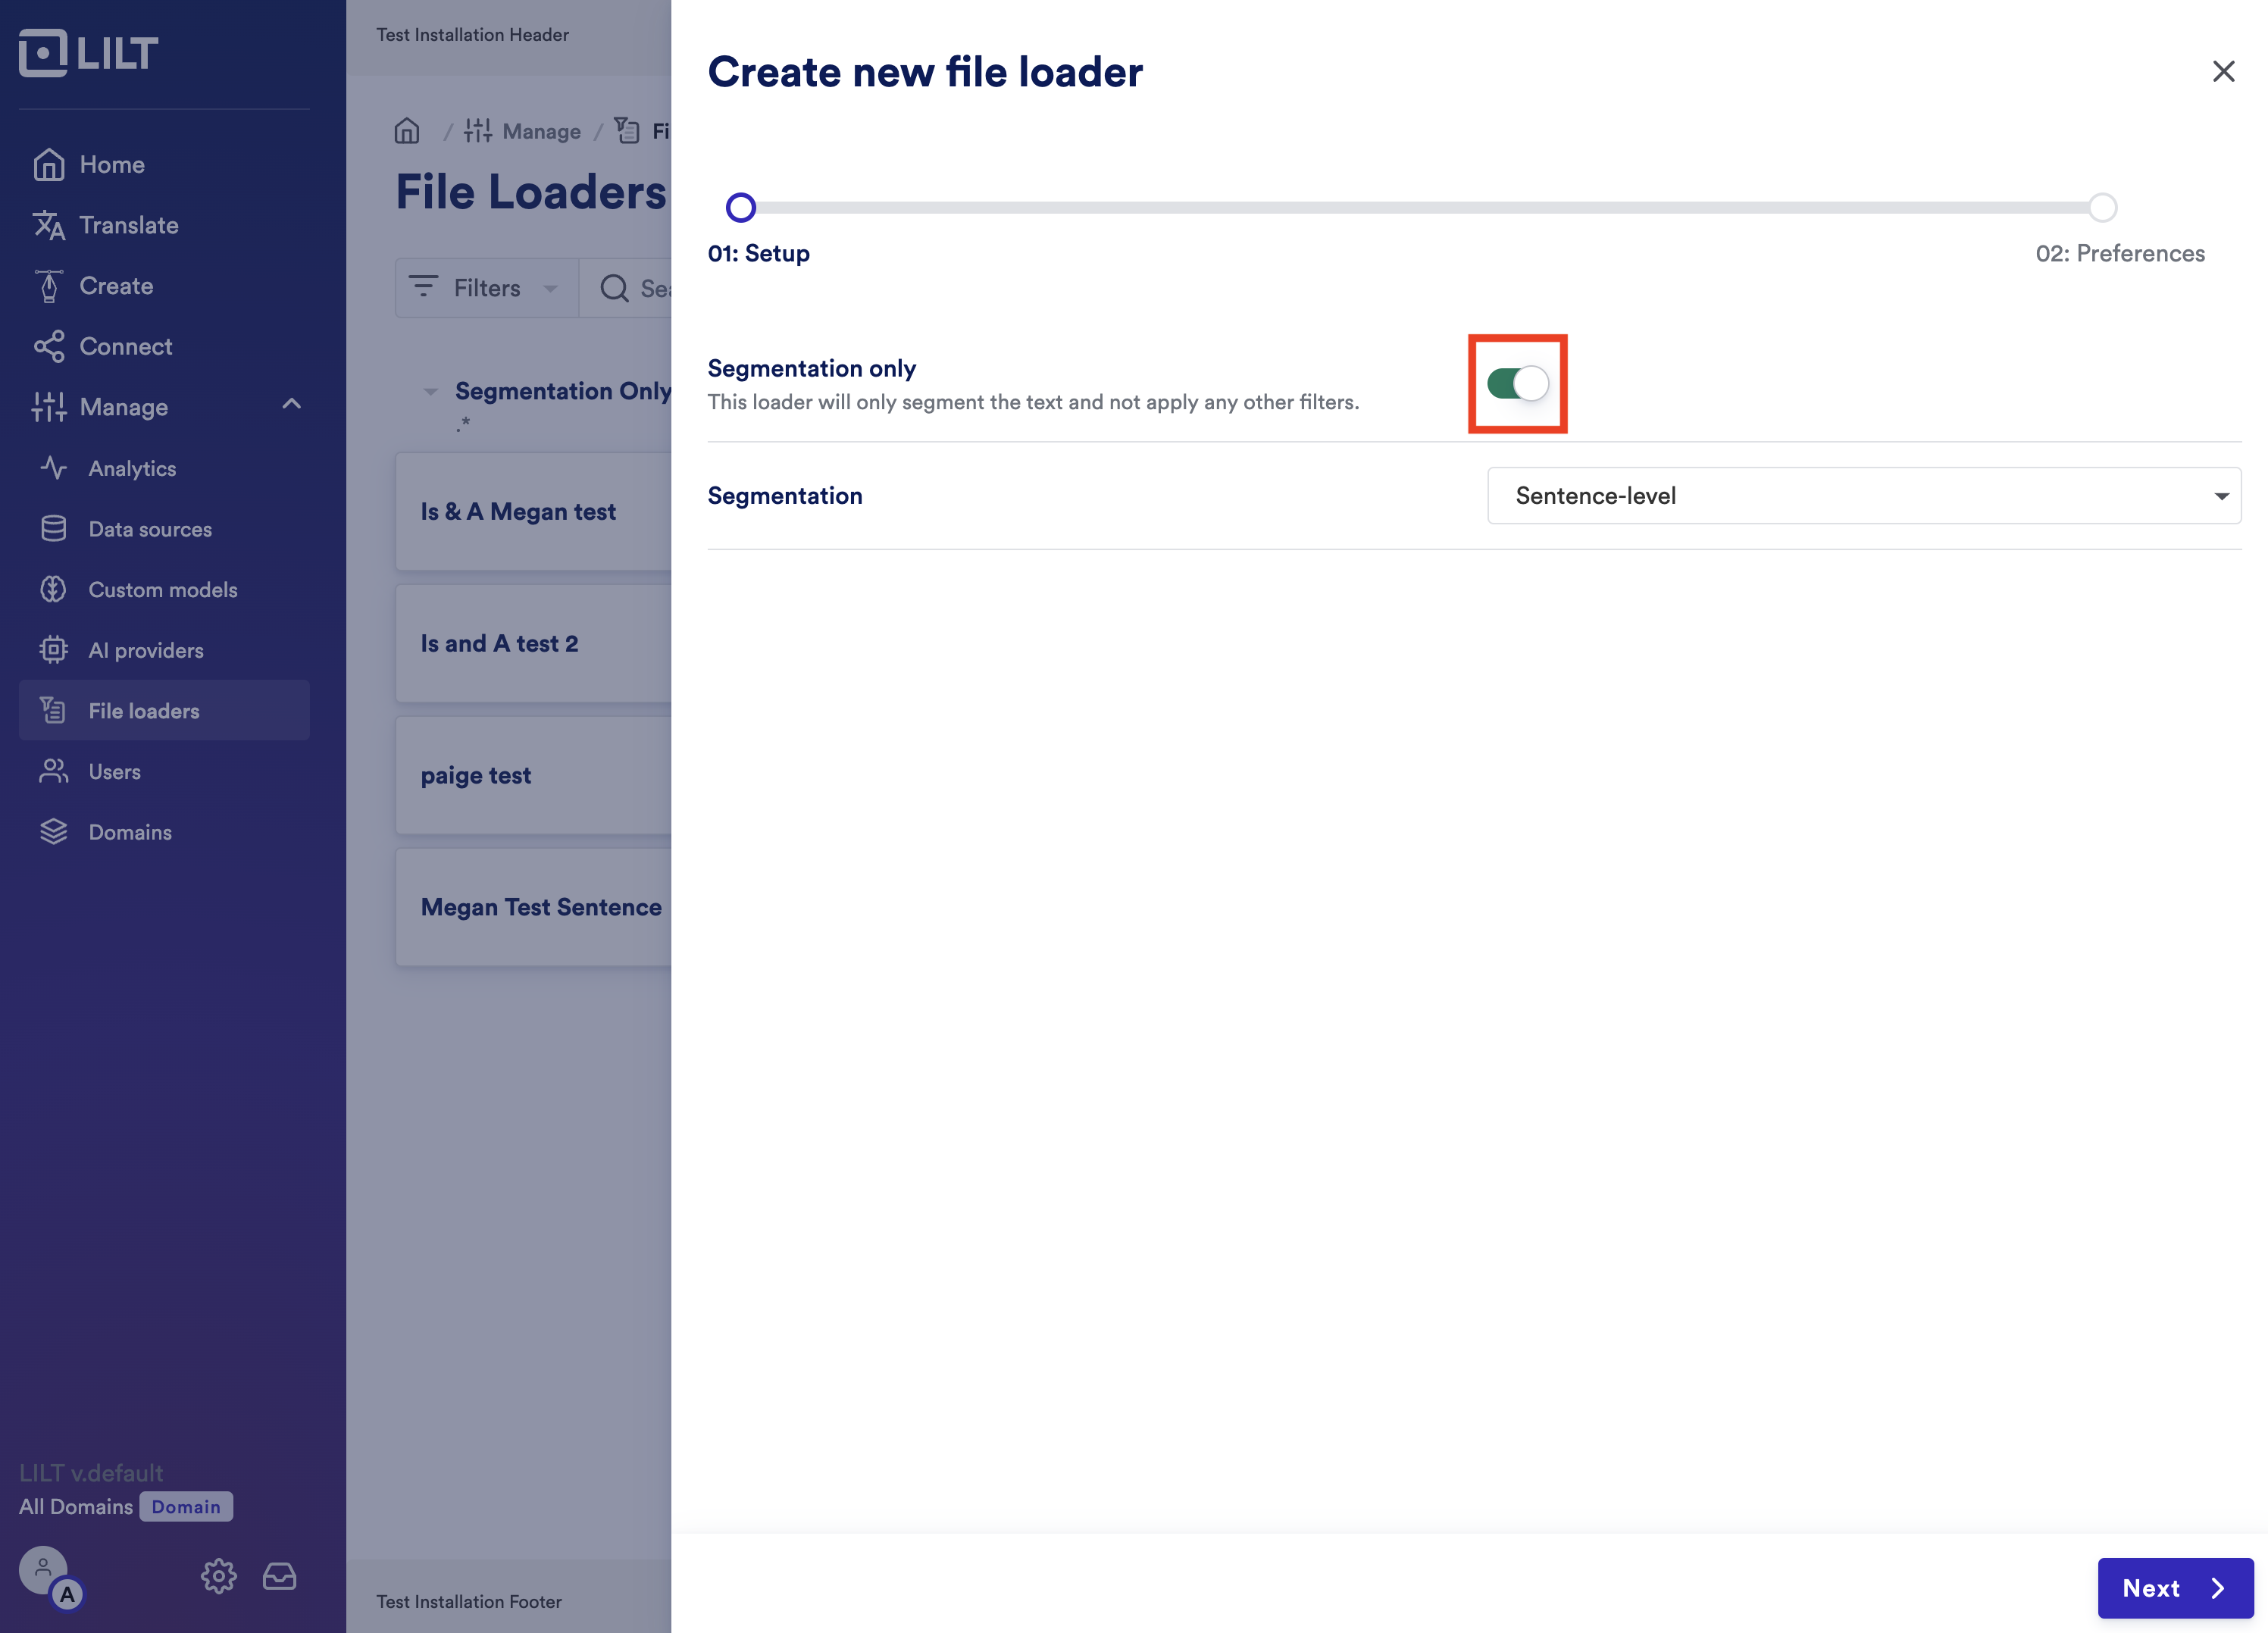 ## Step 6: Click on “Upload custom SRX File” - click on that and in the new selection window - pick out the SRX file that you want to upload
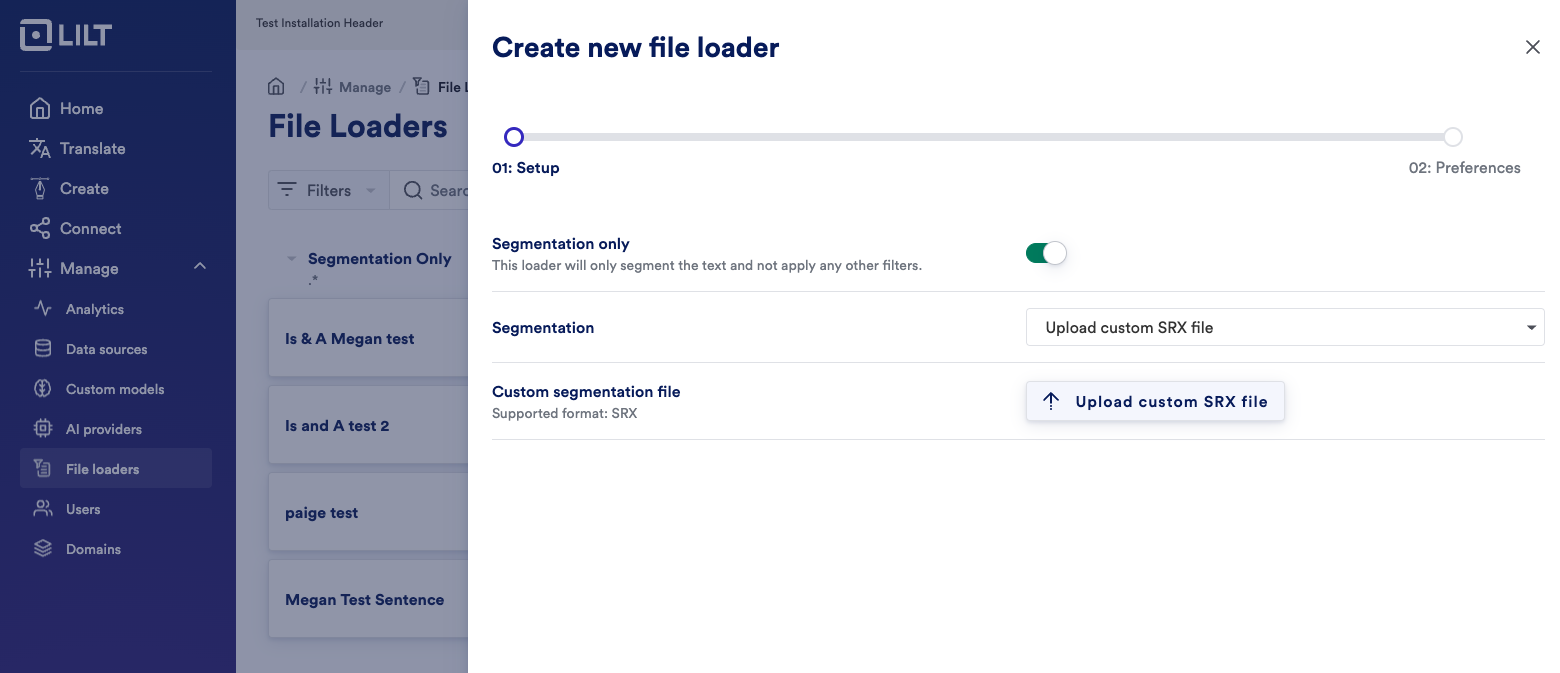 ## Step 7: After uploading the file, click Next in the bottom right corner
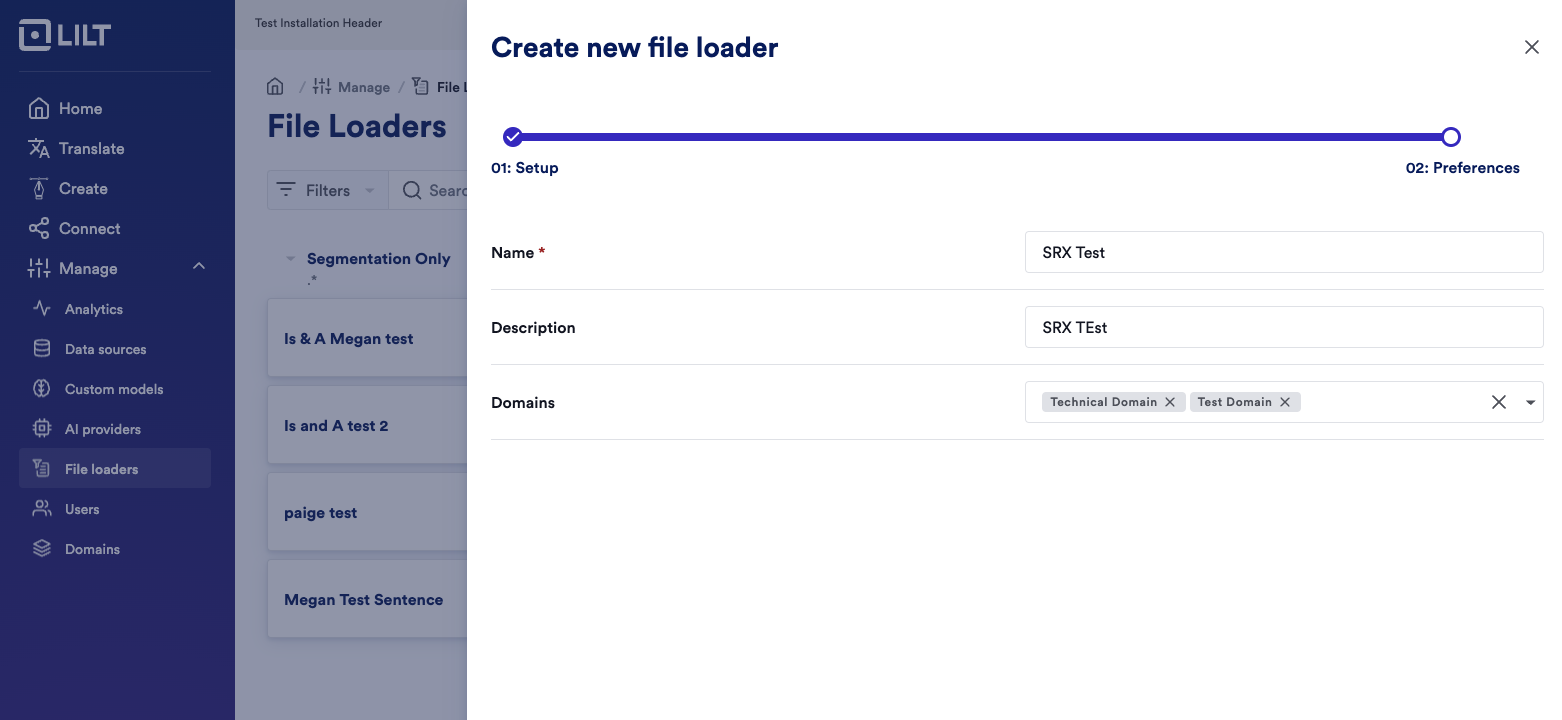
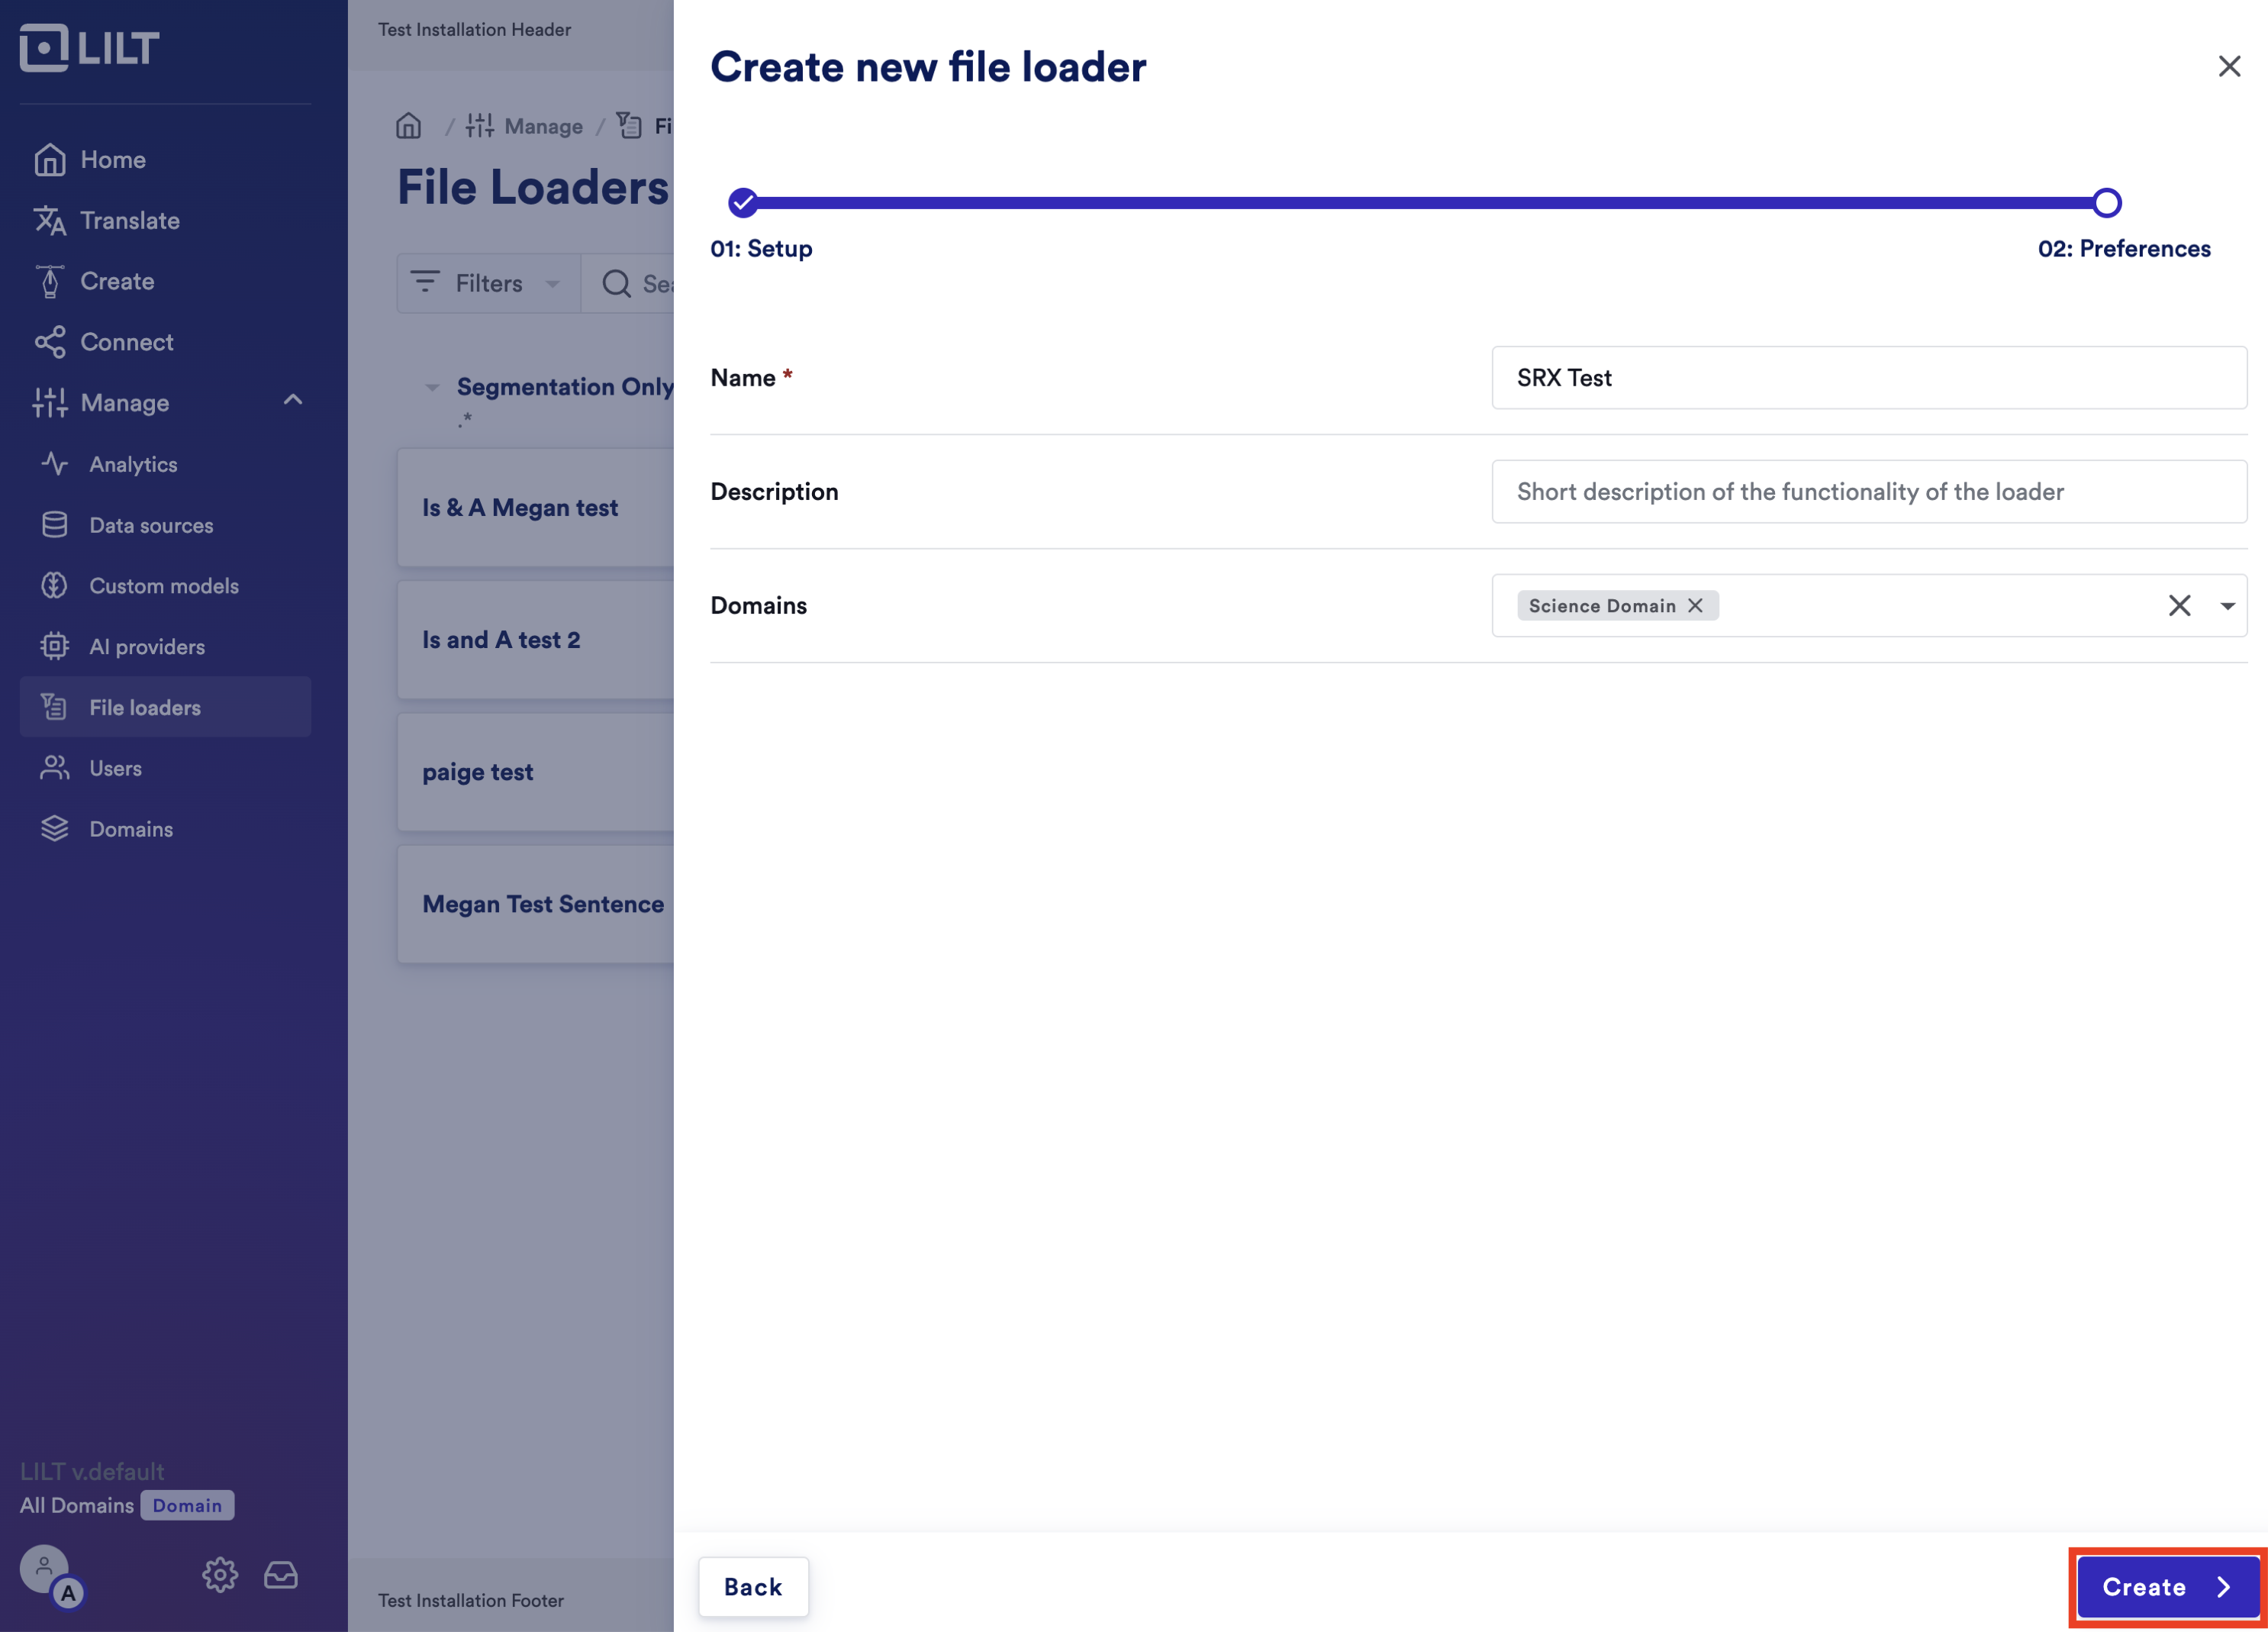 ## Step 8: Name the loader
#### OPTIONAL STEPS
1. Add a short description of the loader
2. Add it to any domains that you want to apply this loader to. If you select specific domains, then the SRX file will only apply to those. Otherwise it will apply to all users of the organisation
## Step 8: Name the loader
#### OPTIONAL STEPS
1. Add a short description of the loader
2. Add it to any domains that you want to apply this loader to. If you select specific domains, then the SRX file will only apply to those. Otherwise it will apply to all users of the organisation
 ## Step 9: Click “Create” at the bottom of the screen and you SRX file loader should be ready.