> ## Documentation Index
> Fetch the complete documentation index at: https://support.lilt.com/llms.txt
> Use this file to discover all available pages before exploring further.
# User Domains Documentation
## Background
#### **What Are Domains?**
* A LILT Domain defines a working group within your LILT organization. Each Domain specifies the translation environment available to the domain members.
#### **Benefits of Domains**
* Simplified User Experience: Users in a Domain can access only the language data and models selected and the translation jobs created within that Domain.
* Enhanced Administrative Control: Administrators easily configure Domains to assign users, and choose the language models, file loaders, and translation preferences.
* Improved Data Privacy and Security: Domains can be configured to restrict access to sensitive data and maintain confidentiality between teams.
#### Considerations
* When setting up Domains, consider grouping users by departments, projects, or language needs.
* Clearly communicate Domain changes to your team to ensure a smooth transition.
## Steps to create a user Domain
1. **Required Step!** Make sure that `enableDomains` is enabled on your instance prior to uploading SRX. To learn more on how to enable it, follow to [Enable/Disable Features](/kb/enable-features)
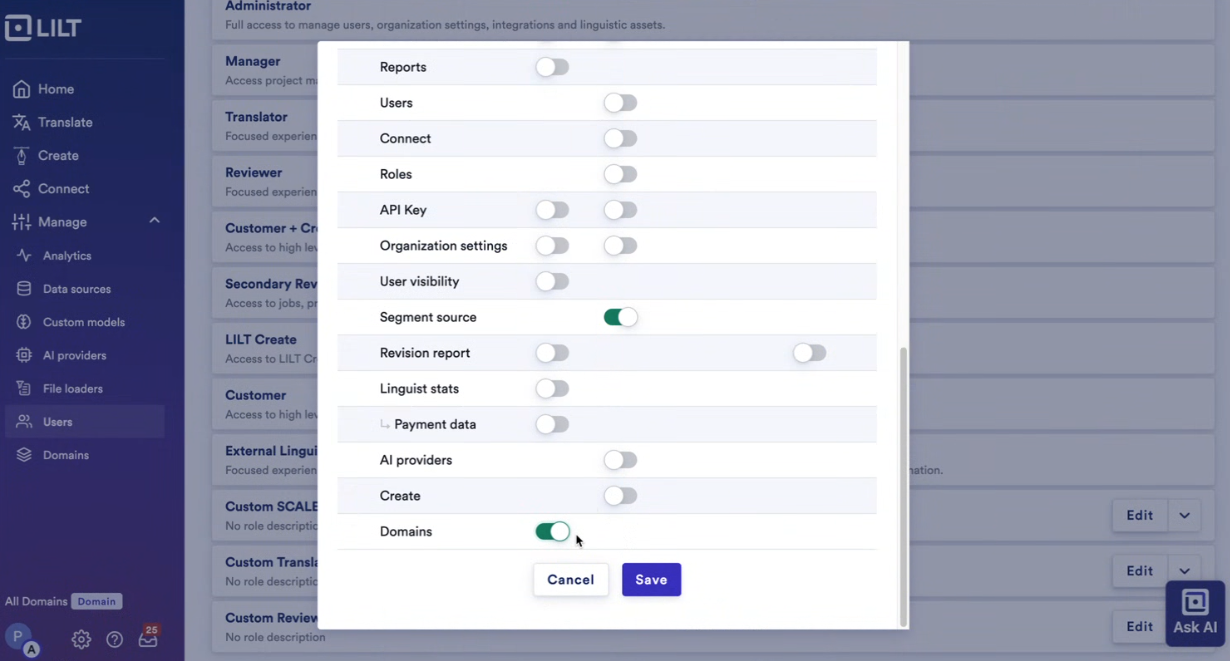
2. Admins must enable Domains under a given user role in User Management
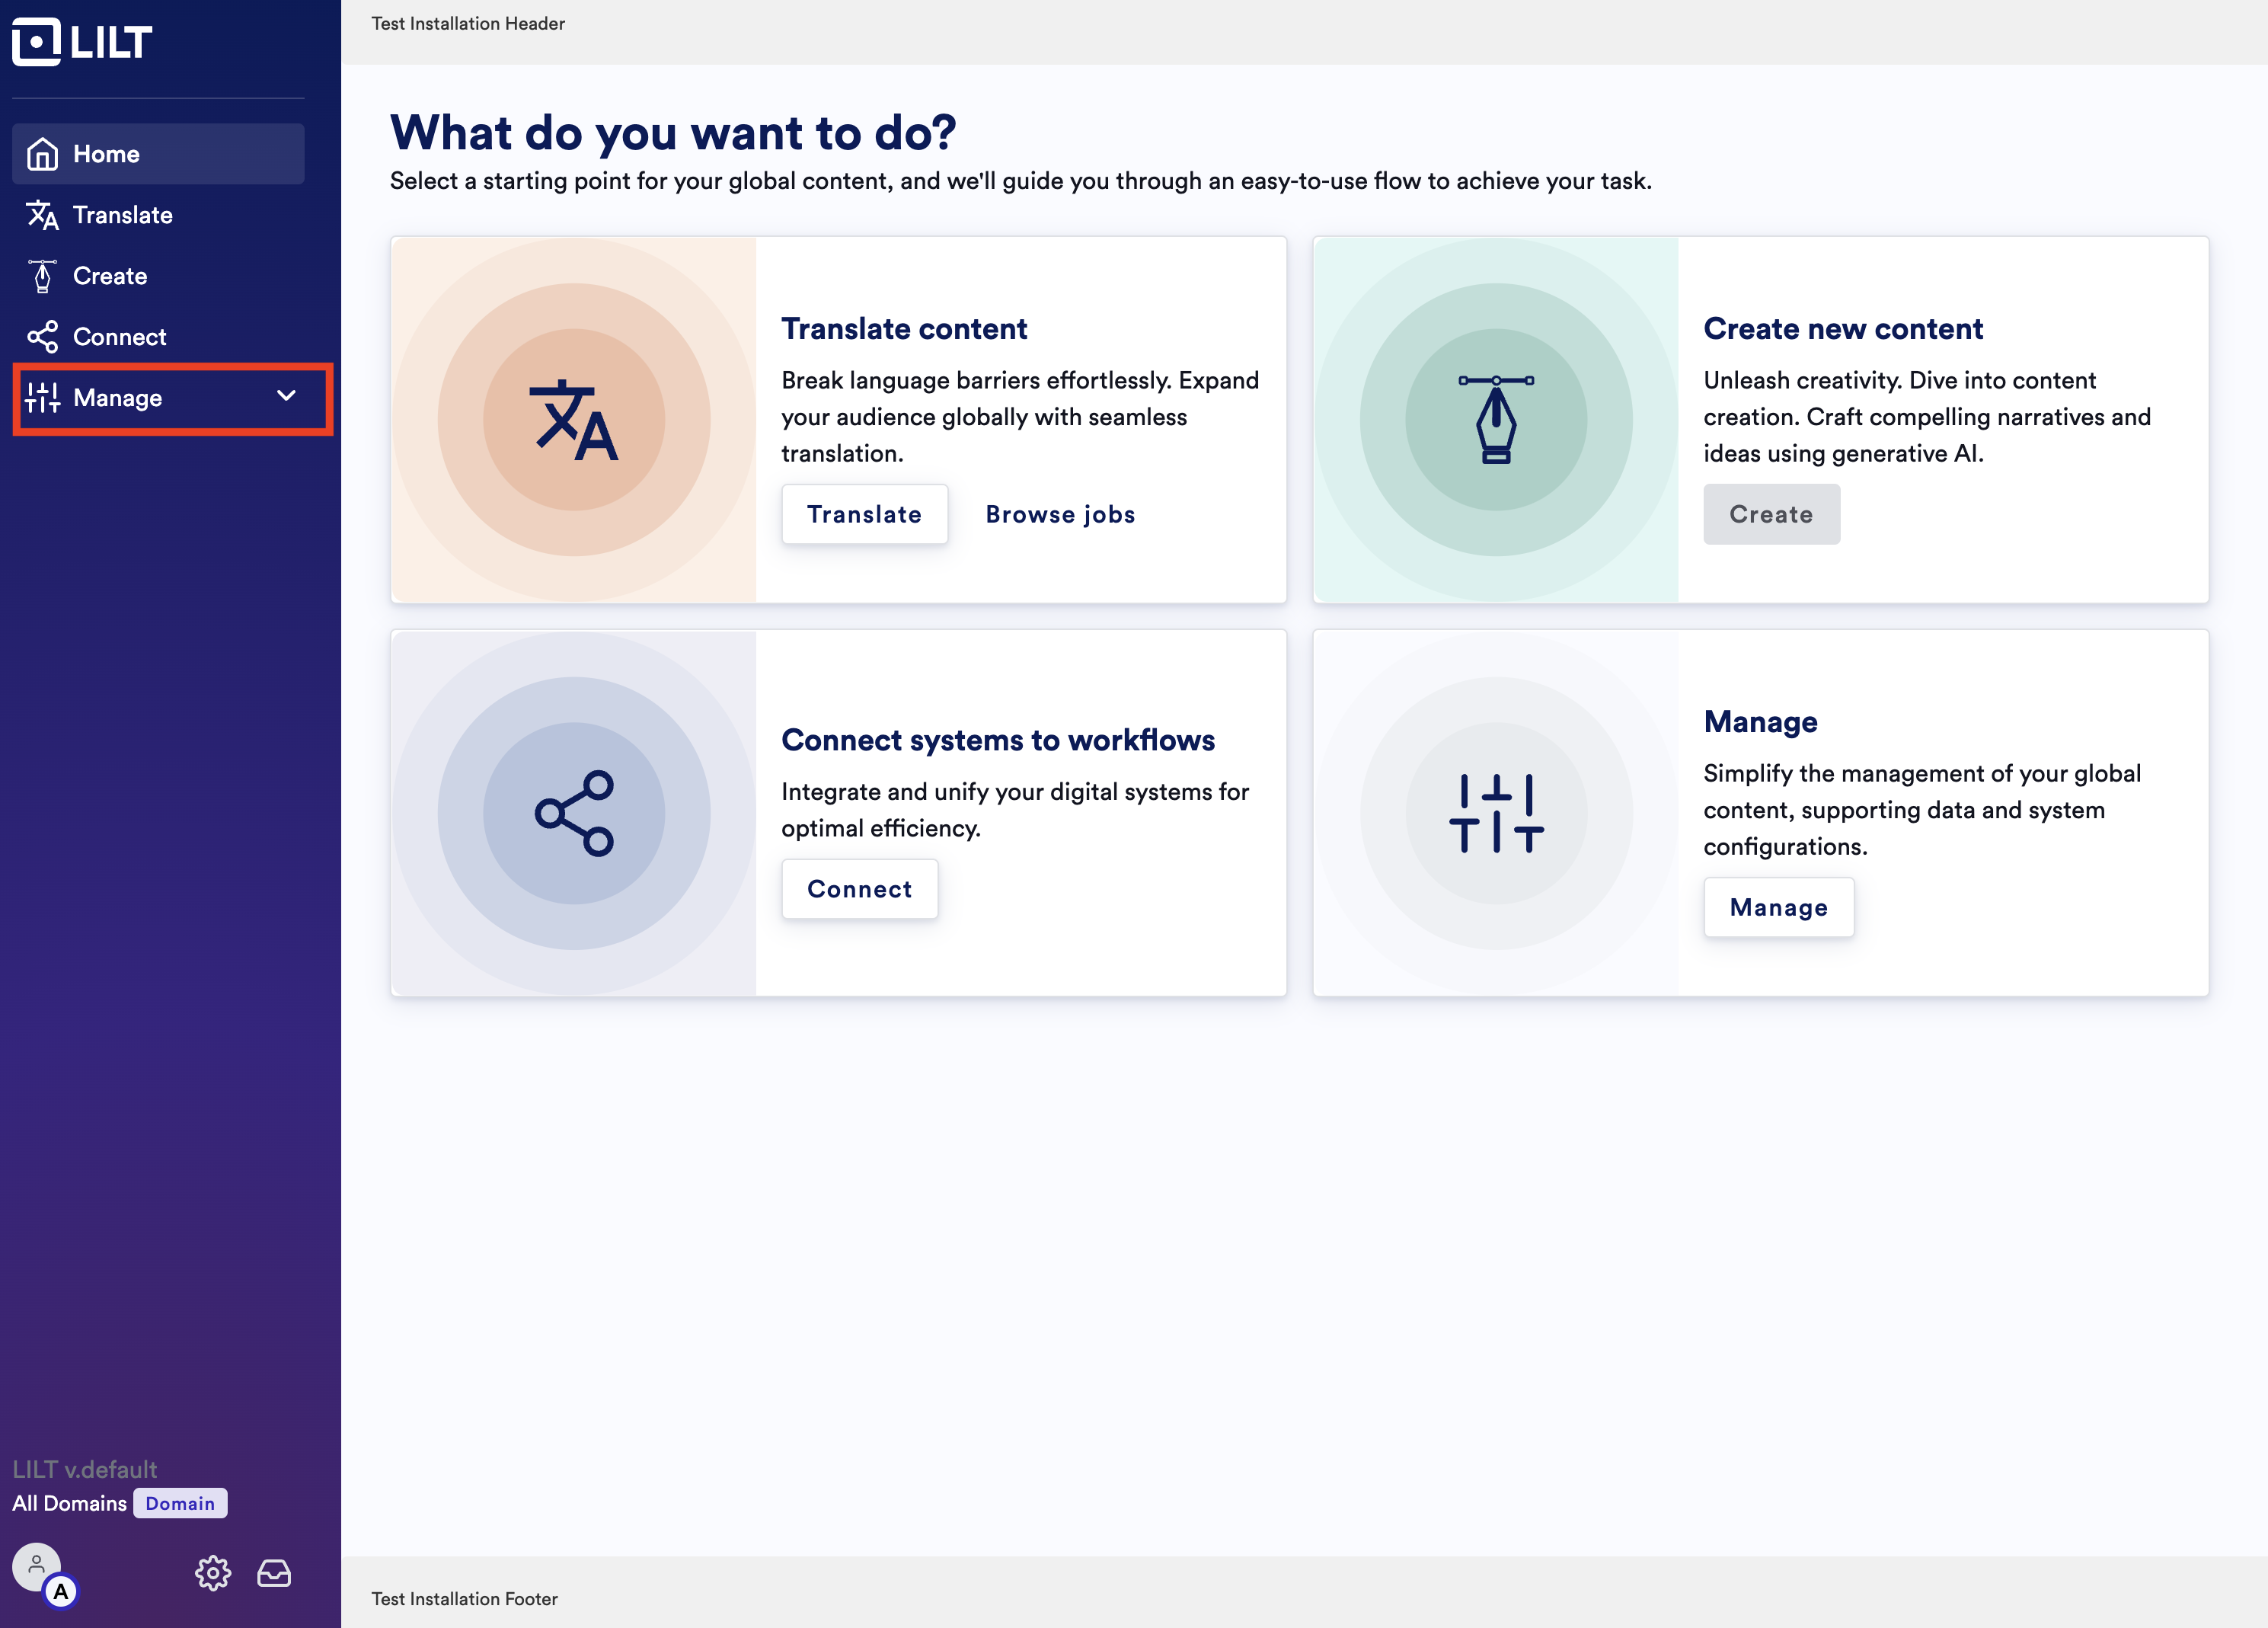
 ## Step 1: Click “Manage” on the left rail
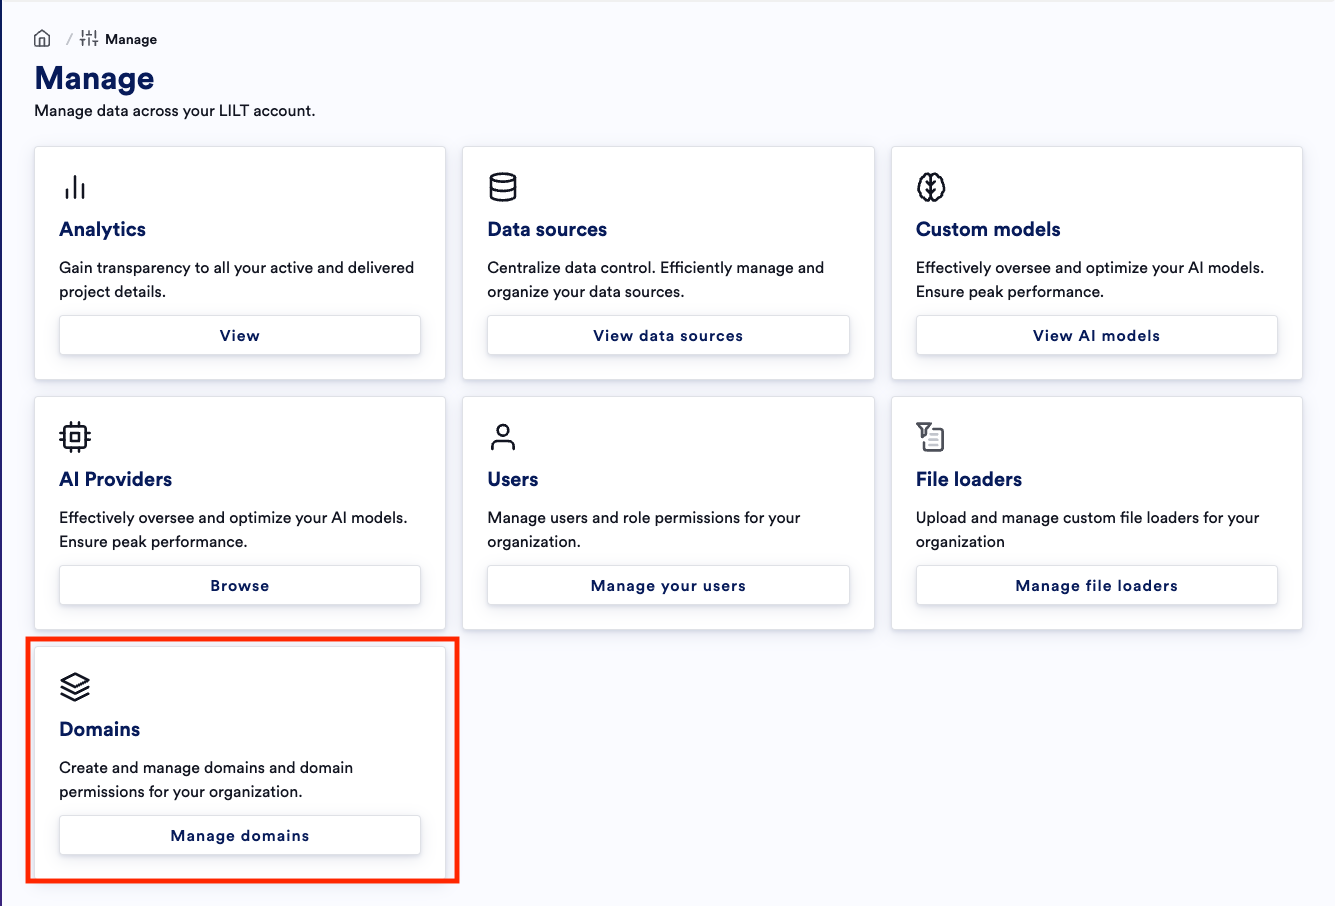
 ## Step 2: Click “Manage Domains”
 ## Step 3: Click “ + New Domain”
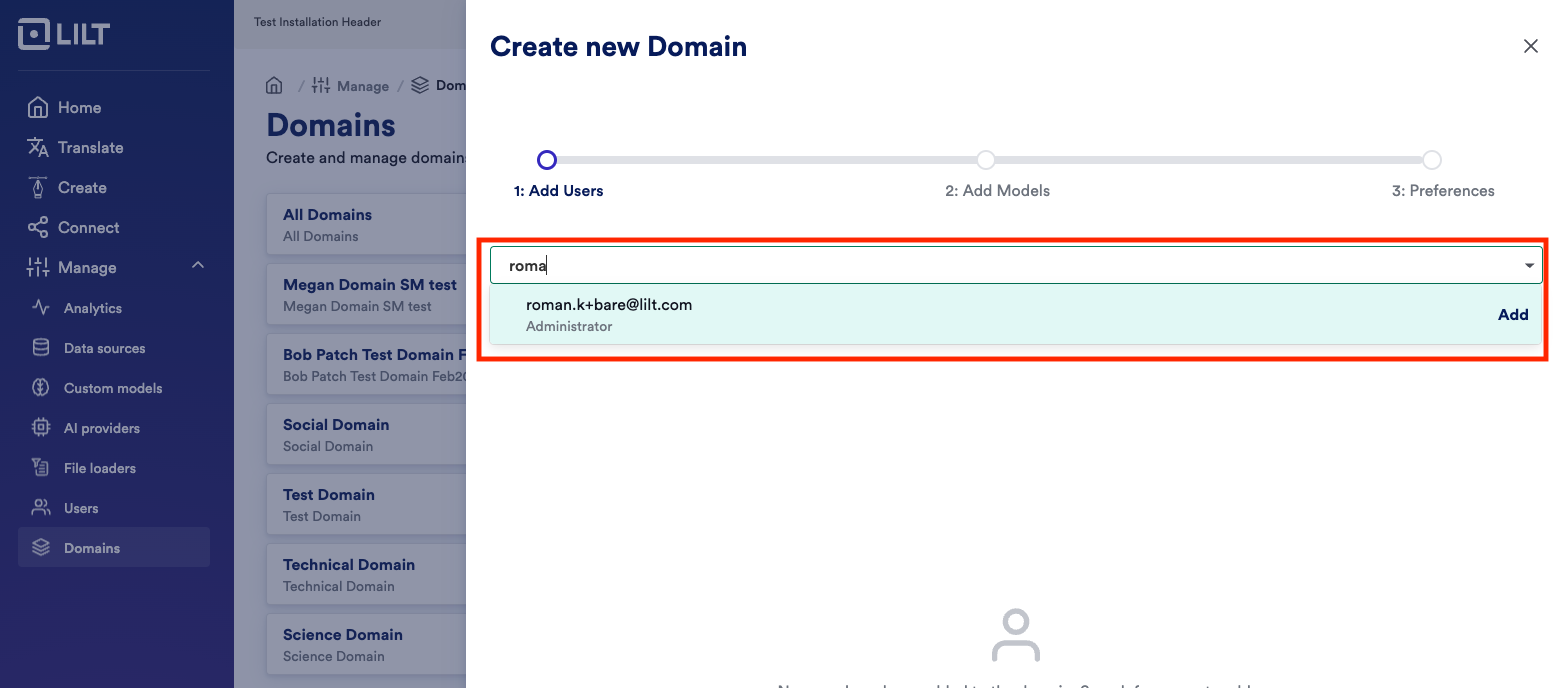
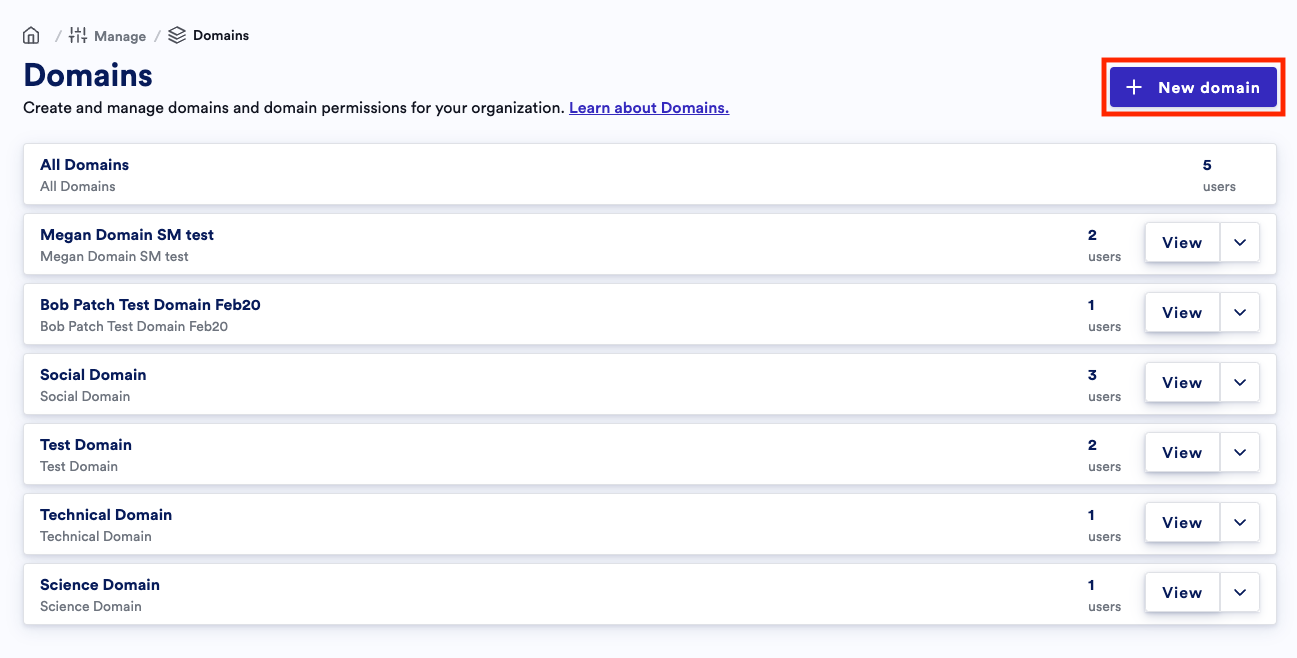 ## Step 4: Enter names of users to be added to a new Domain and click Next
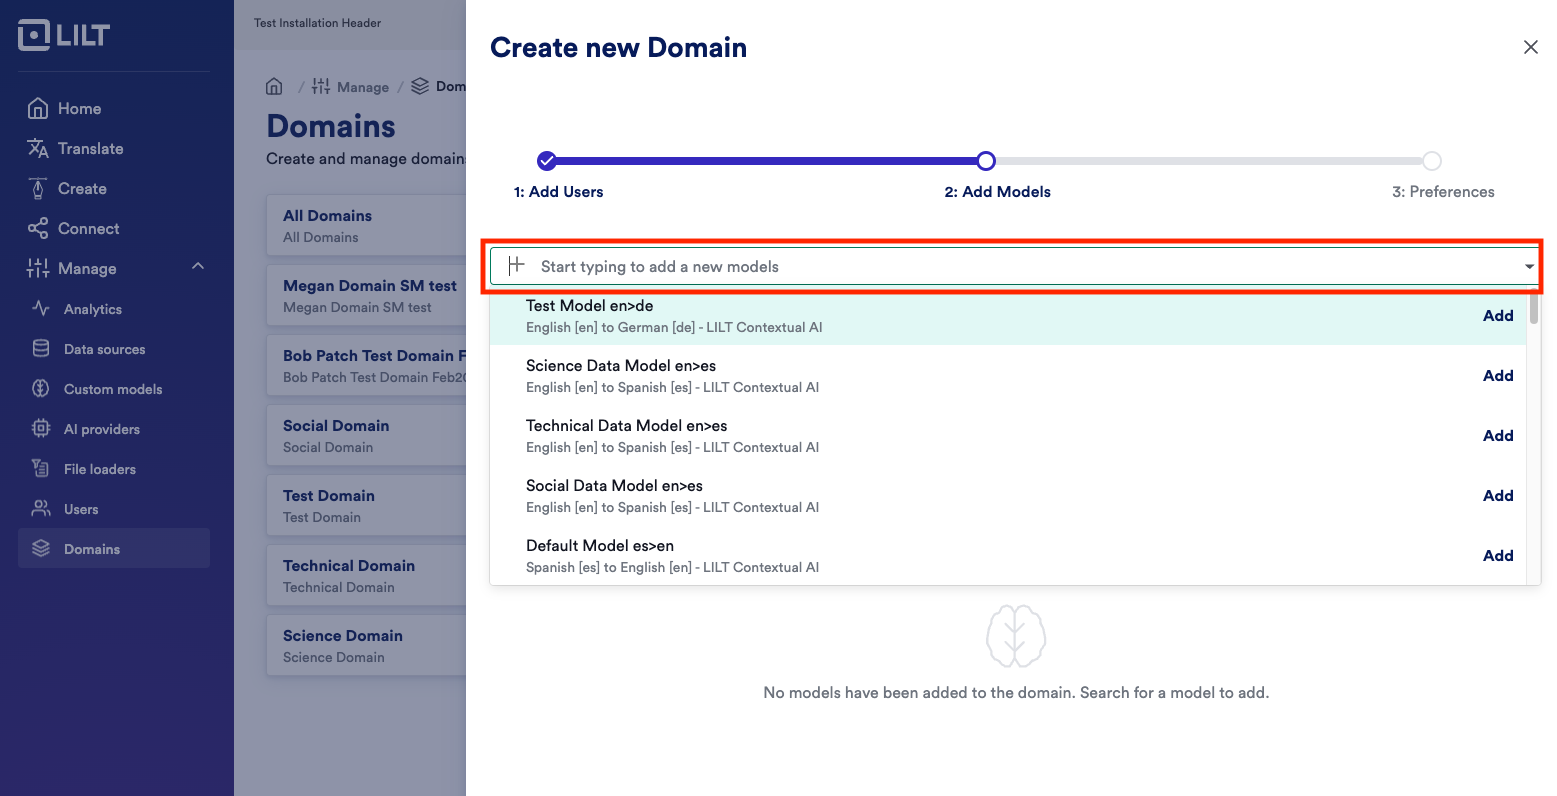
 ## Step 5: Enter the name of the models to be added to the Domain and click Next
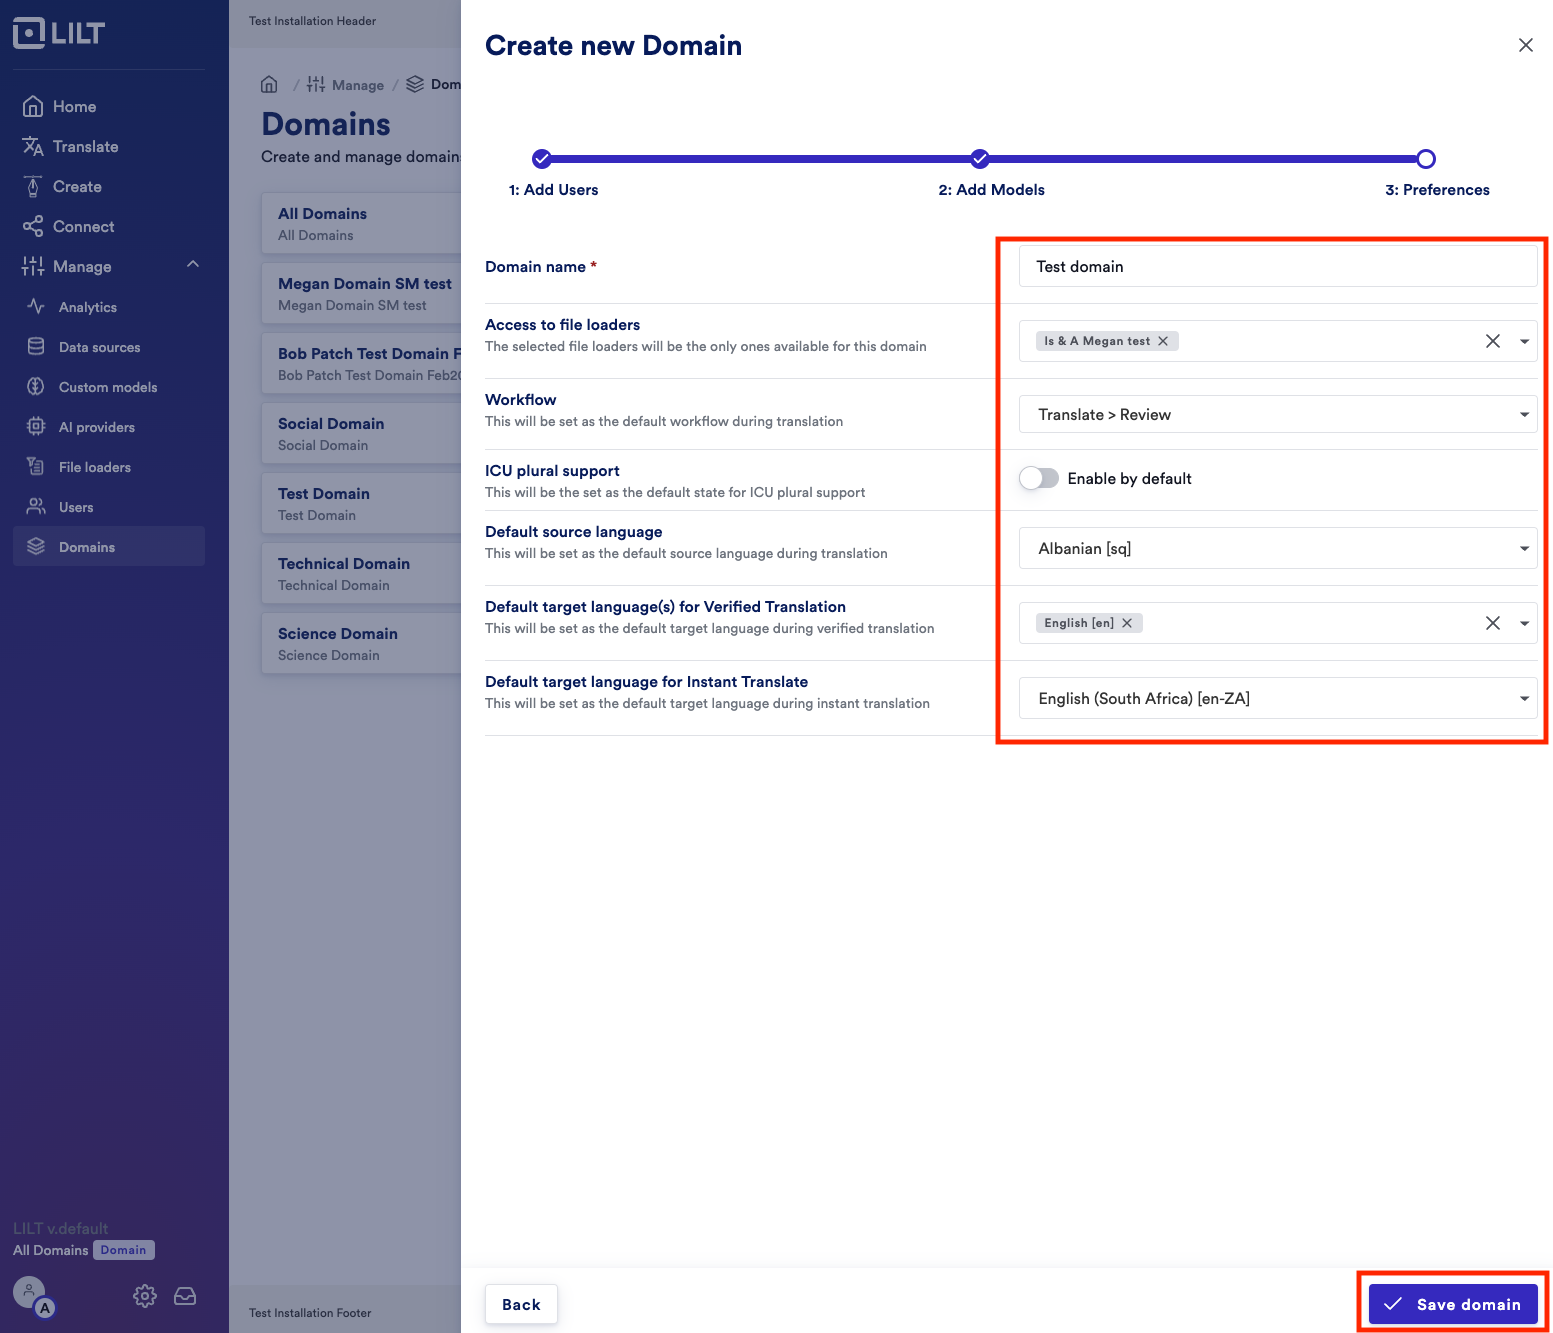
 ## Step 6: Name the Domain, enter any other Domain preferences and click “Save Domain”
Available values to set:
* **Source Language**: The language most commonly used for translation jobs in the domain.
* **Target Languages**: Select default target languages for both **Verified** and **Instant** translation types.
* **File Loaders**: Specify file loaders for the domain, enabling the upload of specific formats.
* **Workflow**: Set the default translation workflow (e.g., Human Translation, Machine Translation).
* **ICU Plural Support**: Toggle on/off ICU plurals based on domain needs.
* **Error logging**: Determine whether error logging in the Review stage is required based on domain needs.
## Step 6: Name the Domain, enter any other Domain preferences and click “Save Domain”
Available values to set:
* **Source Language**: The language most commonly used for translation jobs in the domain.
* **Target Languages**: Select default target languages for both **Verified** and **Instant** translation types.
* **File Loaders**: Specify file loaders for the domain, enabling the upload of specific formats.
* **Workflow**: Set the default translation workflow (e.g., Human Translation, Machine Translation).
* **ICU Plural Support**: Toggle on/off ICU plurals based on domain needs.
* **Error logging**: Determine whether error logging in the Review stage is required based on domain needs.
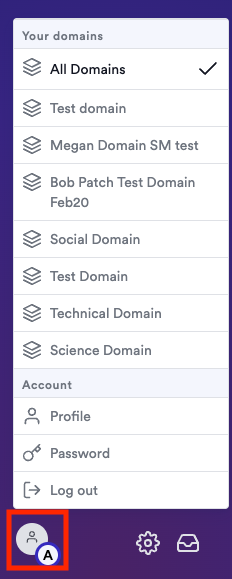
 ## Step 7: Click on the user profile to switch between Domains