Installing and Configuring the LILT Connector
-
To install the LILT Connector, start by going to Apps > Manage Apps in your instance of Contentful. In the list of Available apps, you will find LILT > Install.
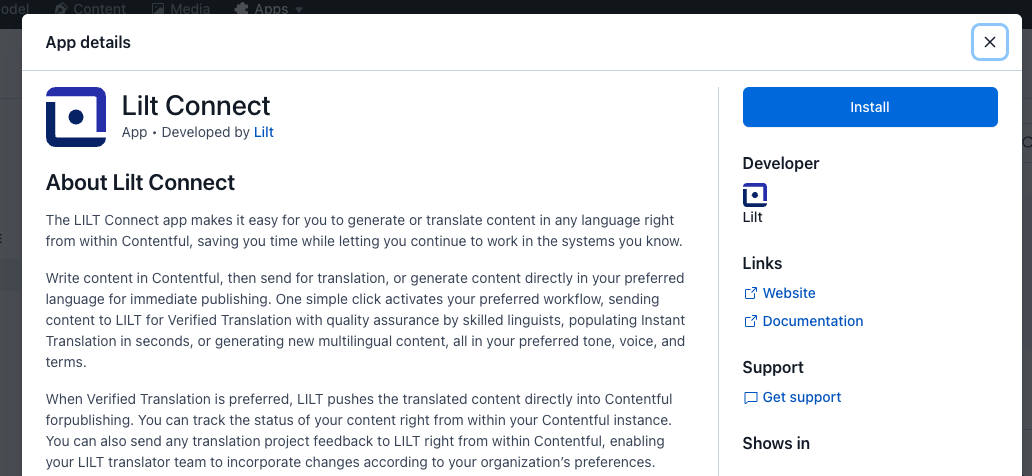
- In the Install pane, you can find more information about this Connector. You can review LILT’s website and documentation, and send any questions to our support team.
-
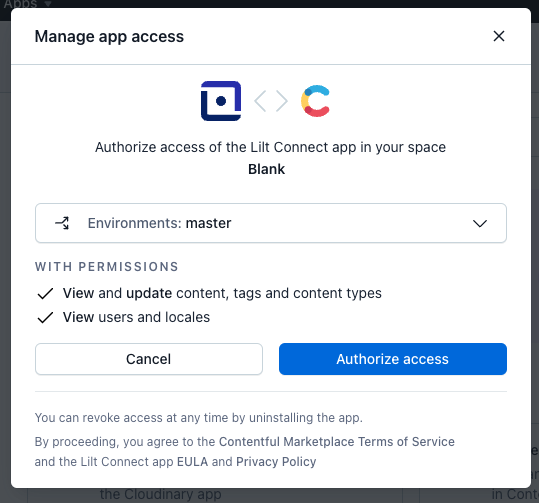
Once you click Install, authorize access for the LILT app to connect with Contentful
-
To configure your application, you have one of two options
- Option 1: Configure via your Contentful account
-
- Option 2: Configure via your LILT account
-
- Option 1: Configure via your Contentful account
-
Finally, you can add LILT to your Contentful sidebar. Navigating to
Content Model, (and for each content type you want to enable the LILT app for), open the content type, click onSidebar, add the LILT app to the custom sidebar, and clickSave.
-
Prior to a demo or a POC, you will need to provide your LILT Account Manager with the following information to ensure that the necessary configurations are enabled for integration between your LILT and Contentful instances.
- Contentful Space ID
- Contentful Environment ID
- List of enabled Content type IDs*(Pulled from Content Models)*
- Contentful Management Token
- Language Pairs
- Confirmed Link Depth
Setting up Content Models for Translation
As LILT works with Contentful for field-level localization, there are certain parameters that must be met within the content model to ensure a stable environment. Now that you’ve added LILT as an app in the sidebar for the content models you would like to localize, there are a few final steps to ensure LILT is ready to handle translations at scale! There are two required fields -LILT Status and LILT Metadata- that will auto-populate. Activate this by completing the following:
- Add LILT to your sidebar
- Ensure there are fields enabled for localization
- Go to
Content>Create a new entry - Re-load page to initialize the LILT Connector
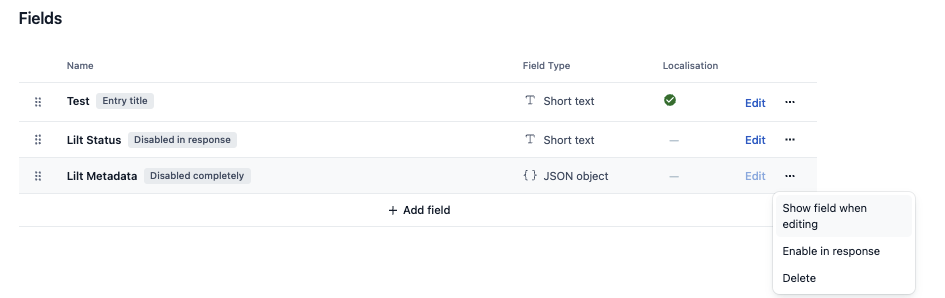
- Return to your content model, and you will now see that the two fields have been automatically added
- Change the
LILT Metadatafield to “Show field when editing”. The field will automatically change to “Disabled in response”, which is the necessary setting.
Sending a Request for Translation
By adding LILT to your content model sidebar, your team can easily view localization statuses and send requests for translation at any time using the steps below.Project creation
-
In Contentful, open a content piece and click the
Send for Localizationbutton under LILT in the sidebar. A popup will appear where you’ll be able to select translation type and your target languages.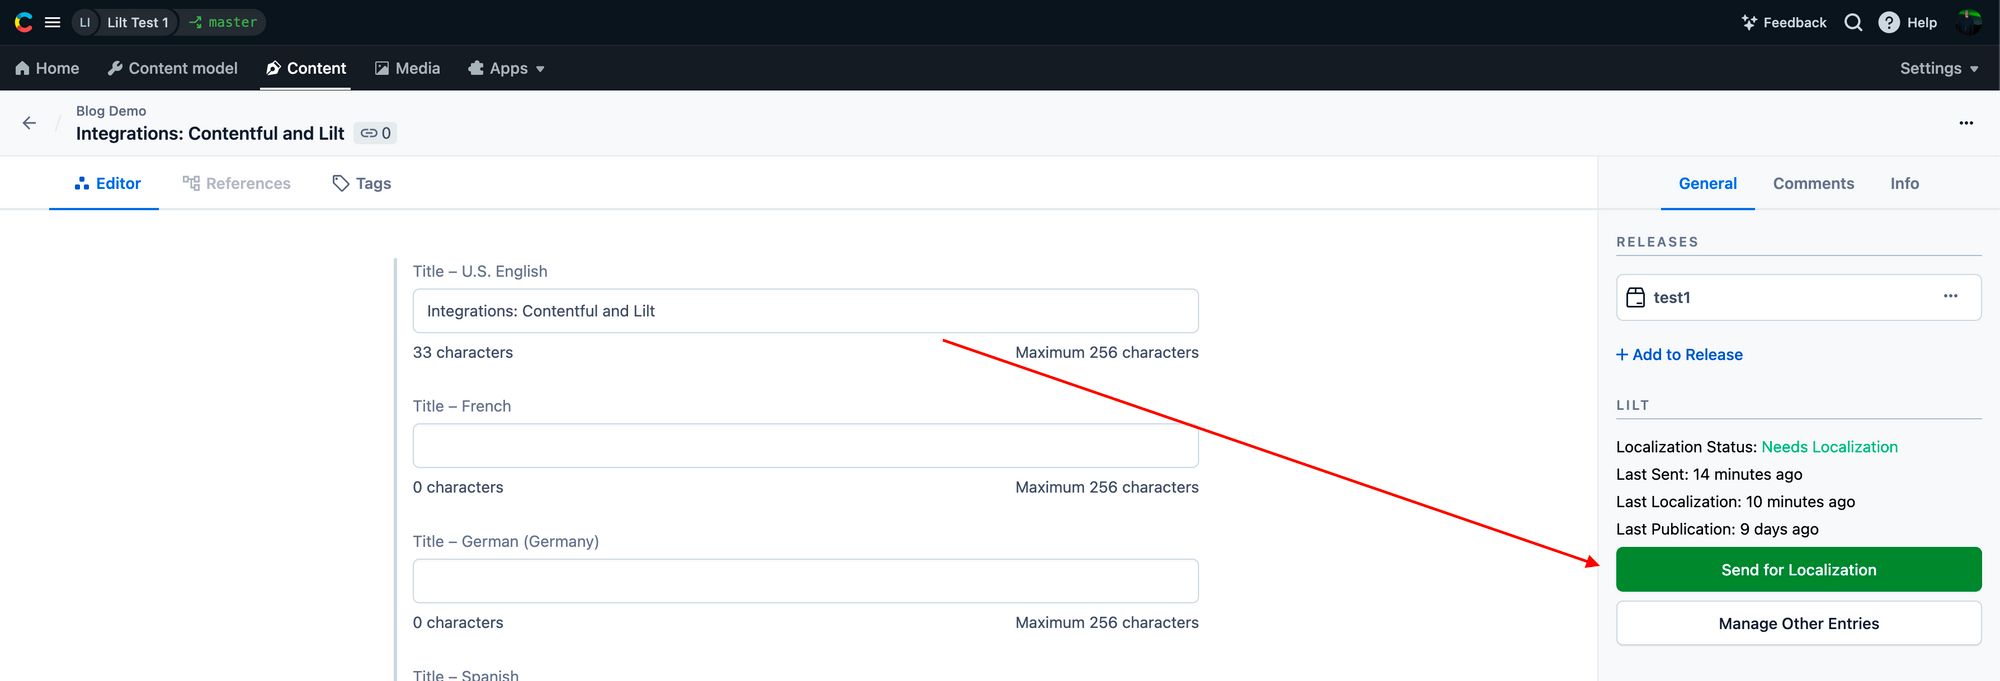
- Select Translation Type & Target Language. If your LILT instance has both Instant and Verified Translation configured, you will be able to select your Translation Type between the two.
A few tips and tricks:
- The selection you make will persist across future localization jobs. You don’t have to set the Translation Type every time you send the entry for localization.
- If the entry is in a Release you can use “Manage Other Entries” to batch set the Translation Type for multiple entries at once.
- With both Verified and Instant Translate, the Entry isn’t pulled into LILT right away. It will still get picked up by the scheduler like all other Contentful Entries.
- If you’re interested in both Instant and Verified Translation and do not see the option to select Translation Type, please discuss with your LILT Account Manager.
-
In the same popup, you will find be able to select your Target Language either by search or checking the respective boxes. Make your language selections and click
Submit.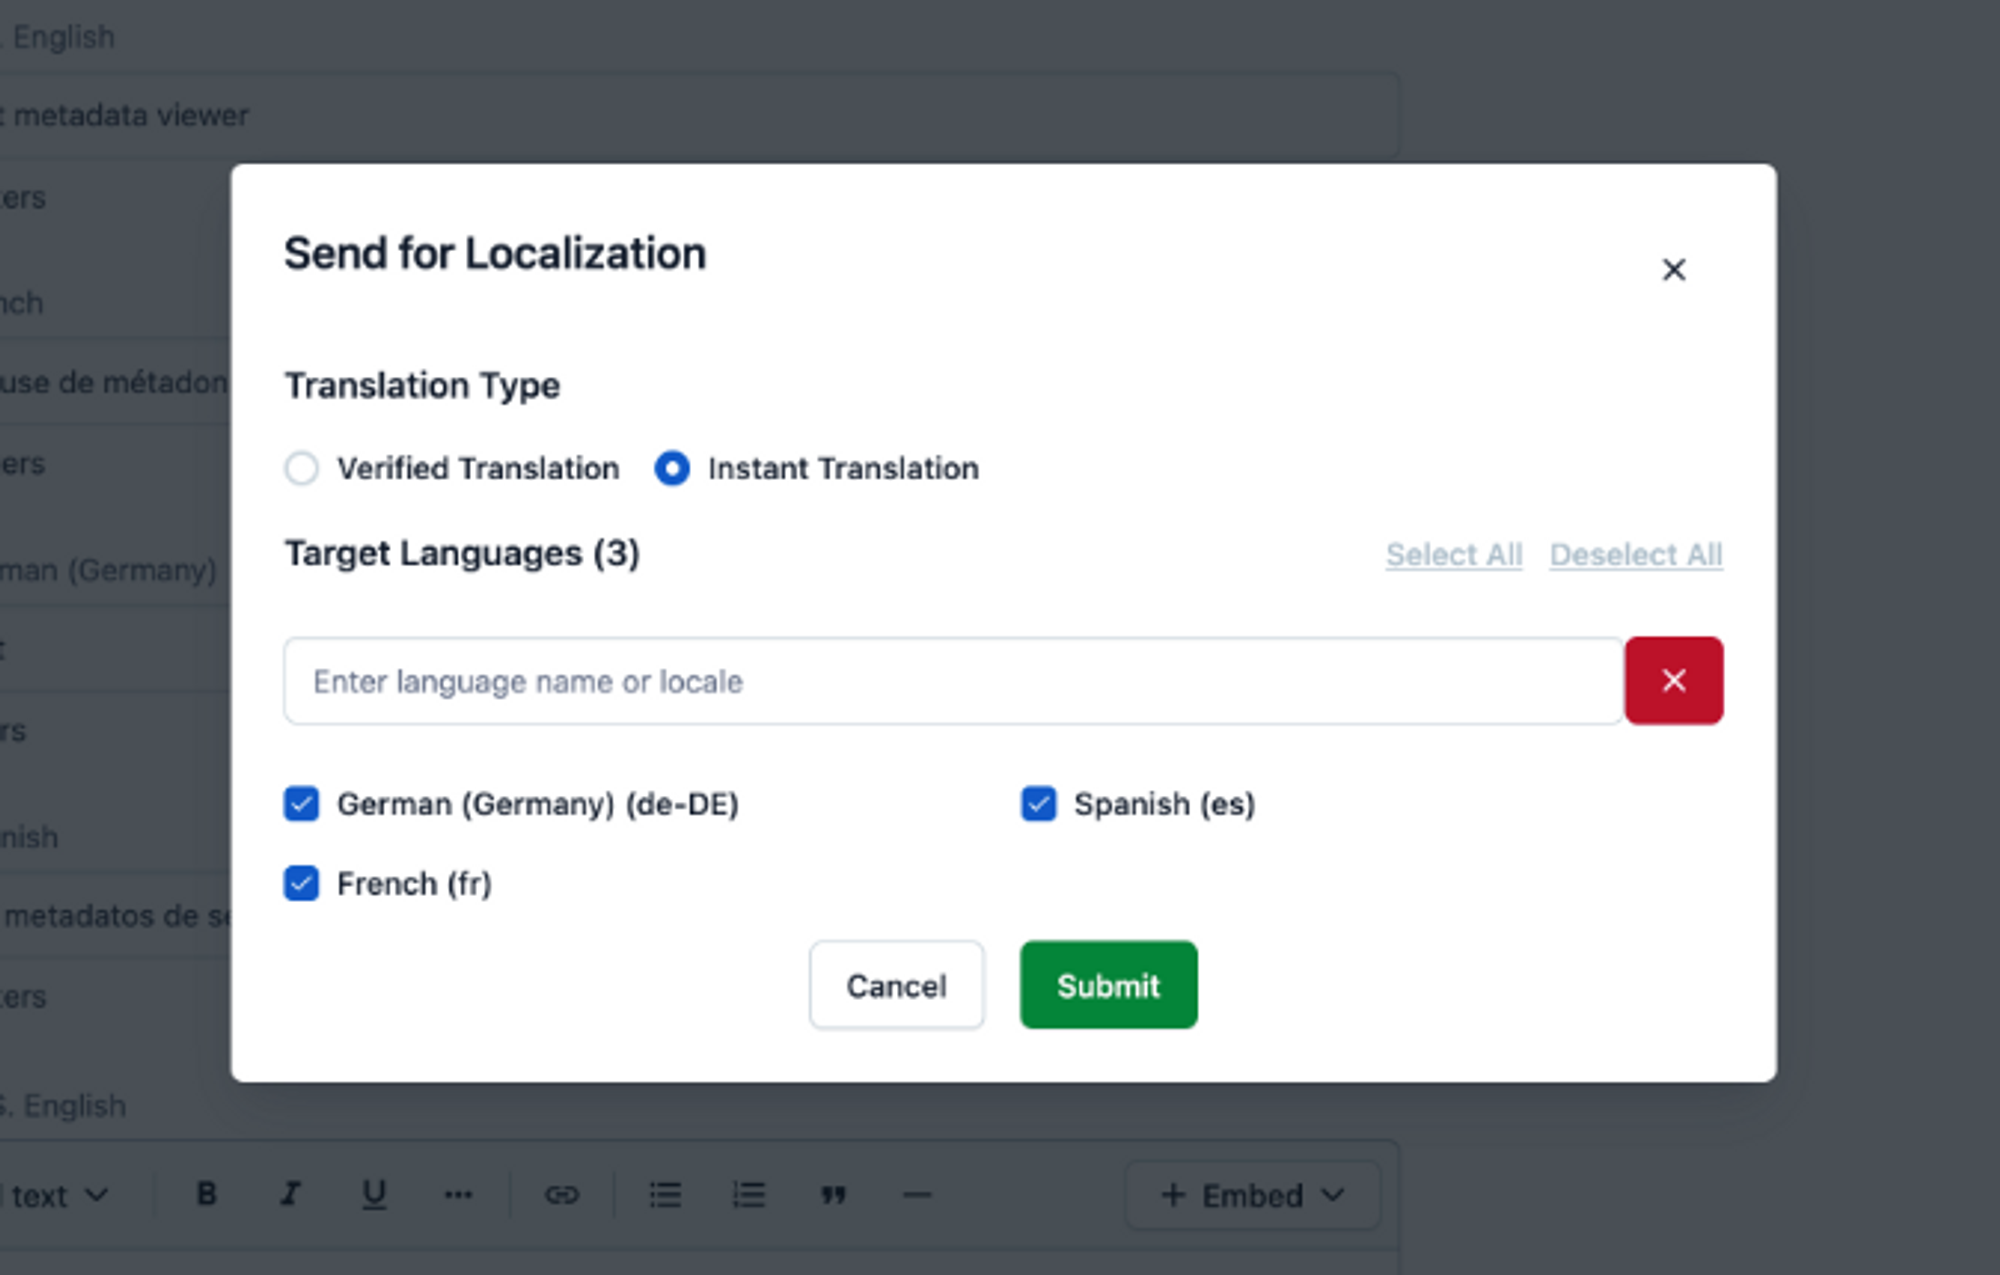
Project Statuses
-
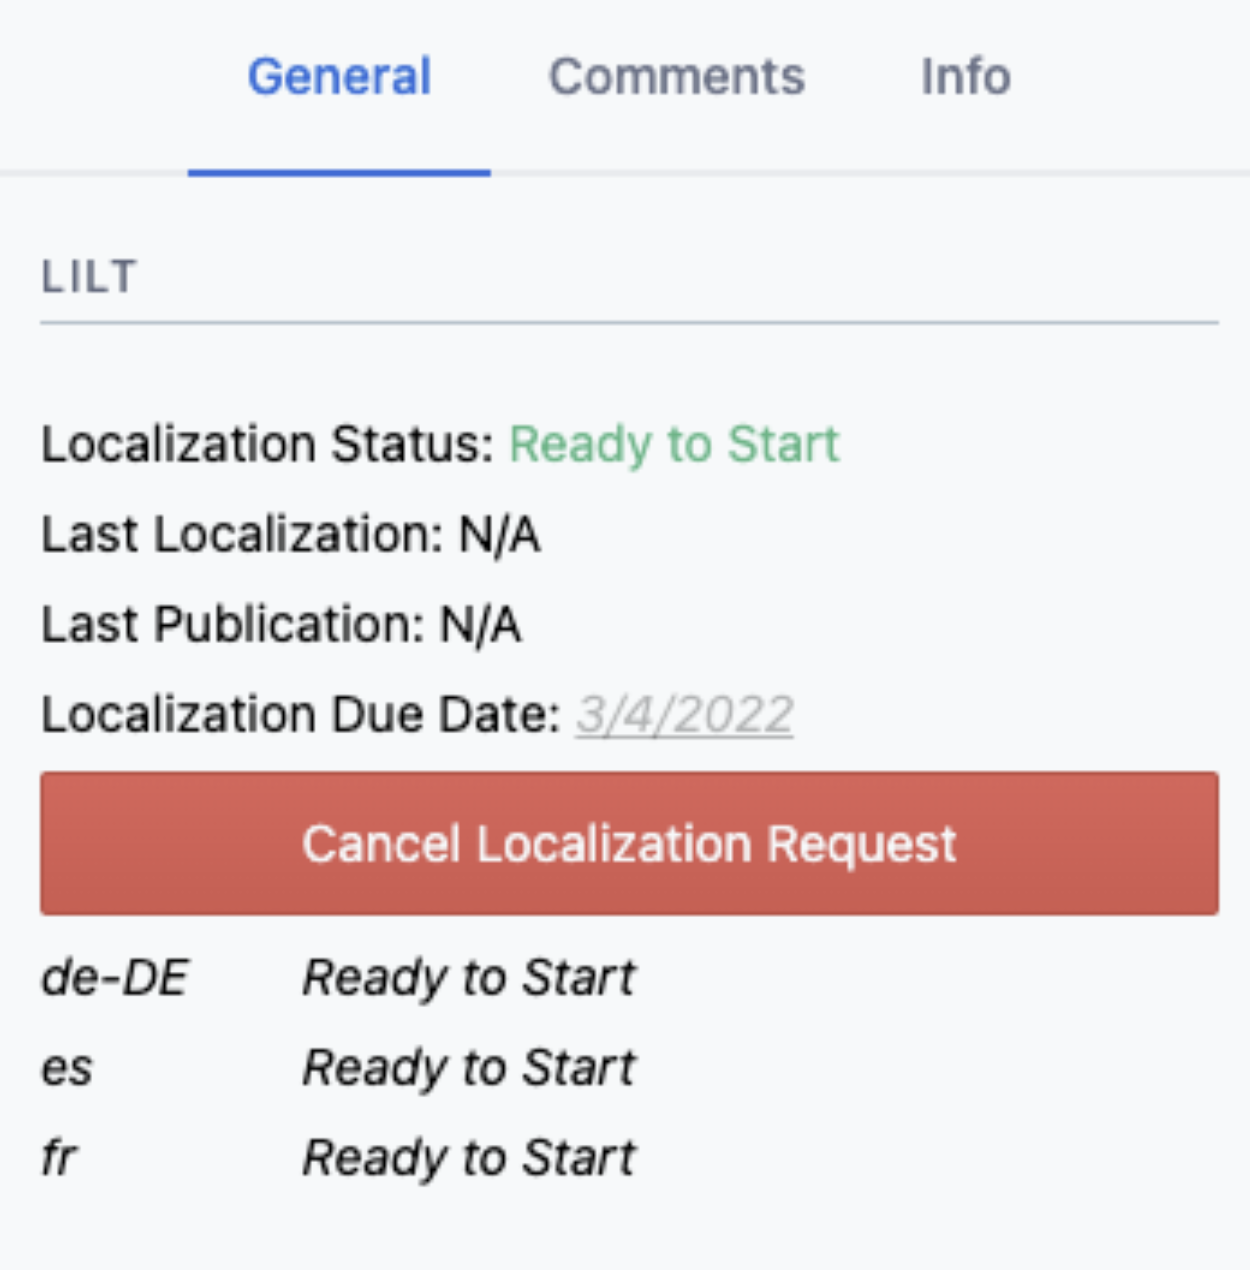
Once submitted for localization, the status will change to “Ready to start.” This status is how our Connector identifies entries that are ready to be picked up for localization.
-
LILT periodically checks Contentful for content that has been sent for localization with LILT. When this content is found, LILT Projects are automatically created that contain the content to be localized. Once the content is pulled into LILT, the content sidebar in Contentful will display
In Progress.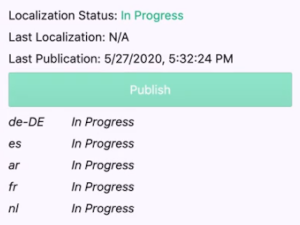
-
LILT periodically checks for Projects marked as
Done. When this is detected, the translated content is automatically sent back to Contentful.Your language pair statuses will update in real time as they are delivered.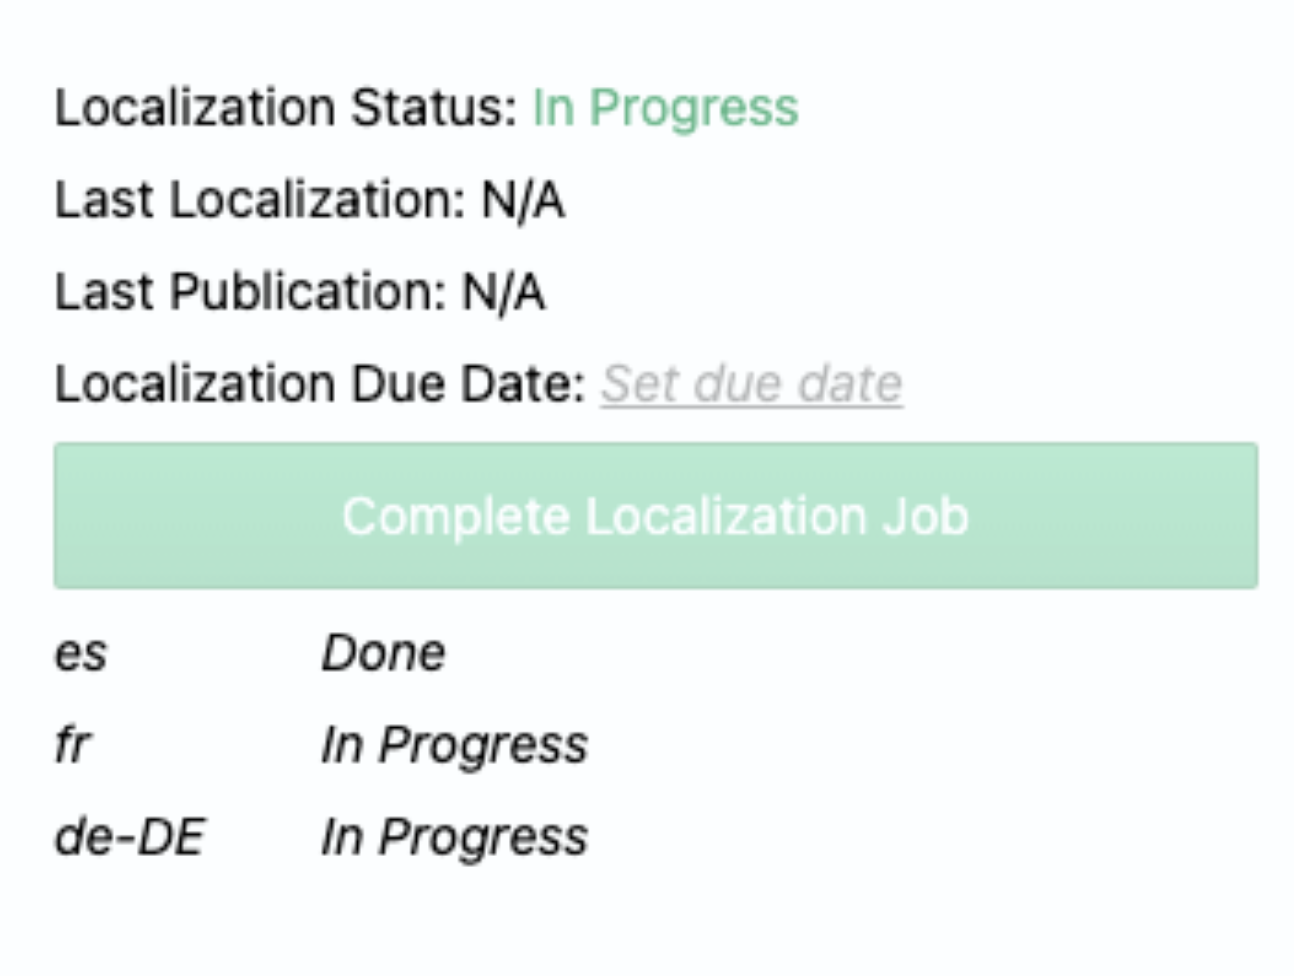
-
To view your translations, ensure you have multiple locales selected on your sidebar. Once all languages are completed to satisfactory quality, click
Complete Localizationto finalize the content and prepare it for publishing.
Using Contentful Release Functionality with LILT
The “Release” functionality in Contentful can be used to bulk export Entry IDs to send to LILT for Translation. This is another way you can set up your workflow for the LILT + Contentful connector. Here’s a quick walkthrough of what this process looks like as a whole! LILT - Contentful - Release Functionality.mp4LILT Create
LILT Create is integrated into the Contentful app ecosystem, which allows creation of on-brand, AI-generated multilingual content directly within Contentful’s content models, saving time and streamlining workflows. Because LILT specializes in brand-specific translation, users can generate content across any number of languages with the same prompt - making content ready to publish globally in partnership with regional marketing teams significantly faster than possible through traditional translation workflows.What is LILT Create?
LILT Create is a new, multilingual content generation product that allows users to quickly create on-brand, locally relevant content in any language. LILT Create pairs your company context and linguistic assets with LLMs to instantly generate enterprise-grade content for the user to review, tweak, and finalize. This new workflow eliminates multiple manual and repetitive steps of content exchange, review, and approval to streamline multilingual content generation and get your content in front of customers faster. To learn more about LILT Create, check out our page here. LILT Create is offering a public preview period for new and existing customers wherein the product is available for any user to try free of charge. Please follow the steps below to set up Create in your Contentful connector as an existing or new user.How to access LILT Create in Contentful as an existing LILT user
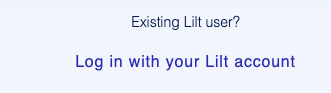
If you are an existing LILT user, click on “Log in with your LILT account”. You’ll get a pop-up in a new window, where you should enter your LILT account credentials. Note: If you receive a 404 error in the pop-up, this is likely because you’re logged in at lilt.com. Please go to lilt.com and log out, then refresh Contentful and try logging in with LILT again.
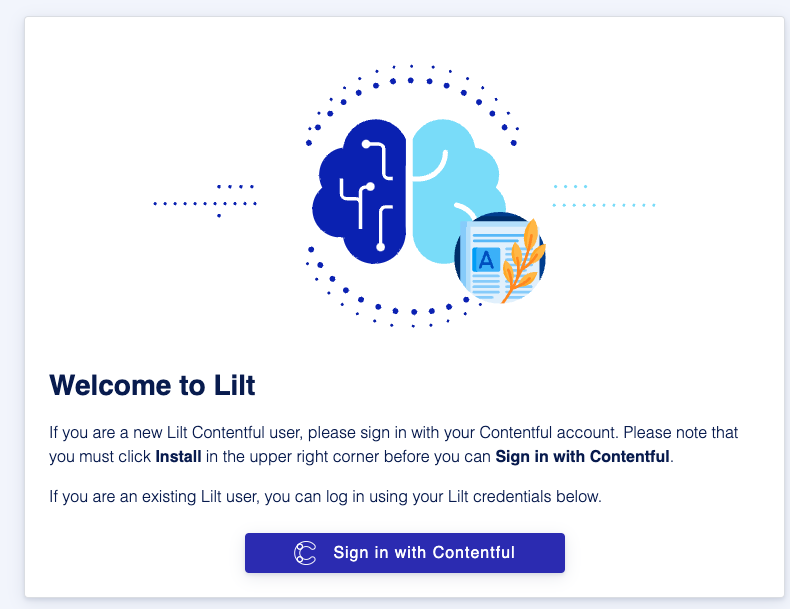
How to access LILT Create in Contentful as a new user
Follow steps 1 and 2 in the “Installing and Configuring the LILT Connector” section above. If you are a new LILT Contentful user, you should sign in with your Contentful account. Click on “Install” in the upper right corner of the page, and then click on “Sign in with Contentful”.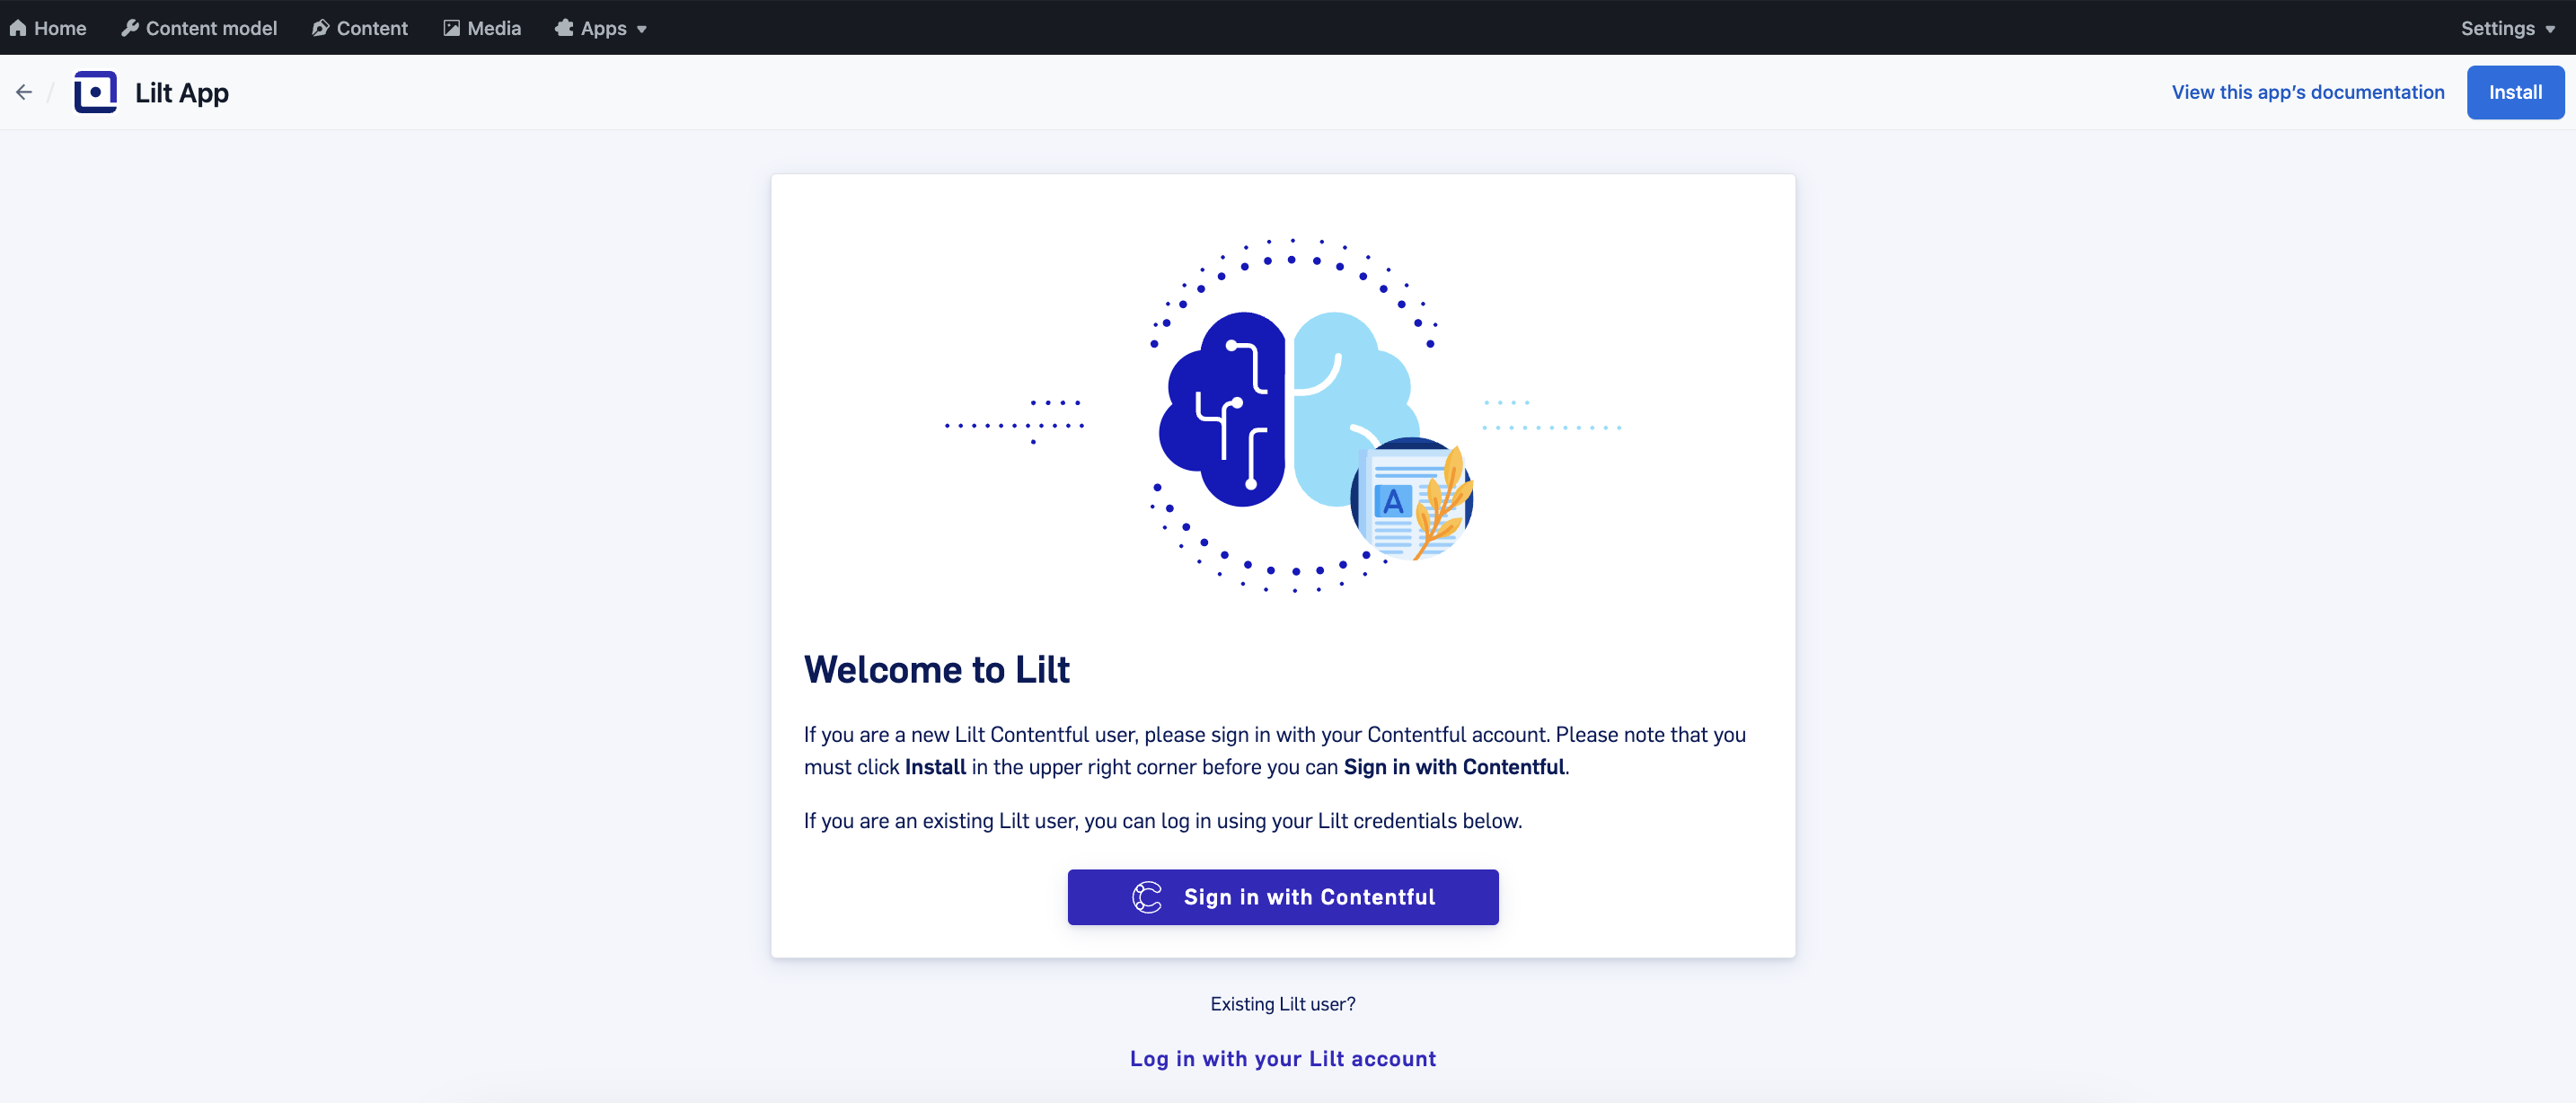

How to use LILT Create in Contentful
-
Once you have the LILT Create modal open, prompt LILT Create with what you are trying to generate. Identify the specific content you want to create and provide relevant context in a clear and concise manner. Here are a few examples to illustrate how to interact with LILT Create effectively:
- Create a blog post about healthy eating habits for children.
- Write an article about how AI is revolutionizing the e-commerce industry.
- Select a target language to generate content in.Note: Please make sure that your selected language is in the entry UI.
- Select a linguistic data source (if available) to provide context to the AI. See section below for more details on data sources.
- Set your brand style guideto create a centralized style guide for all LILT Create users in your organization. Set your Create style guide preferences by selecting a tone and typing (or copy and paste) any relevant guidance that will help refine your content output. For many of you, this may be a direct copy/paste from your company’s brand guidelines (Word document, PowerPoint, etc.). Be clear and concise with any additional guidelines, as this will help ensure accuracy.
- Add any remaining additional guidelines, such as SEO keywords, an approximate word count for your content,or any structural sections you would like to see in your created content (these can be particularly useful for longer-form types of content, such as blog posts or articles).
- Click “Create”. LILT will take ~30 seconds to generate net-new content based on these prompts. While generating your content, the right side of the screen will display a loading icon and your text will appear as it is being created. Once your content has been generated, you can use the markdown editor to tweak and finalize your content.
- If you are not satisfied with the content that was created, edit any of the parameters on the left and click “Create” again. This will regenerate the content referencing the edits and updates you made to the fields on the left. If you recreate your content, it will overwrite the previously generated text (as well as any edits you made) and create new content from scratch.
- Once your content is created, select the fields in your Contentful form where you would like to paste the content. We recommend selecting the section that corresponds to the body of your content. Click “Paste to field”.
- From here, the LILT Create modal will close, and your generated content will appear in the fields you previously selected. You can now continue with your content workflow (publishing, sending for localization, etc.).
Data Sources
When LILT provides translation services for an enterprise customer, that customer’s company account automatically creates and passively trains a customized, bespoke language model in each respective language serviced in that company’s account. If you haven’t previously worked with LILT for translation, your company account will not have these pre-existing customized language models, but you are welcome to add more to your LILT company instance. Examples of content you might want to upload could include translation memories, term bases, and glossaries. LILT Create leverages thetargetlanguage from an existing language model as a prompt. For example, if you select an existing Data Source that is En_to_Fr, it will leverage your existing model for English to French translations, but it will only leverage target segments (French) and not source segments (English). Glossary terms from your data source will be sent as context if those keywords are found in the prompt. If you would like to specify which words to use in certain cases as you would with a glossary, we also suggest specifying these in the prompt or the style guide (e.g. Always use “crêpe” instead of “pancake”). Please contact LILT Sales to learn more.FAQ
Q: How do I resubmit content for translation?
- A: Delete all content in the “LILT Status” field. (eg. Delete “Complete” or “Needs Localization”). Delete all content in the “Metadata” fields. Refresh the page, which will update the button to
Send for Localizationagain.
Q: Why do I need to click the Complete Localization button for each job?
- A: The
Complete Localizationbutton functions to lock the translated content files as finalized and ready for publishing. This helps ensure that any future source changes are clearly delineated as content that may require updated translation steps. ClickingComplete Localizationwill update the labels the LILT platform checks so that when the time comes, it will be ready for these followup translation jobs on the same content after source updates.
Q: Can LILT auto-confirm entries for me?
-
A: Yes! Talk to your LILT Account Manager to update your LILT + Contentful connector configuration to auto-confirm entries on completion. This will change your workflow to look like the following:
- Upon Delivery, Complete Localization is automatically configured
- When source updates are detected, you will see a warning message in the sidebar
- You can dismiss this warning message if needed
- When relevant, you can then resubmit content for translation
Auto-Complete Contentful.mp4
Q: We don’t like/use the LILT Statuses. Can we hide those to simplify the view?
- A: Yes. This is possible through the configuration of the LILT connector. Reach out to your LILT Account Manager for assistance making this change.
Q: I sometimes see inaccurate statuses after I duplicate tasks in Contentful. What should I do?
- A: Contentful’s duplication feature duplicates all metadata, including the LILT status. It is best practice to avoid duplicating tasks for any content that has already been submitted for translation. Instead, you can create a new entry to ensure that the workflow status restarts from the first stage.
Q: I get a lot of pop-up warnings about content translation when I try to publish. Is that expected?
- A: Contentful has a robust verification system geared toward avoiding unintended content getting published. With that, even non-critical updates to files can trigger popup warnings when publishing. This is expected behavior, and these popups can be dismissed in cases where this is not relevant to any source/translation changes.
Q: Some content says it has changed, but I know the source has remained the same. What’s wrong?
- A: Contentful is extremely sensitive to source updates, which can cause it to show content as “modified” even when only metadata or non-source changes have been made.
Q: What content models should I apply the LILT sidebar to?
- A: Apply the LILT sidebar to any content model you wish to send translation jobs for. These can be set up one at a time using the instructions above.
Q: The LILT app and other buttons on the sidebar are similar and confuse some users. Can we change it?
- A: The Contentful sidebar is customizable. In the sidebar setup page for any given content type, drag and drop the active sidebar apps to adjust the ordering.
Q: How does my Contentful Link-Depth work with the LILT connector?
- A: Verified Translation will honor your link-depth strategy. (Remember that you need to share your link-depth information with your LILT account team at the time of setup!)
- A: Instant Translate does NOT take into account link-depth, and only directly selected entries will be sent for instant translation.
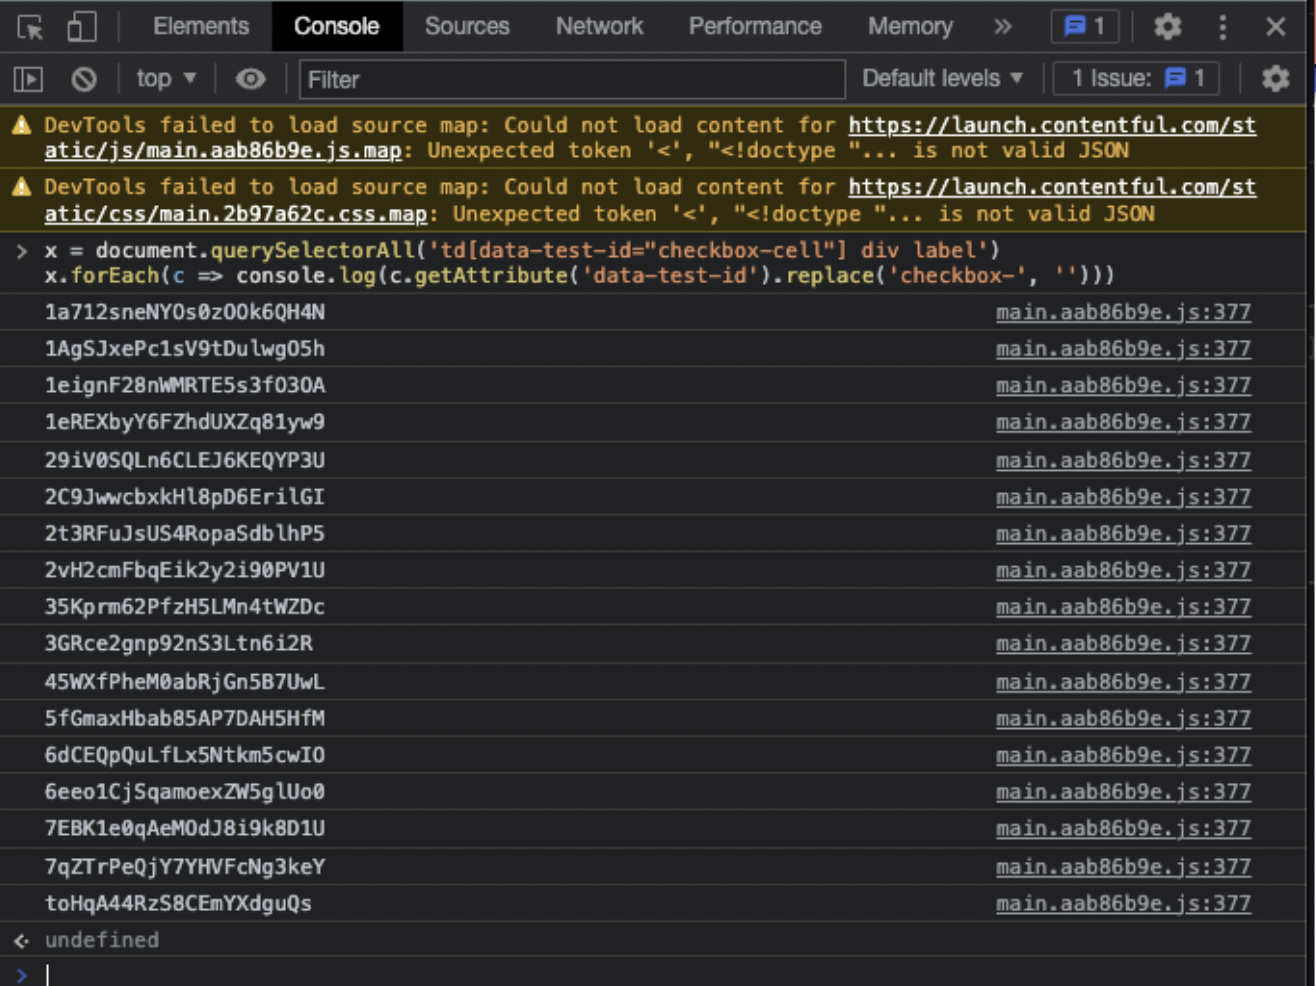
Q: Can I pull a list of Entry IDs from a release?
-
A: Add content to a release and go to your release in the Launch app. Hit “F12” on your keyboard to pull up Developer Tools in your browser and navigate to the
Consoletab.-
Click the blue carrot next to
Add Content.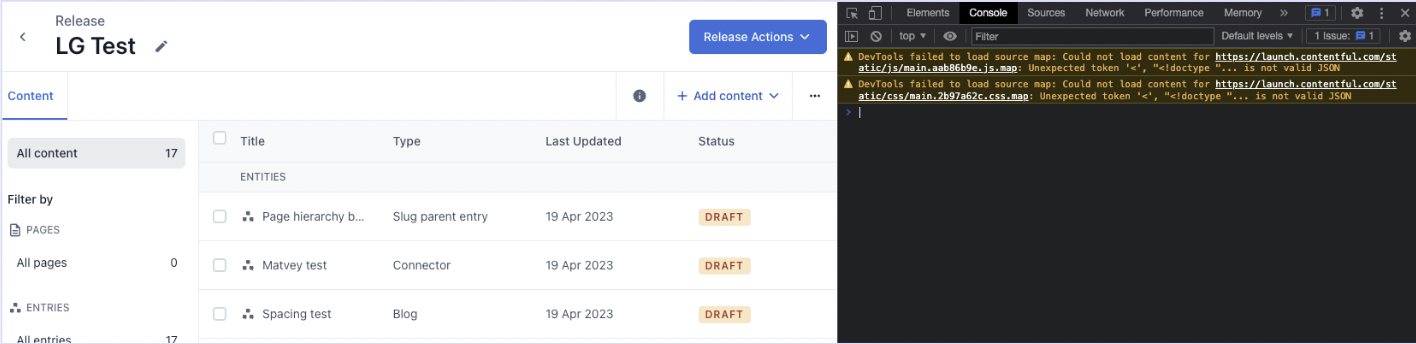
-
Enter the following script in the developer tools Console box:
CODE
Copy
-
Once you click “Enter”, Entry IDs will populate.
- Copy and paste the list of Entry IDs, and reformat as needed.
-
Click the blue carrot next to