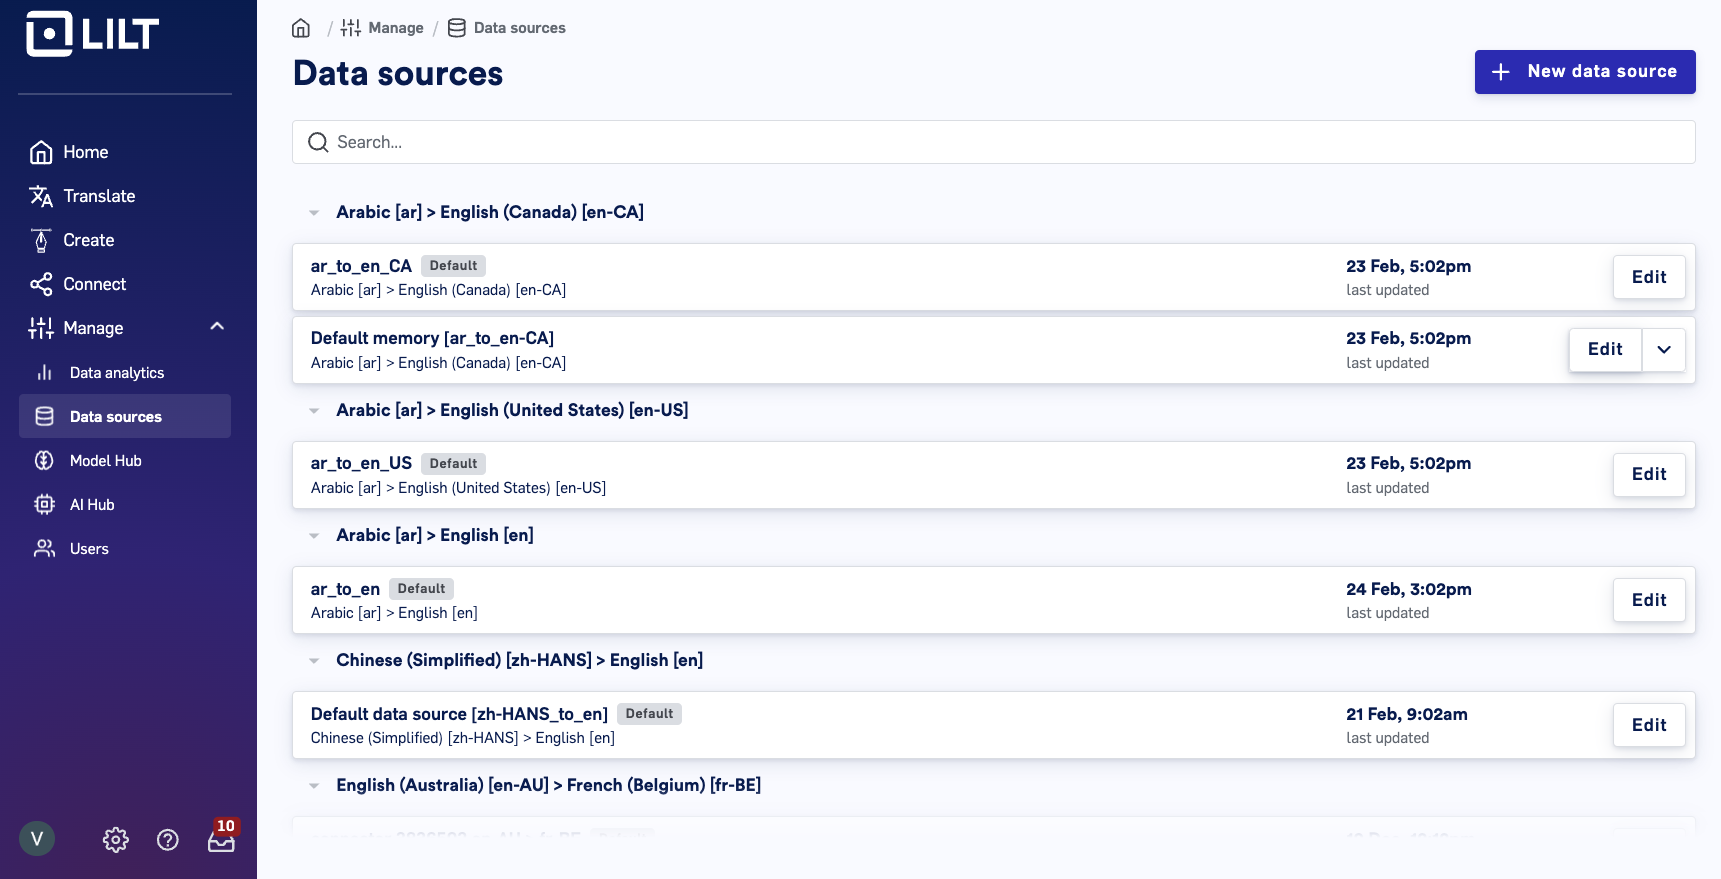
New Data Source button in the upper-right corner of the Data > Sources page. See Managing Data Sources for more details on creating new Data Sources.

Edit button to open up the data source management view.
Navigate to the Manage resources page. This page displays all documents that have been uploaded to the Data Source.
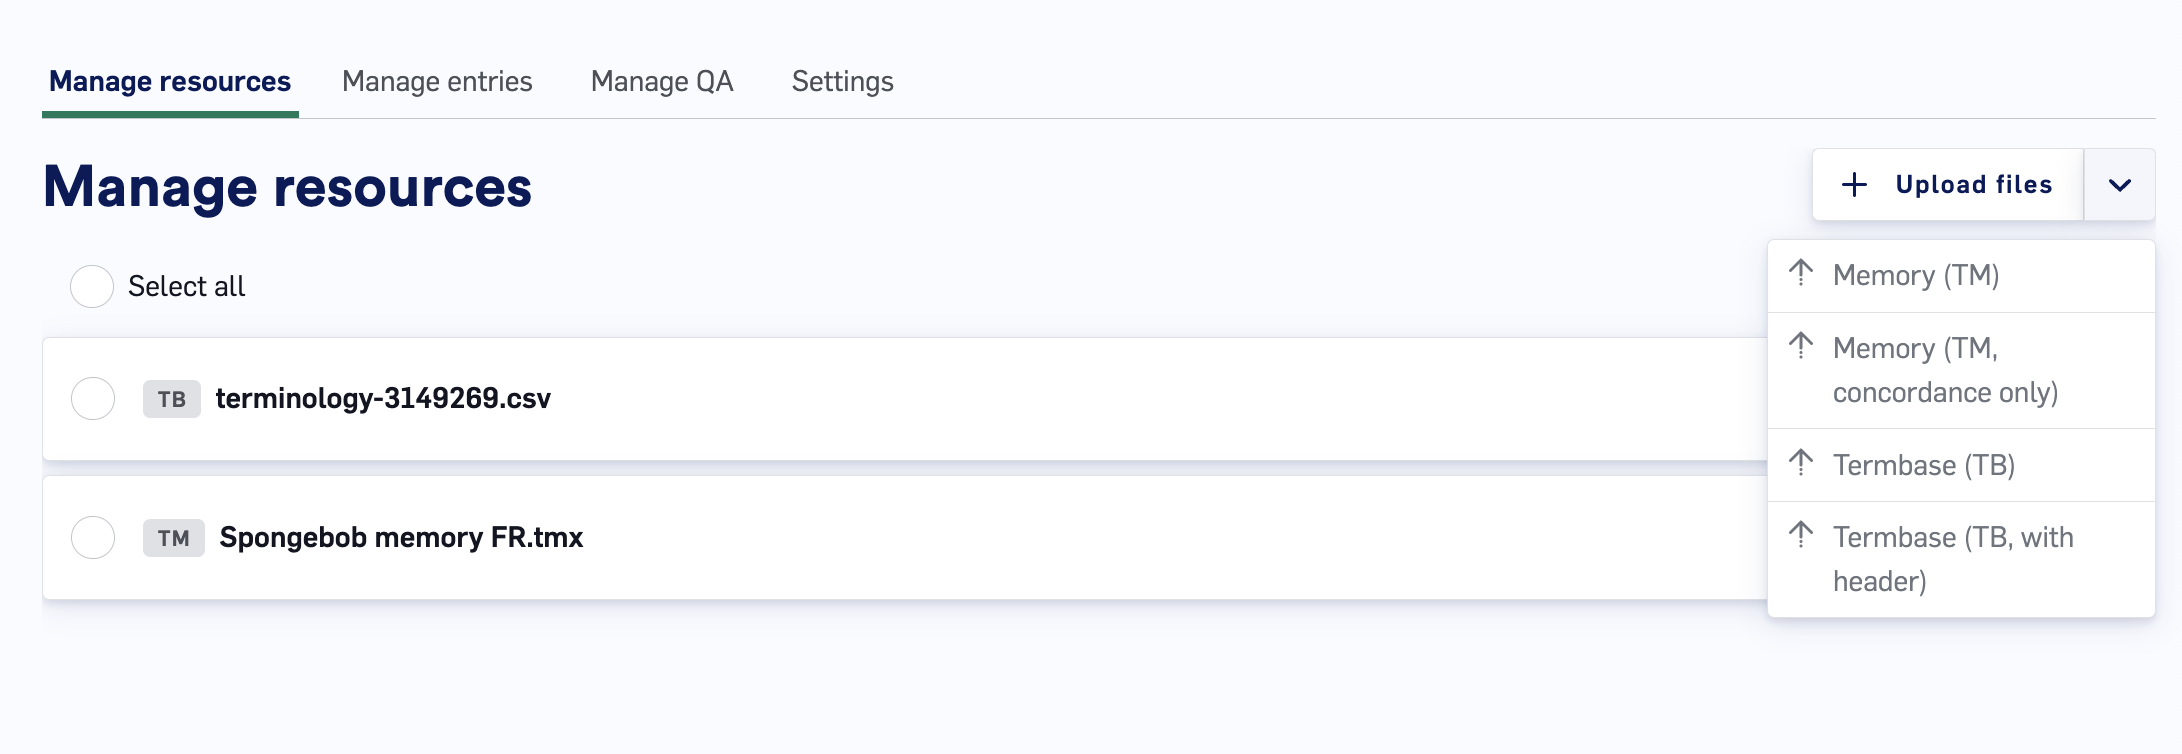
To add files to the Data Source, click the Upload files button in the upper-right and select the type of files you want to upload. Selecting one of the dropdown options will bring up a window for you to locate and select the files you want to upload. After the selected files are loaded into LILT, they will be available to view on the Manage resources page.

- Data Source files can contain as many entries as you like, so long as the file adheres to the TM Size limits. In particular, individual files cannot exceed 200 MB. If files exceed this size, zip them and add filename.tmx.zip appendage before uploading. Once uploaded, the file will be parsed into individual, editable entries.
- See the Data Source Maintenance Best Practices article for information on how to structure CSV files for uploading Termbases.
-
Termbase column entries cannot contain more than 10,000 characters. When uploading a file where any column entries are more than 10,000 characters, LILT will not process the file and will display the following warning:

- When importing JSON files as TM entries into LILT, use the format shown below to ensure your memory entries are properly imported: [ { “srclang”: “es”, “creationdate”: “2019-04-04T11:24:22Z”, “text”: “Introducción[editar]”, “units”: [ { “trglang”: “en”, “text”: “Introduction” } ] }, { “srclang”: “es”, “creationdate”: “2019-04-04T11:24:22Z”, “text”: “Aumentar”, “units”: [ { “trglang”: “en”, “text”: “Increase” } ] } ]
- Memory (TM): Choose this option if you want your memory files to be indexed for Concordance, used to train the MT, and used as TM results. The Contextual AI model learns from uploaded data immediately upon upload. Note that deleting documents from a Data Source does not affect the Contextual AI model (i.e. the Contextual AI model does not unlearn the deleted resources). However, there is a recency bias, meaning the most recent documents have a stronger input on the translation output.
- Memory (TM, concordance only): Choose this option if you want your memory files to only be indexed for Concordance but not used to train the Contextual AI and not used as TM results.
- Termbase (TB): Choose this option if your Termbase document does not have a header and you want all entries to be added to the Termbase entries of the Data Source.
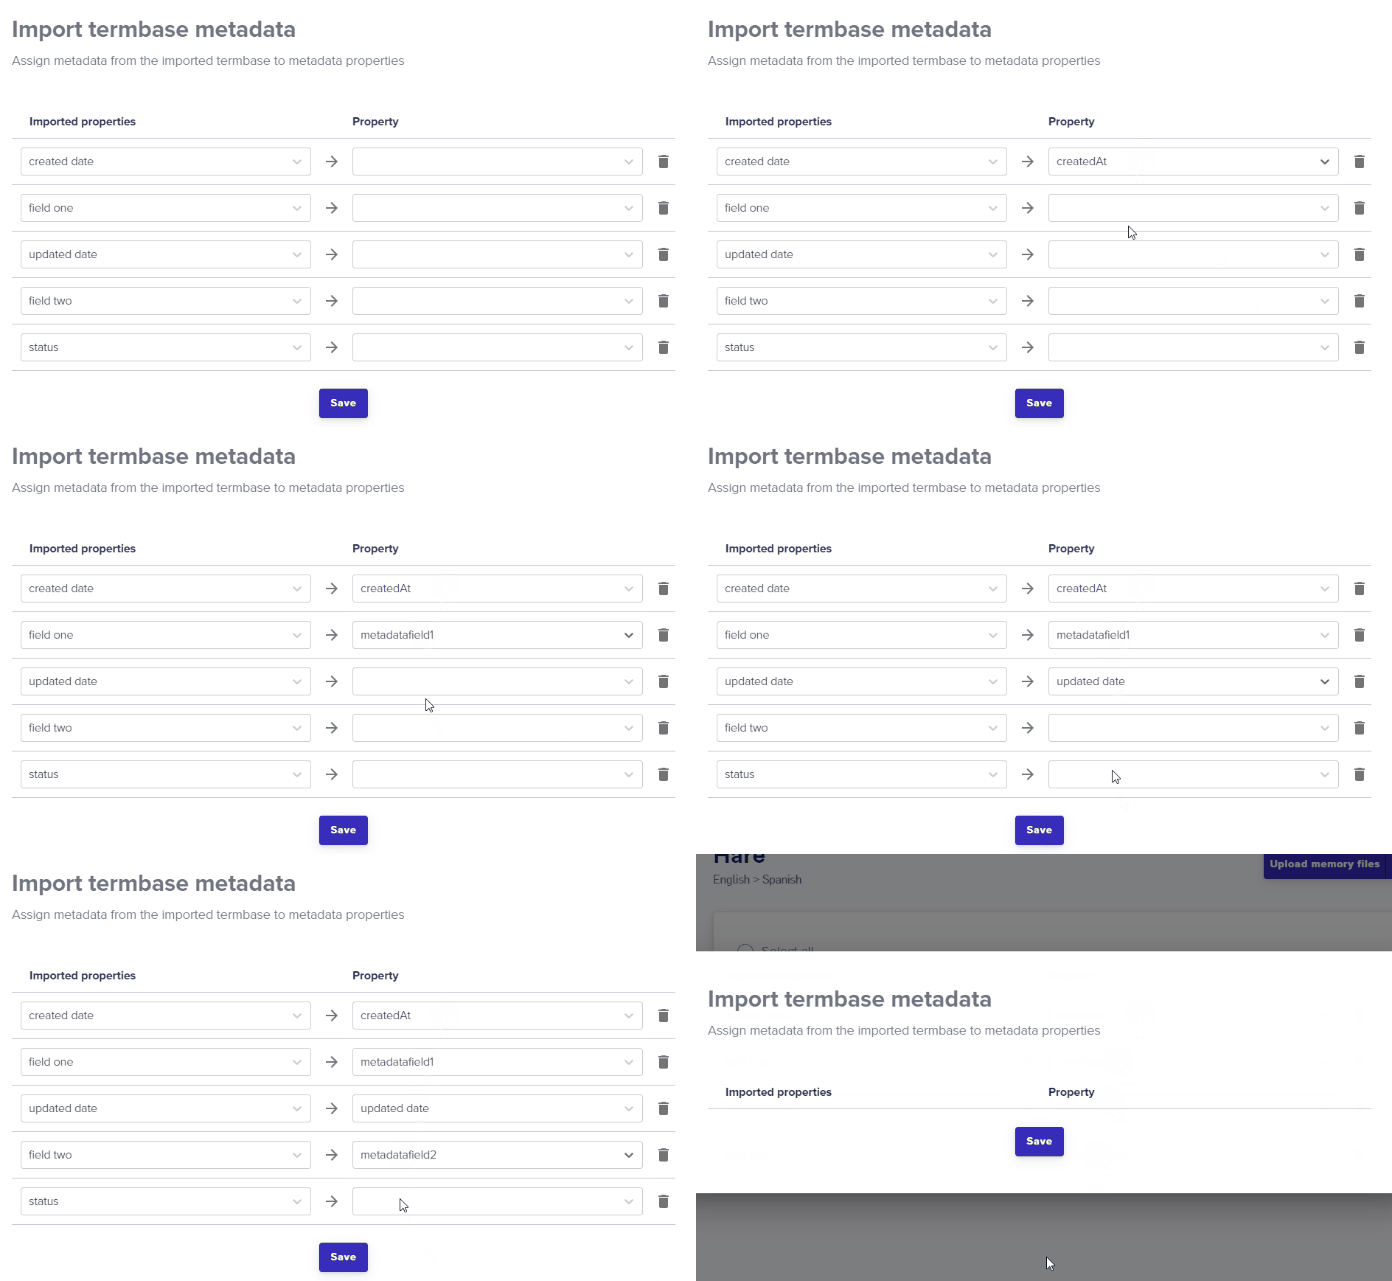
- Termbase (TB, with header): Choose this option if your Termbase document has a header at the top of the file that you want to exclude from adding to the Termbase entries of the Data Source.


Deleting Data Source files
-
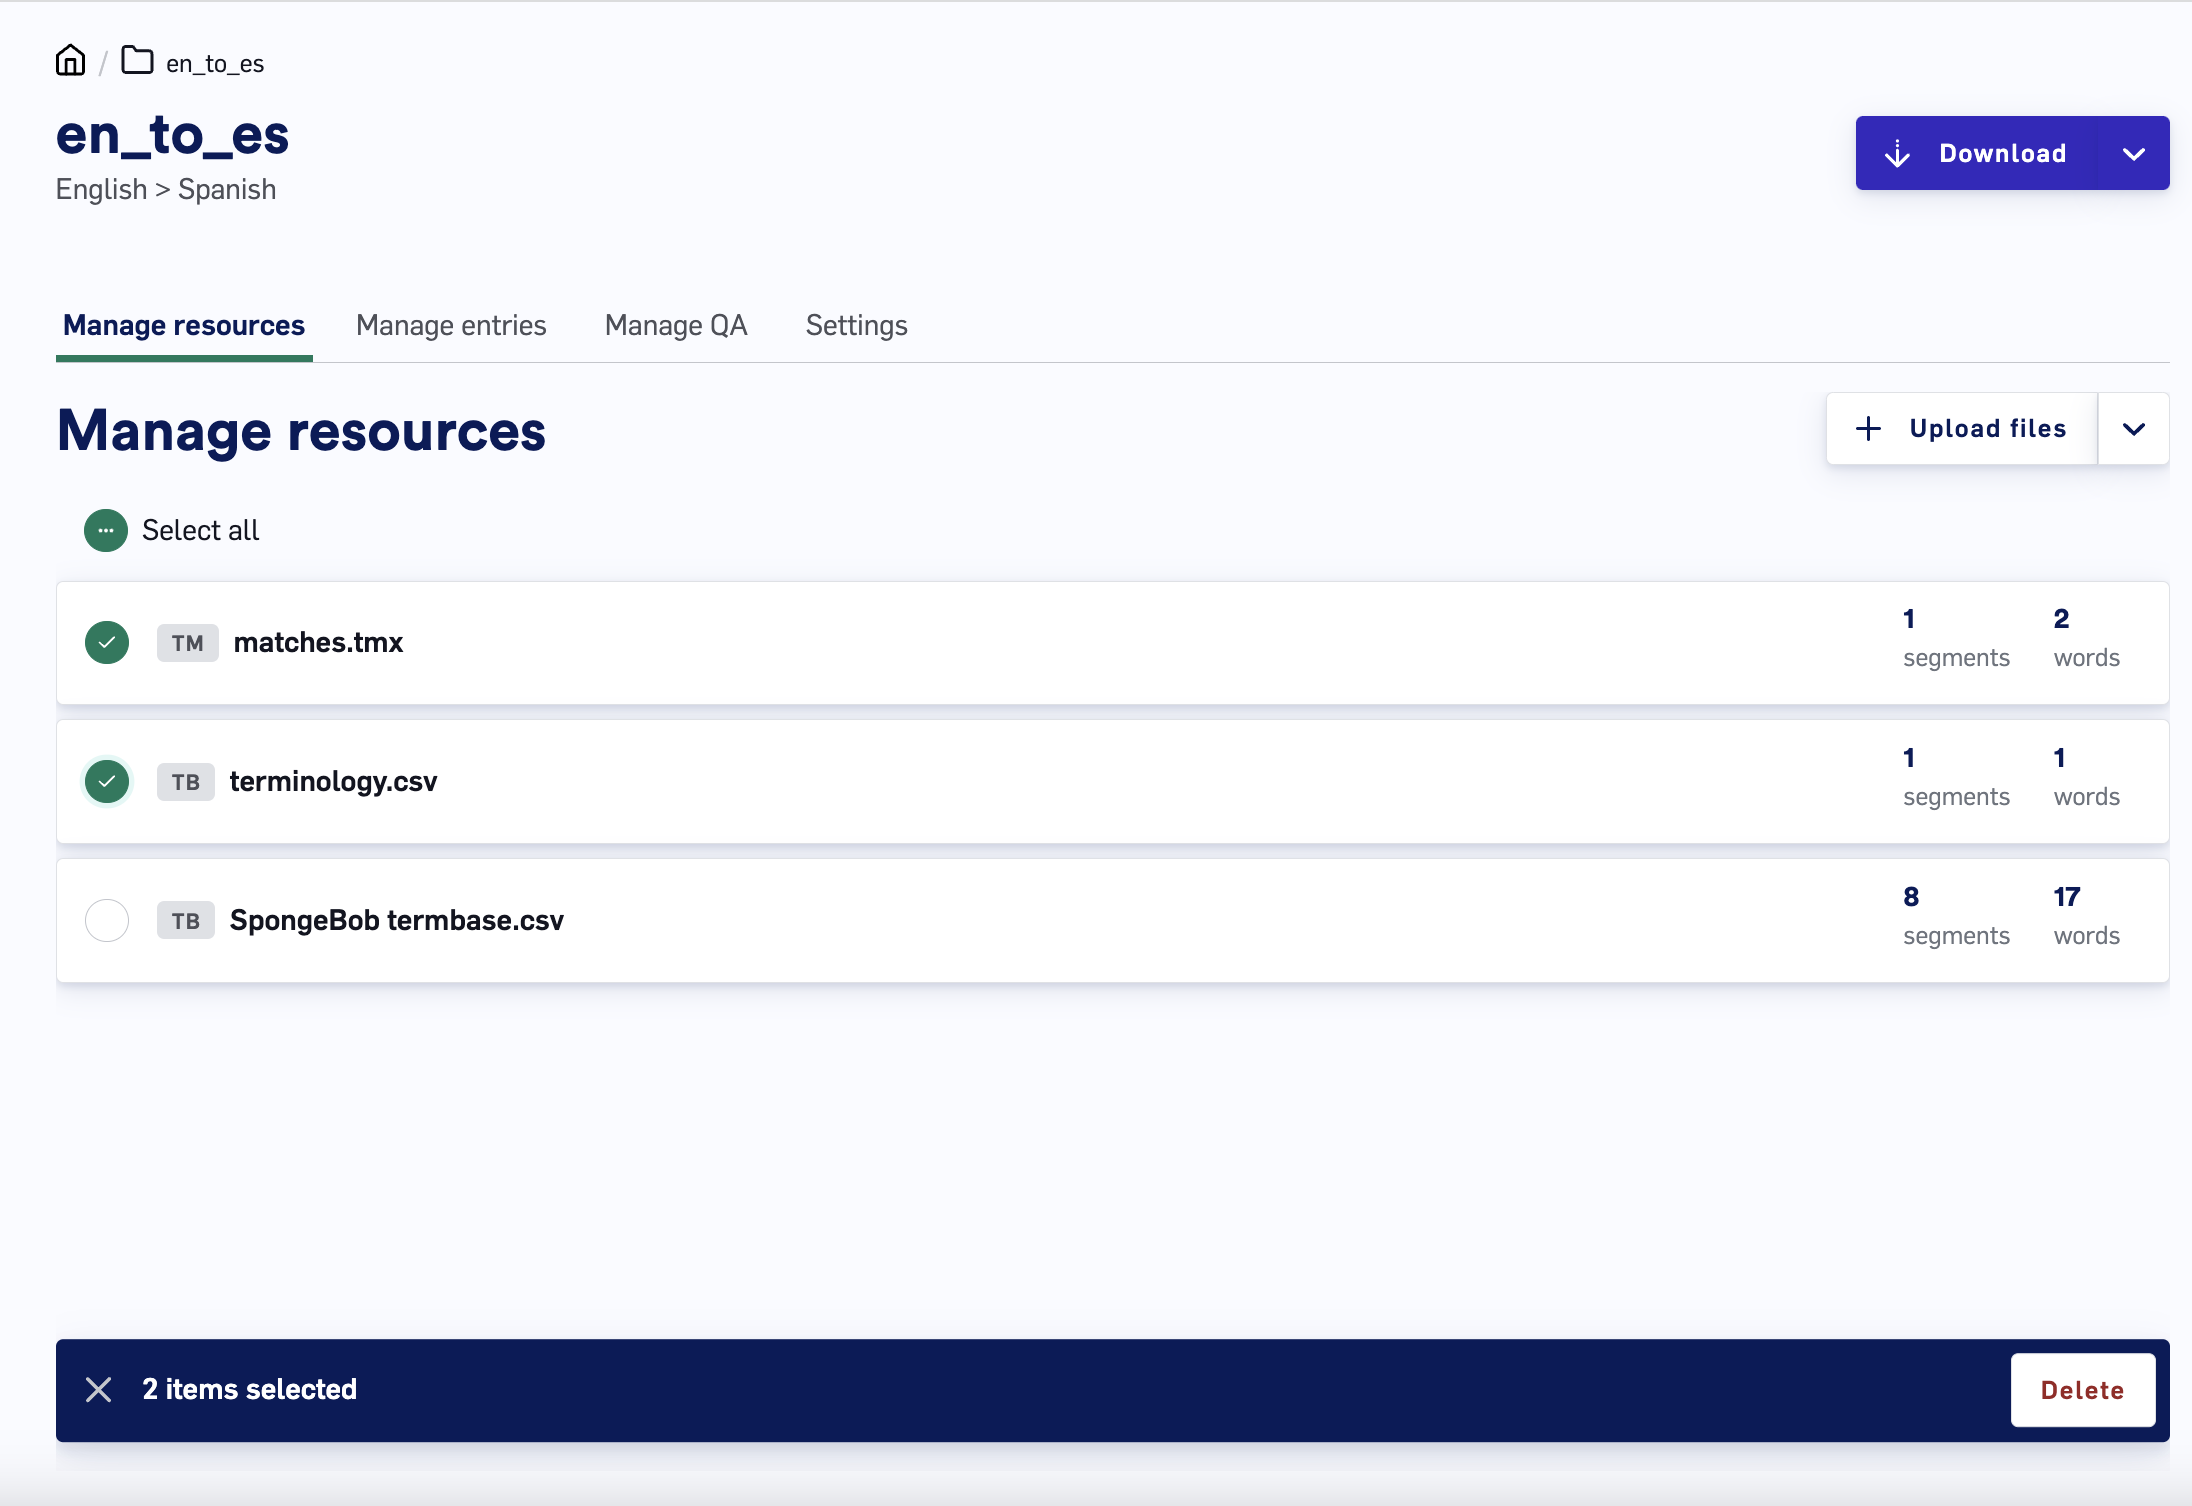
Select the files you want to delete by clicking the checkbox next to the resource name. Alternatively, you can select all files with the
Select allbutton. If any files are selected, this turns into aDeselectbutton that will deselect all the resources currently selected. -
Click the
Deletebutton in the upper-right to bring up a popup to confirm you want to permanently delete the selected resources. Deleting a resource permanently removes all that resource’s TM/TB entries from the Data Source.

Data Source Maintenance Best Practices
This section provides insights into various tactics that project managers can utilize to enhance localization workflows by leveraging data sources.TMX File Uploads
- TM files under 200 MB can be directly uploaded to LILT.
-
For TM files over 200 MB, compress the TMX file and upload it as
.tmx.zip. Currently, LILT supports only TMX file format for zipped memory files.
Termbase (TB) CSV File Formatting
Prior to uploading CSV files, consider the following:- For immediate visibility to translators, set the Default TB Entry Status to Reviewed.
- For entries requiring linguist review before use, set the Default TB Entry Status to Unreviewed or Draft.

TMX File Preparation
Before upload:- Remove outdated TM entries by date.
- Eliminate duplicate entries with identical source text but differing target texts.
TMX File Naming
Use informative labels, including the date, content type, and project or product name, to facilitate easier tracking and organization. Naming Convention Example:[DATE]-[CONTENT TYPE]-[NAME]

